
Vibe Coding Best Practices
Vibe Coding Best Practices
This article will guide you step-by-step to set up a complete Vibe Coding environment from scratch, including terminal configuration, Shell customization, AI programming tools, and advanced techniques.
Table of Contents
- Introduction
- Terminal Configuration
- Oh-My-Zsh Configuration
- Vibe Coding CLI Tools
- BYOK - Model Selection Guide
- Agent Skills
- MCP (Model Context Protocol)
- Advanced Customization
- Workflow Examples
- Summary and Resources
0. Introduction
What is Vibe Coding
The concept of Vibe Coding was first introduced by AI legend Andrej Karpathy (former Tesla AI Director, OpenAI founding member) on X (Twitter) in February 2025.
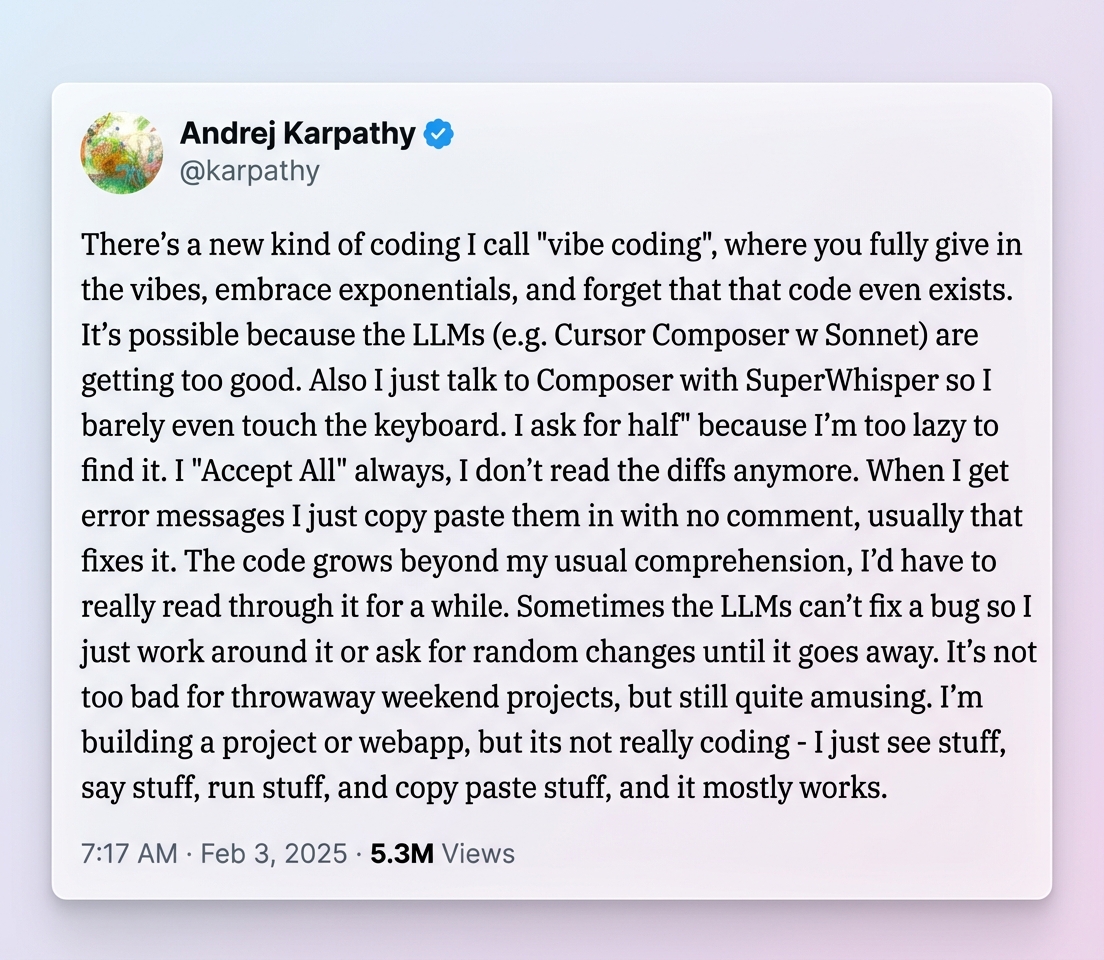
Simply put, Vibe Coding is a "vibe-driven" programming approach:
- 🗣️ Describe what you want in natural language
- 🤖 AI generates the code, you verify the results
- 🔄 Rapid iteration, without obsessing over code details
- ✨ Focus on creativity and the problem itself, not syntax and debugging
The term quickly went viral after its introduction and was even included in the Merriam-Webster Dictionary as a trending word of 2025.
📚 Further Reading:
Why This Toolchain
- Modern terminal experience: Kitty and Warp provide a smooth, beautiful terminal interface
- Efficient Shell environment: Oh-My-Zsh + Powerlevel10k brings powerful command-line enhancements
- Intelligent AI programming: Factory Droid provides professional-grade AI programming assistance
- Flexible model selection: BYOK lets you use any LLM model
- Extensible skill system: Skills and Custom Droids make AI better understand your workflow
Target Audience
This tutorial is for all developers interested in AI programming, whether you're a beginner or an experienced veteran. Each step has detailed instructions - just follow along to complete the setup.
Quick Start
Choose any of the following configuration methods based on your preference:
| Method | Description |
|---|---|
| 🤖 AI Agent Setup | Download the LLM Configuration Guide, paste it to Warp AI or Factory Droid, and let AI complete the setup automatically |
| ⚡ One-click Script | Run curl -fsSL https://neardws.com/scripts/vibe-setup.sh | bash |
| 📖 Manual Setup | Continue reading below and manually configure each component step by step |
1. Terminal Configuration
A good terminal is the foundation of Vibe Coding. Here we introduce two excellent modern terminals.
1.1 Kitty Terminal
Kitty is a GPU-accelerated terminal emulator that is highly customizable and performs excellently.
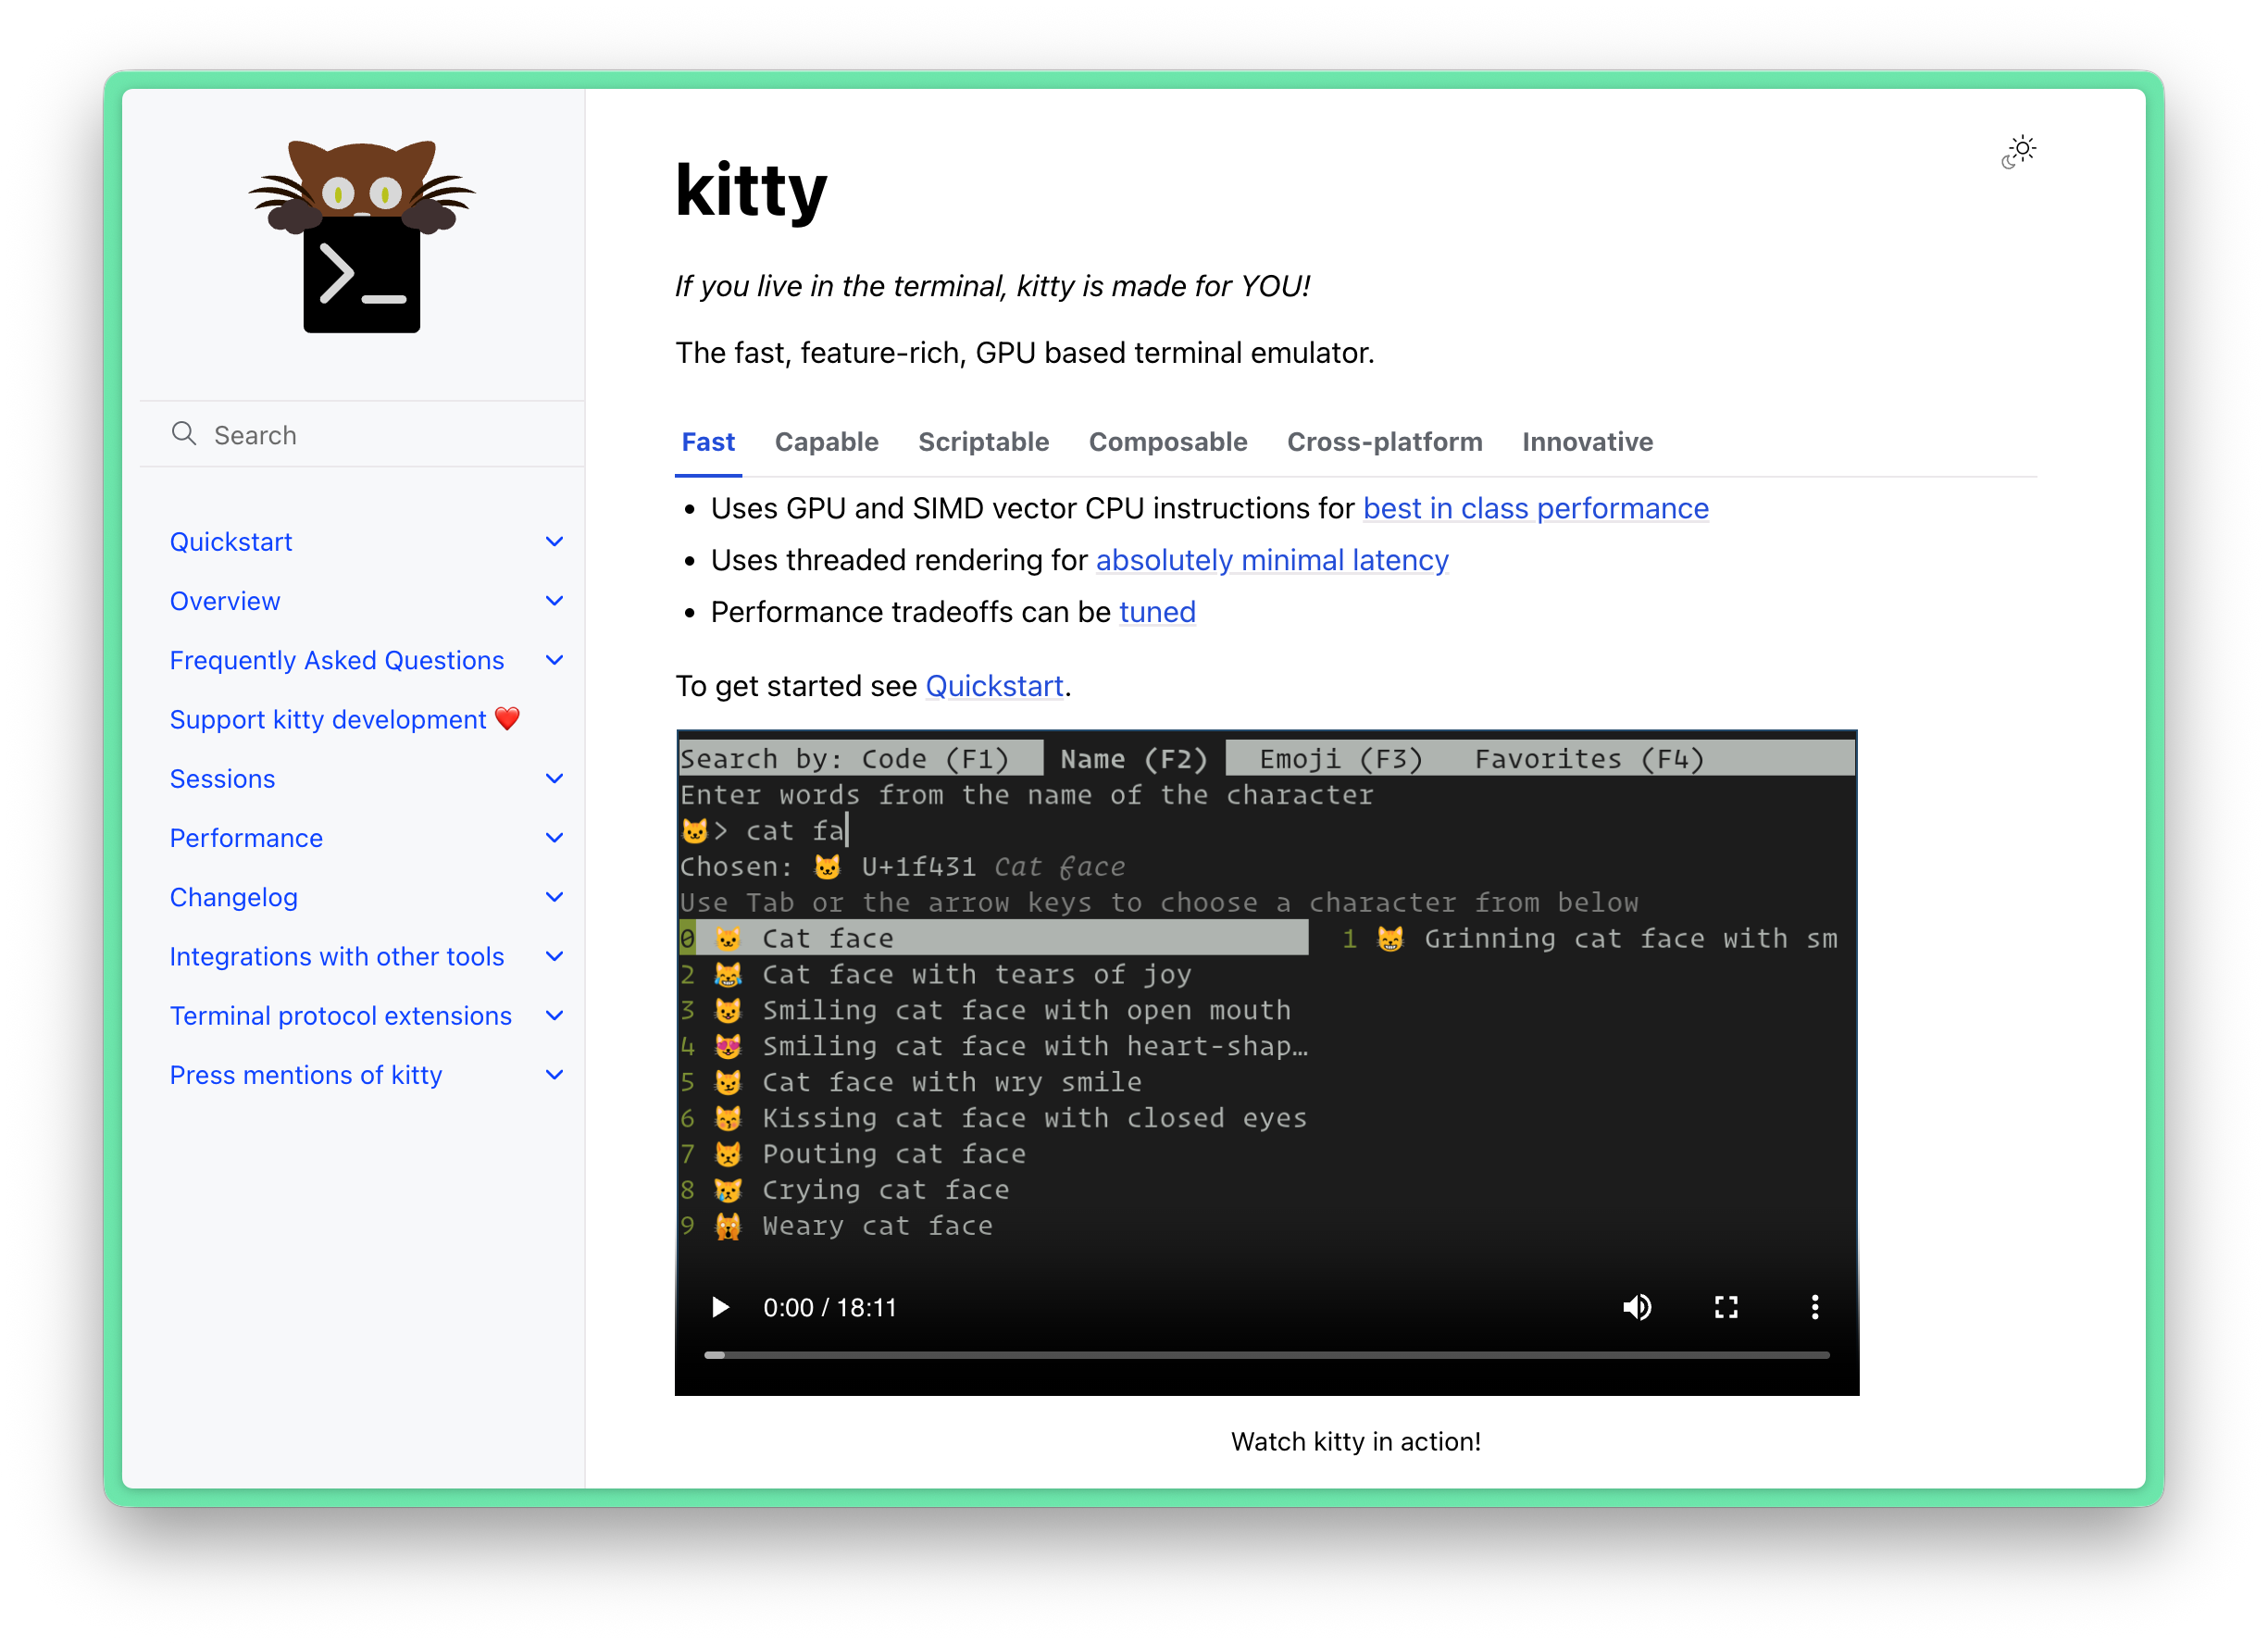
Features
- 🖥️ GPU rendering, super fast
- ⚙️ Highly configurable
- 🖼️ Image display support
- 📑 Built-in tabs and splits
Installation
Linux / macOS (Recommended):
curl -L https://sw.kovidgoyal.net/kitty/installer.sh | sh /dev/stdinmacOS (Homebrew):
brew install --cask kittyInstallation location:
- macOS: /Applications/kitty.app
- Linux: ~/.local/kitty.app
⚠️ Note: Kitty does not support native Windows, but can be used in WSL2 + WSLg environment.
💡 Update Kitty: Simply re-run the installation script.
Linux Desktop Integration (Optional, if you want Kitty icon in desktop menu and taskbar):
# Create symbolic links (ensure \~/.local/bin is in PATH)
ln -sf \~/.local/kitty.app/bin/kitty \~/.local/kitty.app/bin/kitten \~/.local/bin/
# Copy desktop files
cp \~/.local/kitty.app/share/applications/kitty.desktop \~/.local/share/applications/# Update icon and path
sed -i "s|Icon=kitty|Icon=$(readlink -f \~)/.local/kitty.app/share/icons/hicolor/256x256/apps/kitty.png|g"
\~/.local/share/applications/kitty\*.desktop
sed -i "s|Exec=kitty|Exec=$(readlink -f \~)/.local/kitty.app/bin/kitty|g" \~/.local/share/applications/kitty\*.desktopBasic Configuration
Create or edit the configuration file ~/.config/kitty/kitty.conf:
# ===== Theme Include =====
include ./theme.conf
# ===== Remote Control (for live theme preview) =====
allow_remote_control yes
# ===== Font Settings =====
# Main font - English
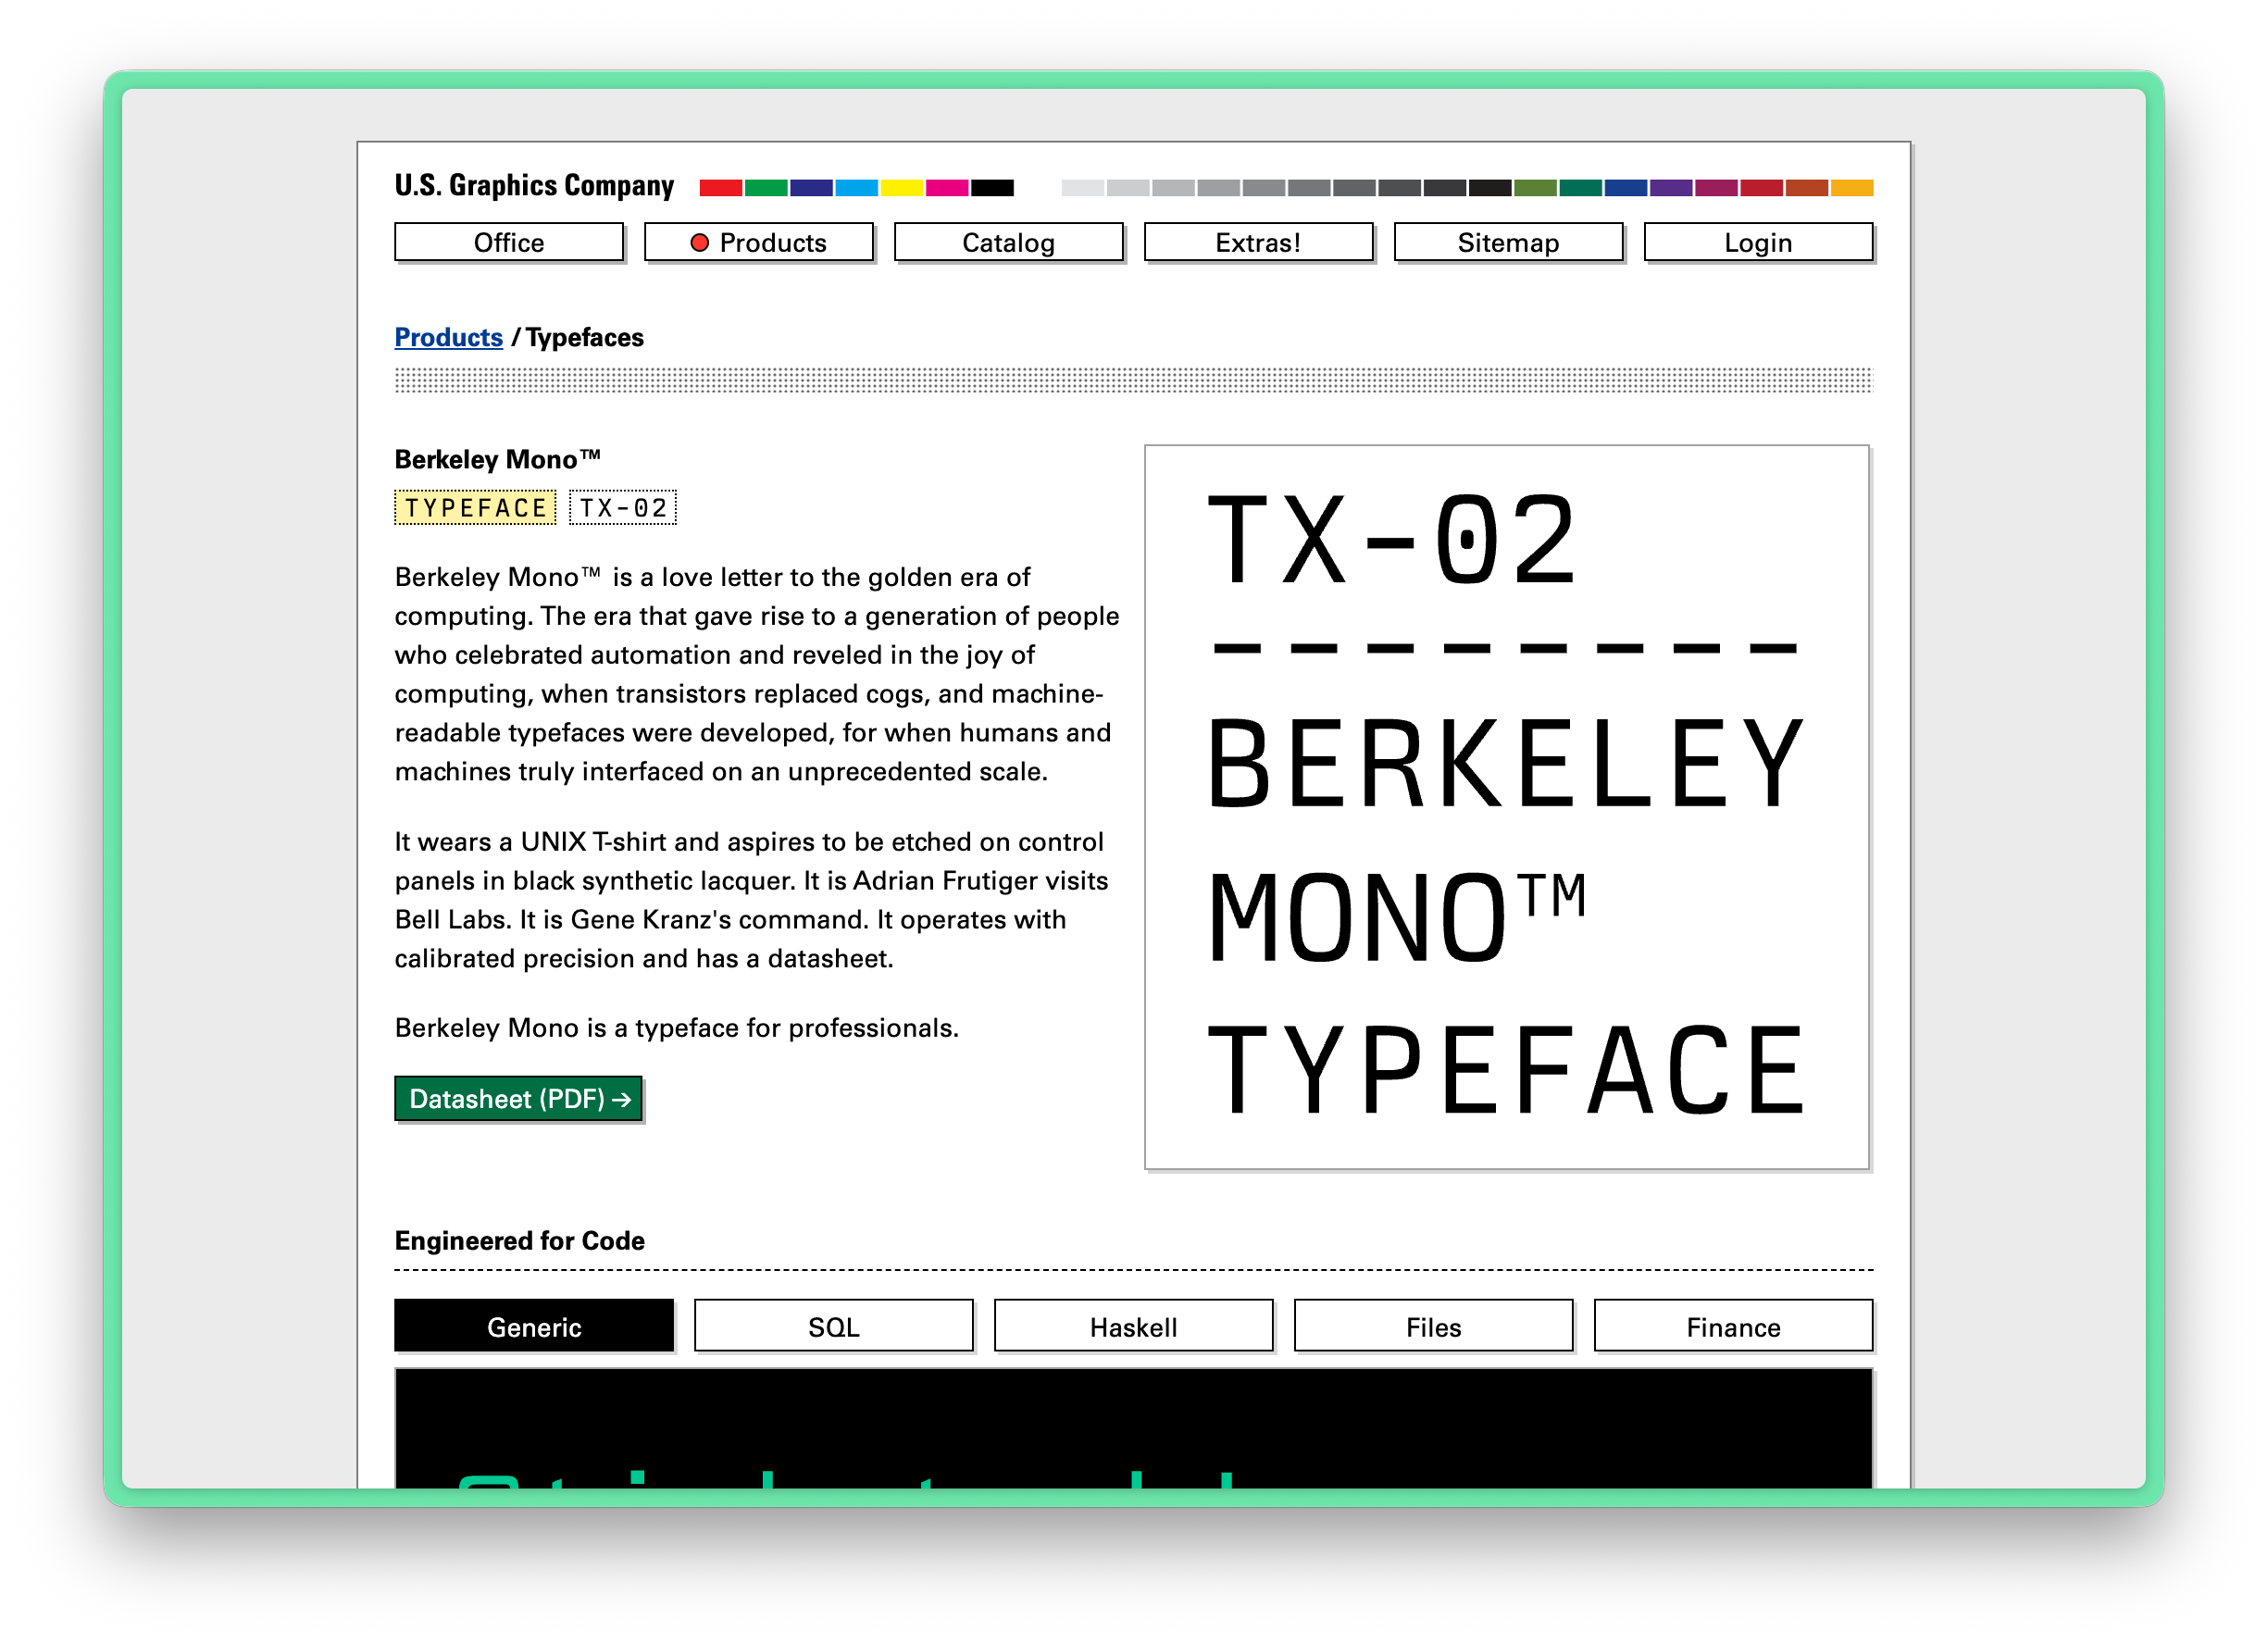
font_family Berkeley Mono
bold_font Berkeley Mono Bold
italic_font Berkeley Mono Italic
font_size 14.0
# Chinese font fallback - CJK character range
symbol_map U+4E00-U+9FFF,U+3400-U+4DBF Maple Mono CN
# Nerd Font icons - Private Use Area
symbol_map U+E000-U+F8FF,U+F0000-U+FFFFF Hack Nerd Font
# ===== Window Settings =====
window_padding_width 4
hide_window_decorations no
mouse_hide_wait 3.0
term xterm-kitty
# ===== Layout =====
enabled_layouts splits,stack
# ===== Tab Bar Settings =====
tab_bar_edge bottom
tab_bar_style custom
tab_bar_min_tabs 1
tab_bar_margin_height 5.0 0.0
tab_bar_background #1e1e2e
# Tab Colors (Soft Pastel style)
active_tab_foreground #1e1e2e
active_tab_background #cdd6f4
active_tab_font_style bold
inactive_tab_foreground #cdd6f4
inactive_tab_background #313244
# ===== Shortcuts (macOS) =====
# Split
map cmd+d launch --location=hsplit # Horizontal split
map cmd+r launch --location=vsplit # Vertical split
# Tab management
map cmd+t new_tab
map cmd+w close_window
map cmd+shift+w close_tab
map cmd+1 goto_tab 1
map cmd+2 goto_tab 2
# ... cmd+3-9 similar
# Focus switching
map cmd+j neighboring_window left
map cmd+k neighboring_window right
map cmd+i neighboring_window up
map cmd+m neighboring_window down
# Others
map cmd+c copy_to_clipboard
map cmd+v paste_from_clipboard
map cmd+equal change_font_size all +1.0
map cmd+minus change_font_size all -1.0
map cmd+enter toggle_fullscreenInstall Themes
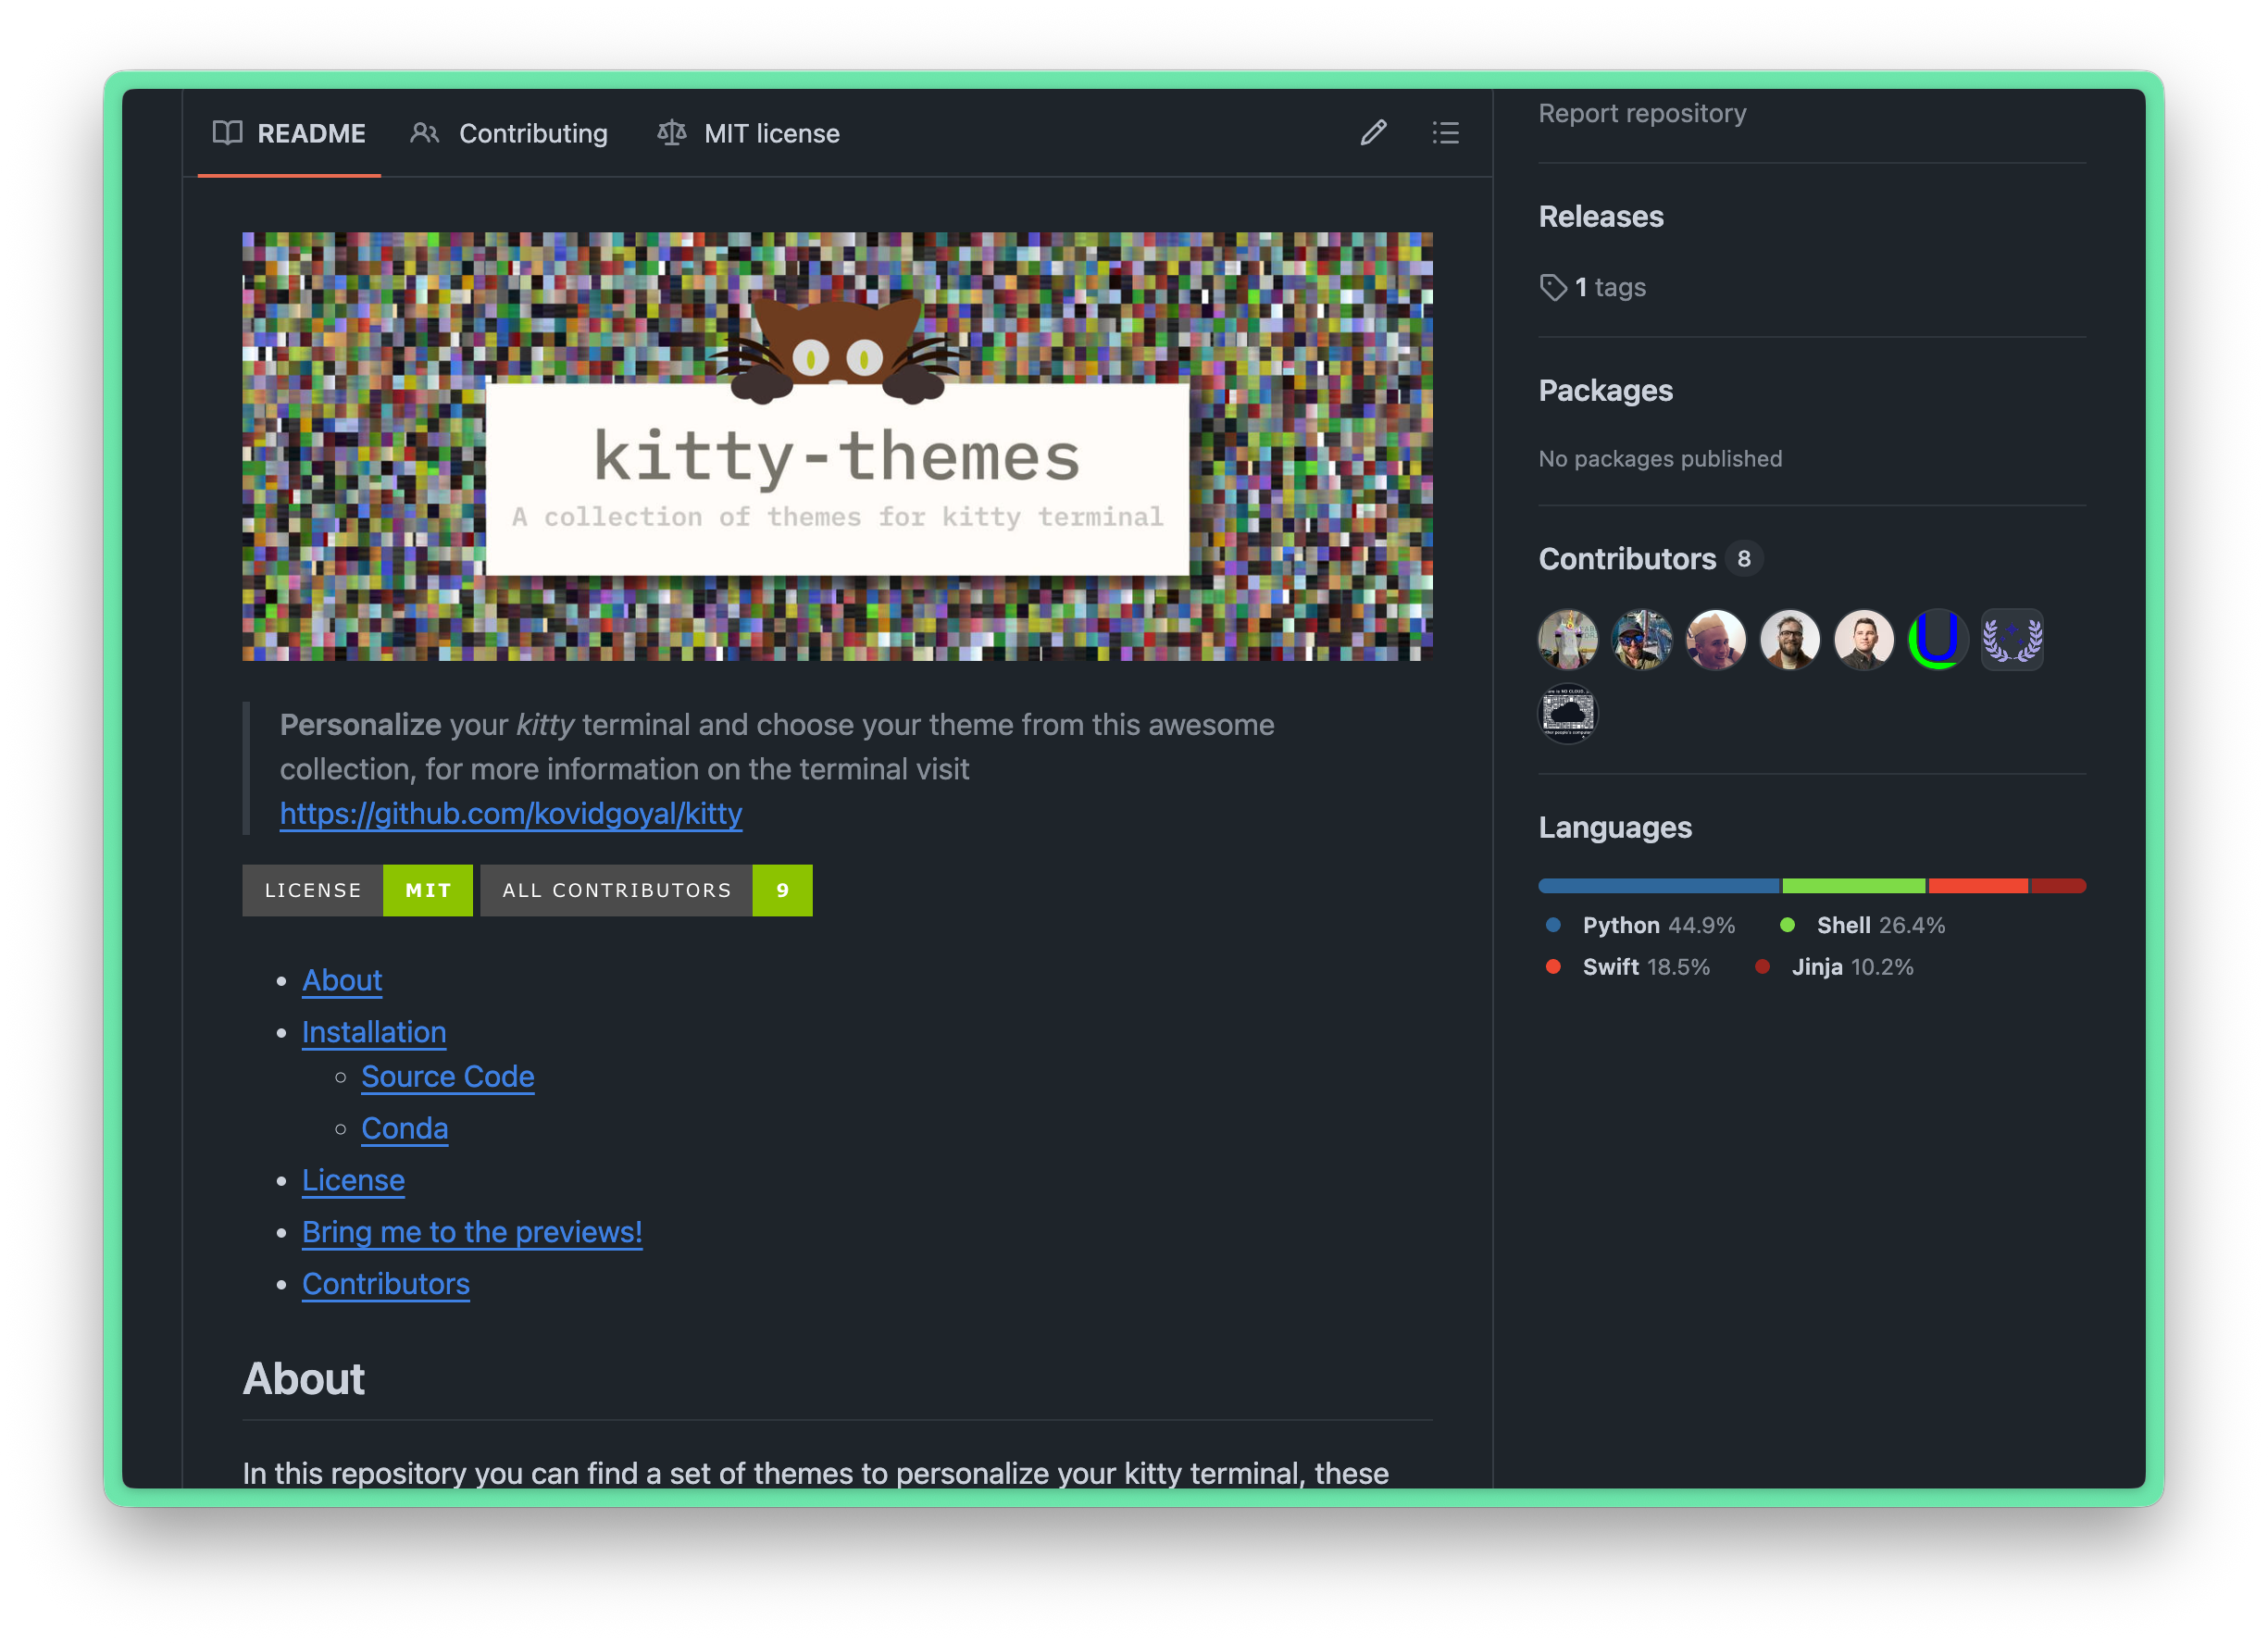
# Clone theme repository
git clone --depth 1 https://github.com/dexpota/kitty-themes.git \~/.config/kitty/kitty-themes
# Select theme (Dracula as example)
ln -sf ./kitty-themes/themes/Dracula.conf \~/.config/kitty/theme.conf# Or use built-in theme switcher
kitty +kitten themesCustom Tab Bar
Get the complete configuration from neardws/kitty-config:
# Clone config repository
git clone https://github.com/neardws/kitty-config.git \~/kitty-config
# Copy configuration files
cp \~/kitty-config/kitty.conf \~/.config/kitty/
cp \~/kitty-config/tab\_bar.py \~/.config/kitty/Features:
- 10-color cycling palette (Catppuccin style)
- Left side: username, current directory, Git branch
- Middle: Tab list (number + program name)
- Right side: Session name, time (15-second refresh)
- SSH mode automatically shows server info
Tab Bar layout:
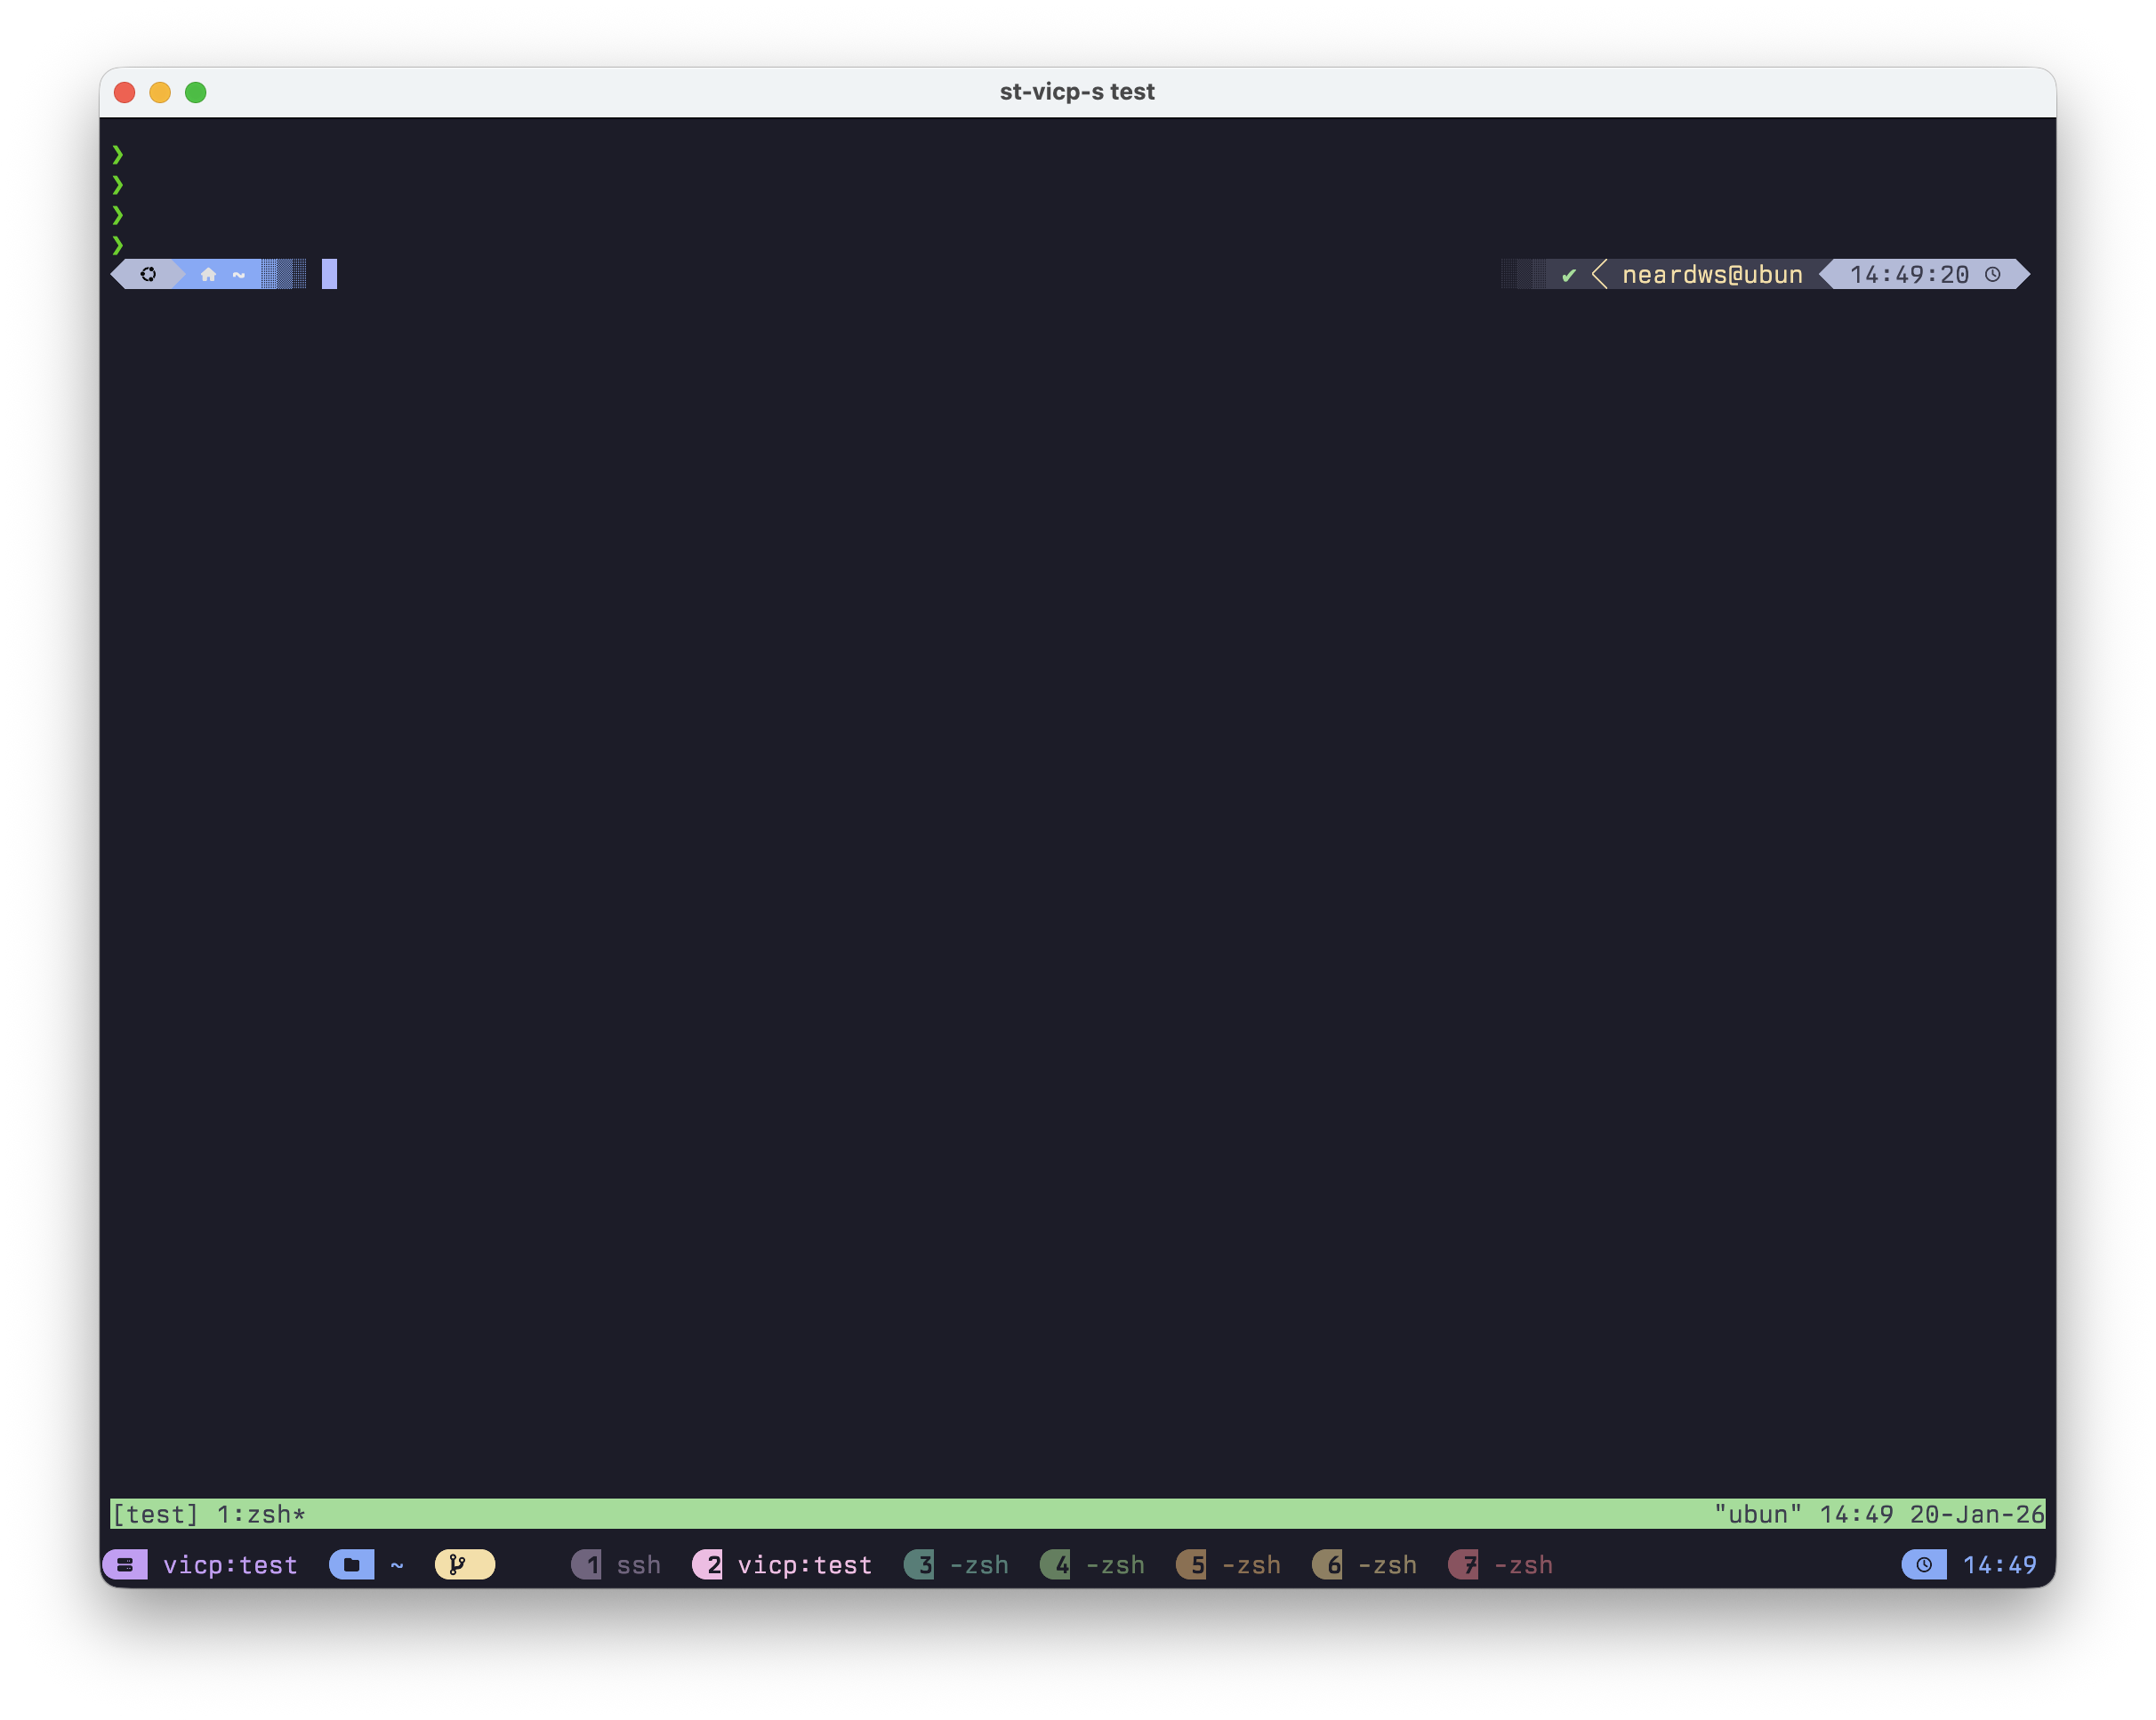
[👤 User] [📁 Directory] [Git] [1 zsh] [2 vim] [3 python] [💻 Session] [🕐 Time]
⚠️ Note: Custom Tab Bar requires Nerd Font, see Install Nerd Font.
Zsh Configuration
# ===== Kitty SSH + Tmux Configuration =====
# kitten ssh basic alias
alias s="kitten ssh"
# Server 1 - local (LAN)
alias ssh-local="kitten ssh user@local-server"
alias st-local="kitten ssh user@local-server -t 'tmux new -As main'"
# Server 2 - remote
alias ssh-remote="kitten ssh user@remote-server"
alias st-remote="kitten ssh user@remote-server -t 'tmux new -As main'" ⚠️ Note: Replace user with actual username, local-server/remote-server with actual LAN or remote server IP addresses.
Add the following function to ~/.zshrc to automatically set Tab title when connecting to servers:
# ===== Kitty Tab Auto-naming =====
# Check if running in Kitty terminal
if [[ "$TERM" == "xterm-kitty" ]]; then
   # Set tab name to current directory name
   function _kitty_set_tab_title() {
        printf "\033]1;%s\007" "${PWD##*/}"
   }

   # Trigger on directory change
   autoload -Uz add-zsh-hook
   add-zsh-hook chpwd _kitty_set_tab_title

   # Set once on initialization
   _kitty_set_tab_title
fi

# SSH + tmux with auto Tab title
st-server-s() {
   local session="$\{1:-main}"
   kitty @ set-tab-title "#server:$session" # # prefix triggers custom title
   kitten ssh user@your-server -t "tmux new -As $session"
}

# Example: multi-server configuration
st-dev-s() {
   local session="${1:-main}"
   kitty @ set-tab-title "#dev:$session"
   kitten ssh user@dev-server -t "tmux new -As $session"
}

st-prod-s() {
   local session="${1:-main}"
   kitty @ set-tab-title "#prod:$session"
   kitten ssh user@prod-server -t "tmux new -As $session"
}
Usage:
| Command | Effect | Tab Title |
|---|---|---|
st-dev-s |
Connect to dev + main session | dev:main |
st-dev-s work |
Connect to dev + work session | dev:work |
st-prod-s train |
Connect to prod + train session | prod:train |
📚 Complete Configuration Reference: neardws/kitty-config
Recommended Fonts
Terminal fonts need to meet three requirements: English display, Chinese display, and icon support. Here are my recommended three fonts:
| Font | Purpose | Features |
|---|---|---|
| Berkeley Mono | English monospace | Elegant, clear, designed for programming |
| Maple Mono CN | Chinese display | Open source, beautiful, Chinese-English monospace alignment |
| Hack Nerd Font | Icon support | Required for Tab Bar, includes 3000+ icons |
Install Nerd Font (Required for Icons)
macOS:
# macOS
brew tap homebrew/cask-fonts
brew install --cask font-hack-nerd-font
Linux:
# Linux
mkdir -p ~/.local/share/fonts
cd ~/.local/share/fonts
curl -fLO https://github.com/ryanoasis/nerd-fonts/releases/download/v3.1.1/Hack.zip
unzip Hack.zip && rm Hack.zip
fc-cache -fv
💡 Berkeley Mono is a paid font, available from the official website.
Maple Mono CN is open source and free, download from GitHub.
Of course, you can also choose fonts you prefer.
1.2 Warp Terminal
Warp is a modern terminal with built-in AI capabilities, designed for developers.
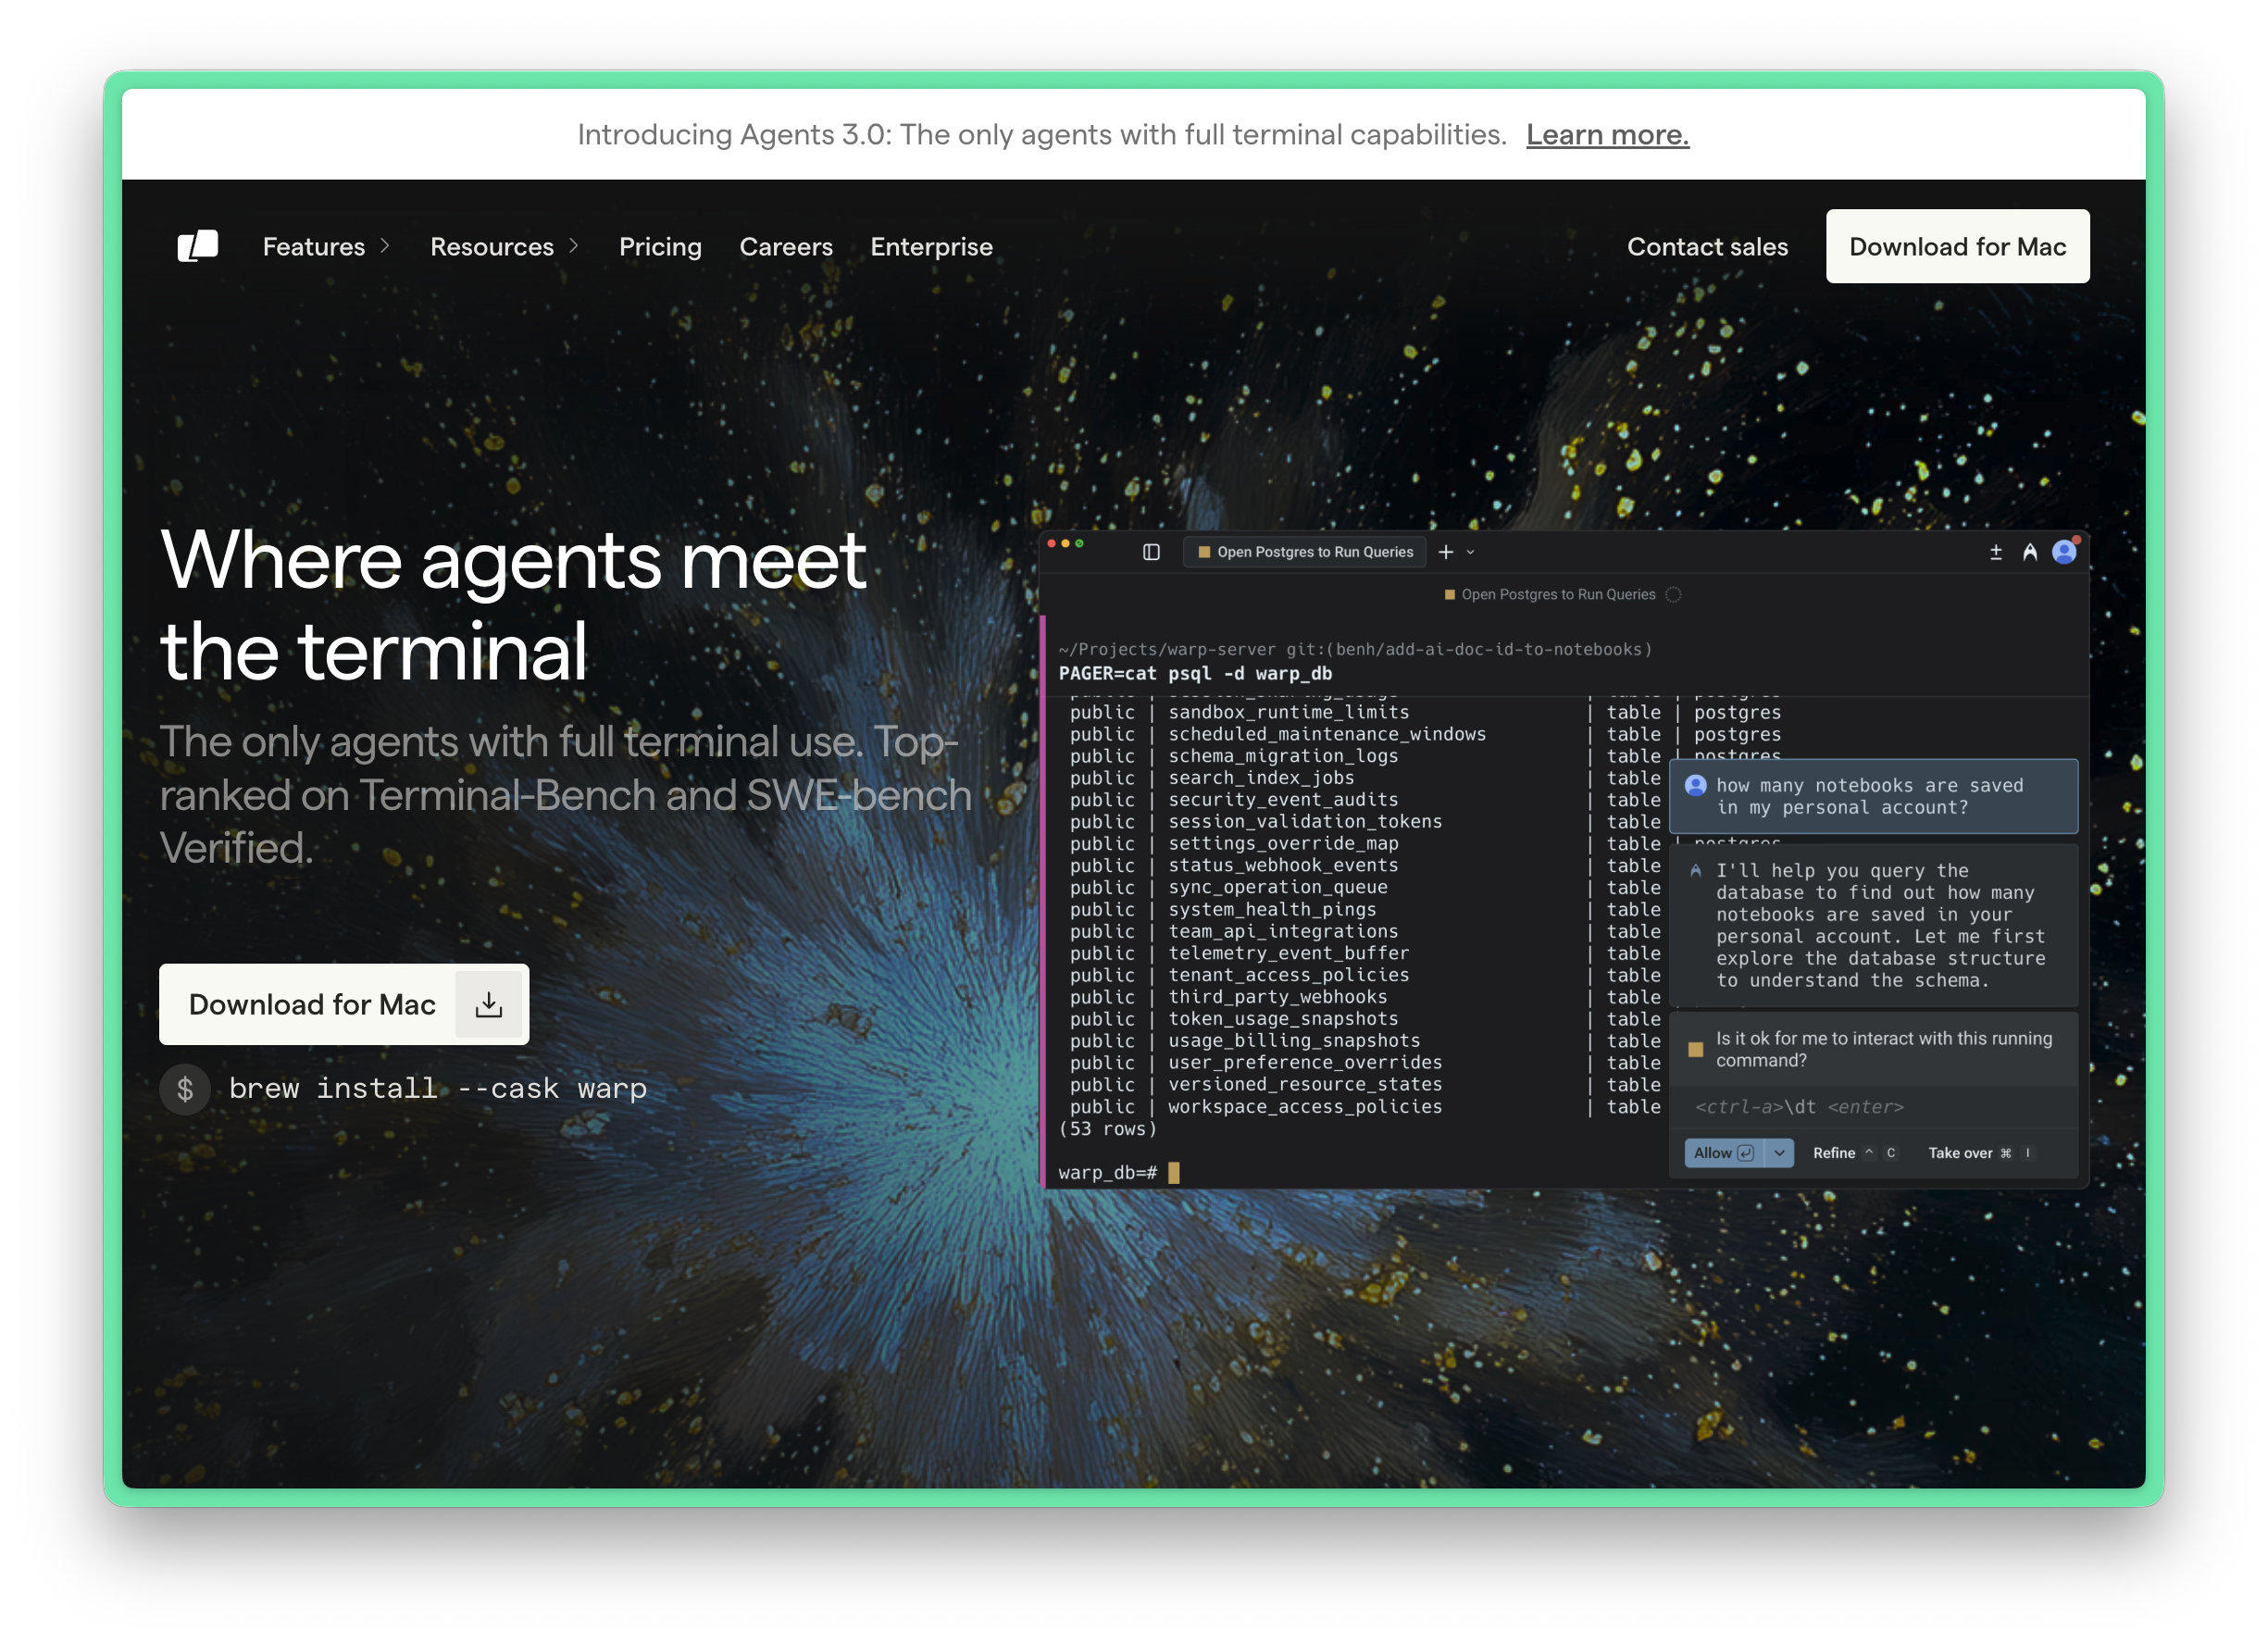
Features
- 🚀 Built-in AI command suggestions
- 📝 Block-style command output for easy copying and sharing
- 🎨 Modern UI design
- ⚡ Ultra-fast startup and response
Installation
📌 Platform Support: macOS (Intel/Apple Silicon), Windows (x64/ARM64), Linux (x64/ARM64)
macOS:
brew install --cask warpWindows:
winget install Warp.WarpLinux (Debian/Ubuntu):
# Download .deb package (recommended)
# After downloading from https://www.warp.dev/download:
sudo apt install ./<file>.deb
# Or use apt repository
sudo apt-get install wget gpg
wget -qO- https://releases.warp.dev/linux/keys/warp.asc | gpg --dearmor > warpdotdev.gpg
sudo install -D -o root -g root -m 644 warpdotdev.gpg /etc/apt/keyrings/warpdotdev.gpg
sudo sh -c 'echo "deb \[arch=amd64 signed-by=/etc/apt/keyrings/warpdotdev.gpg] https://releases.warp.dev/linux/deb stable main" > /etc/apt/sources.list.d/warpdotdev.list'
rm warpdotdev.gpg
sudo apt update && sudo apt install warp-terminal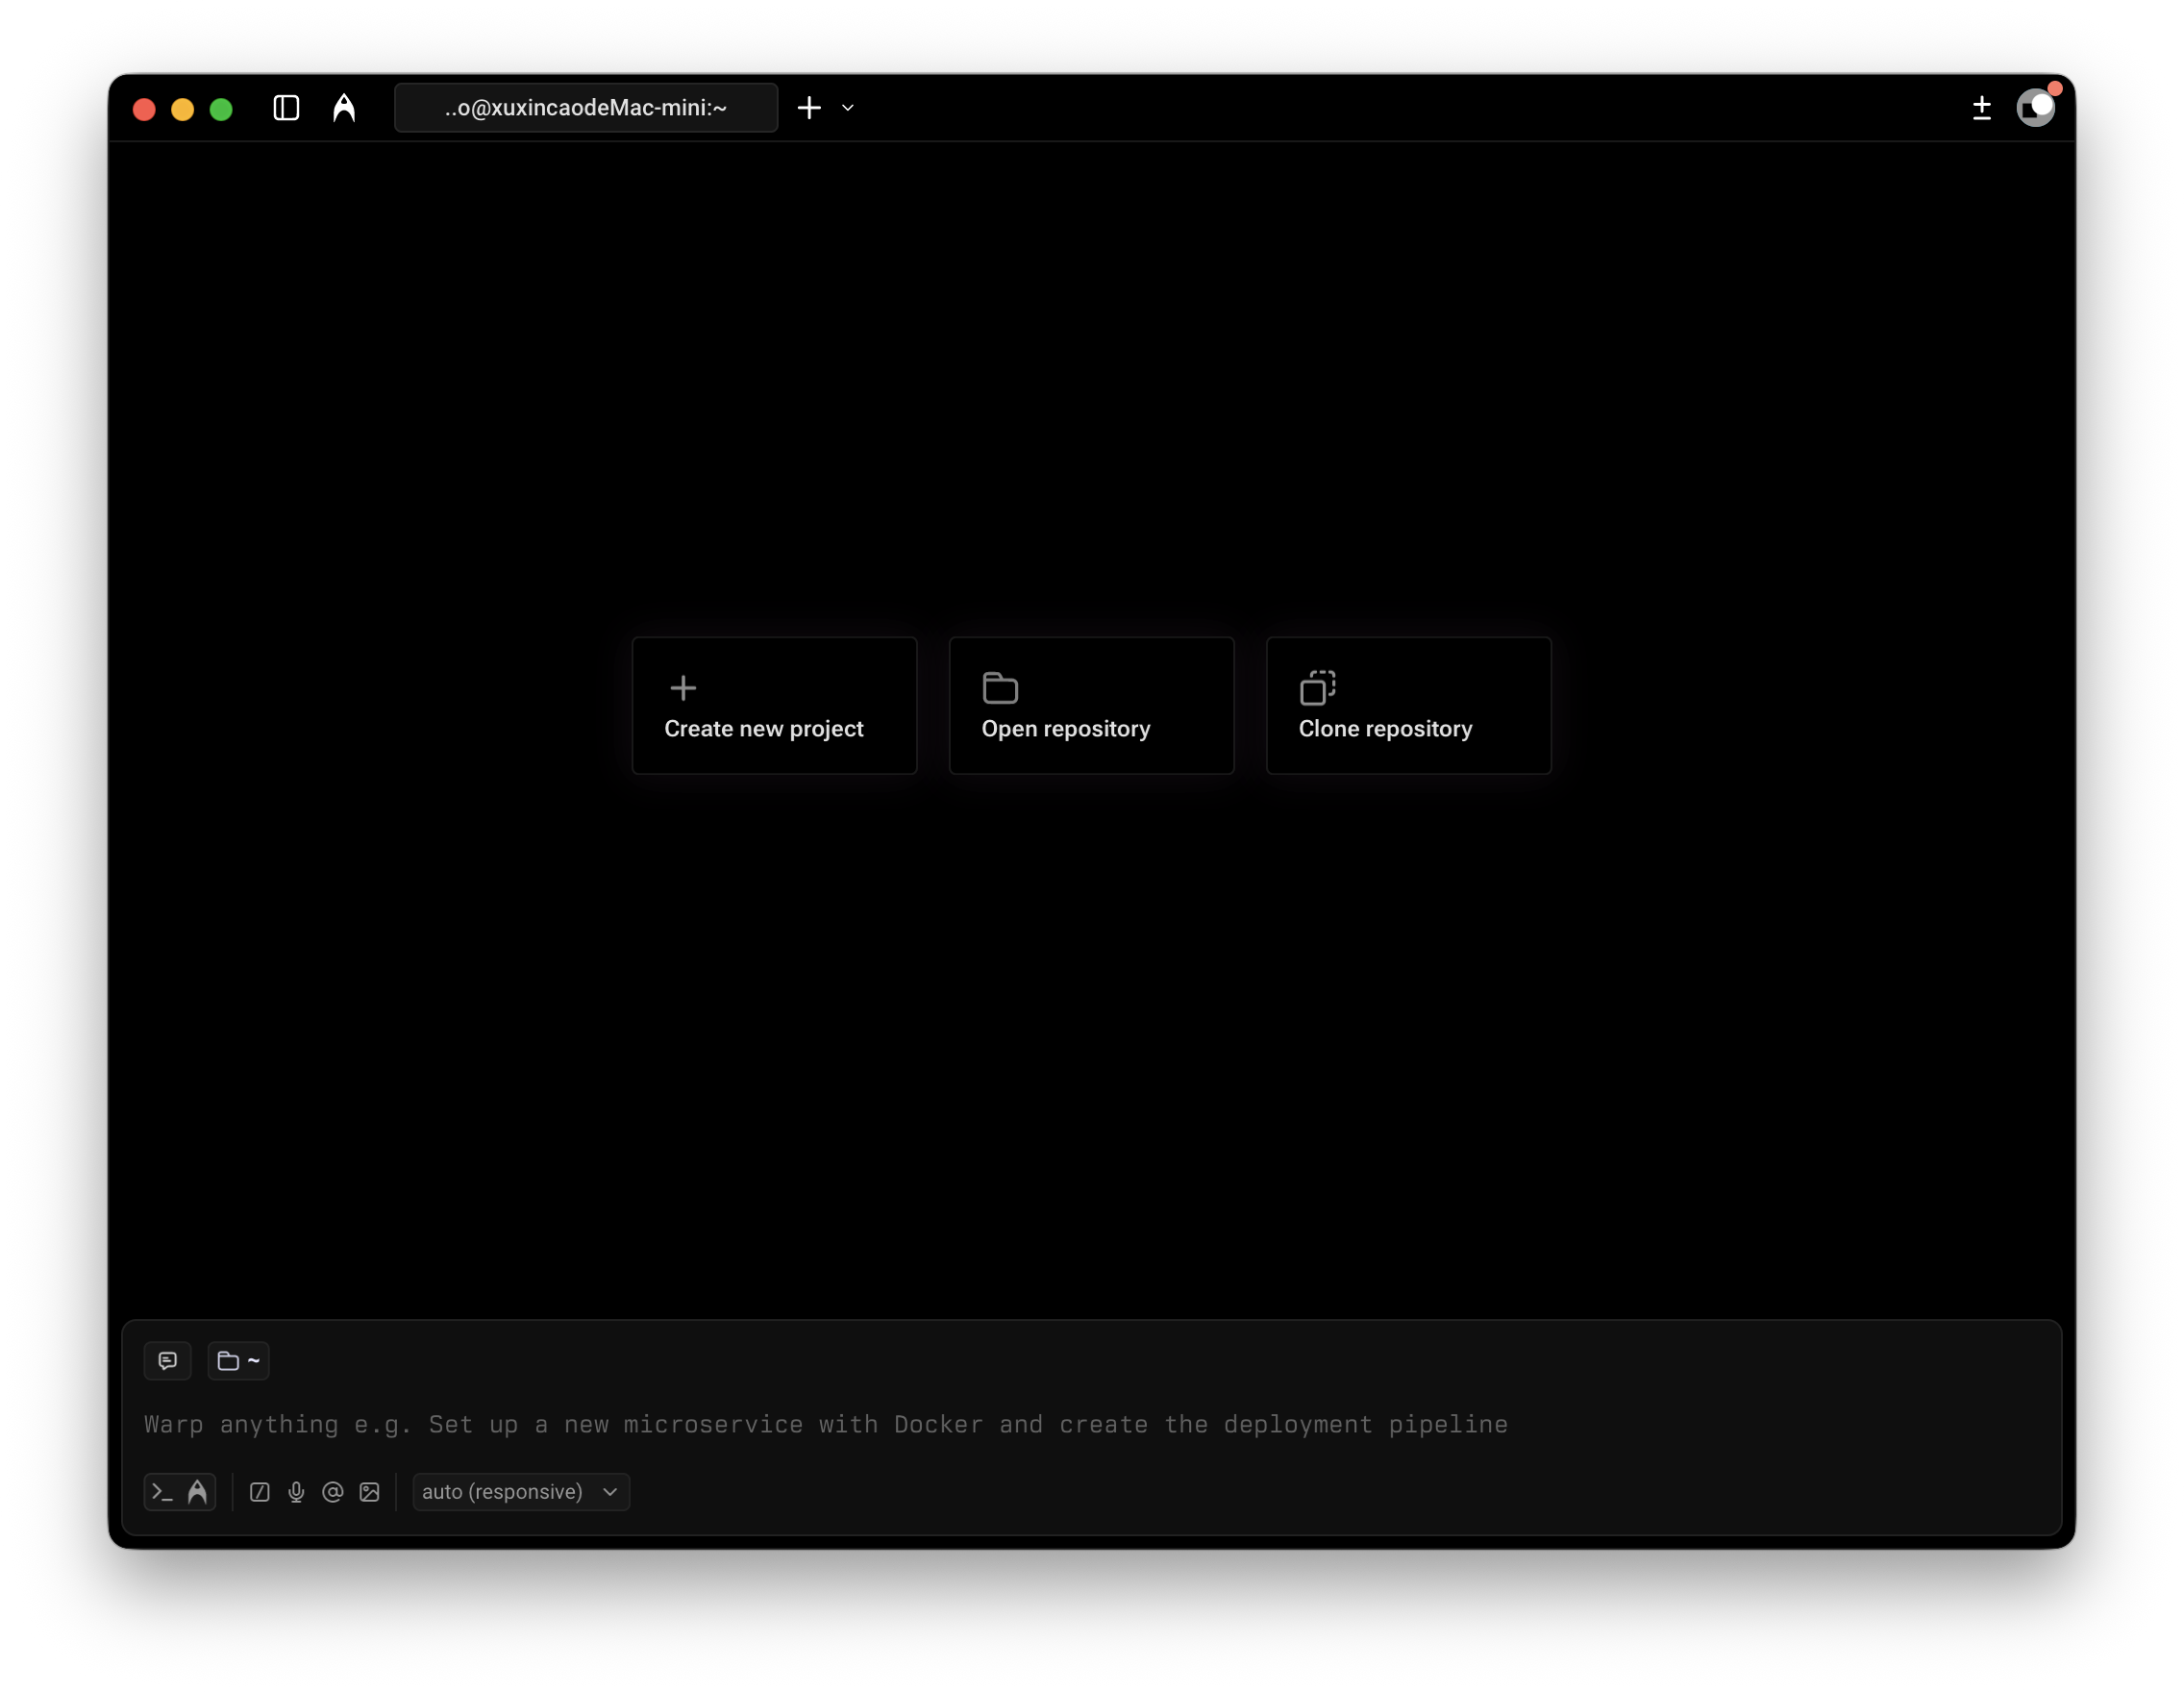
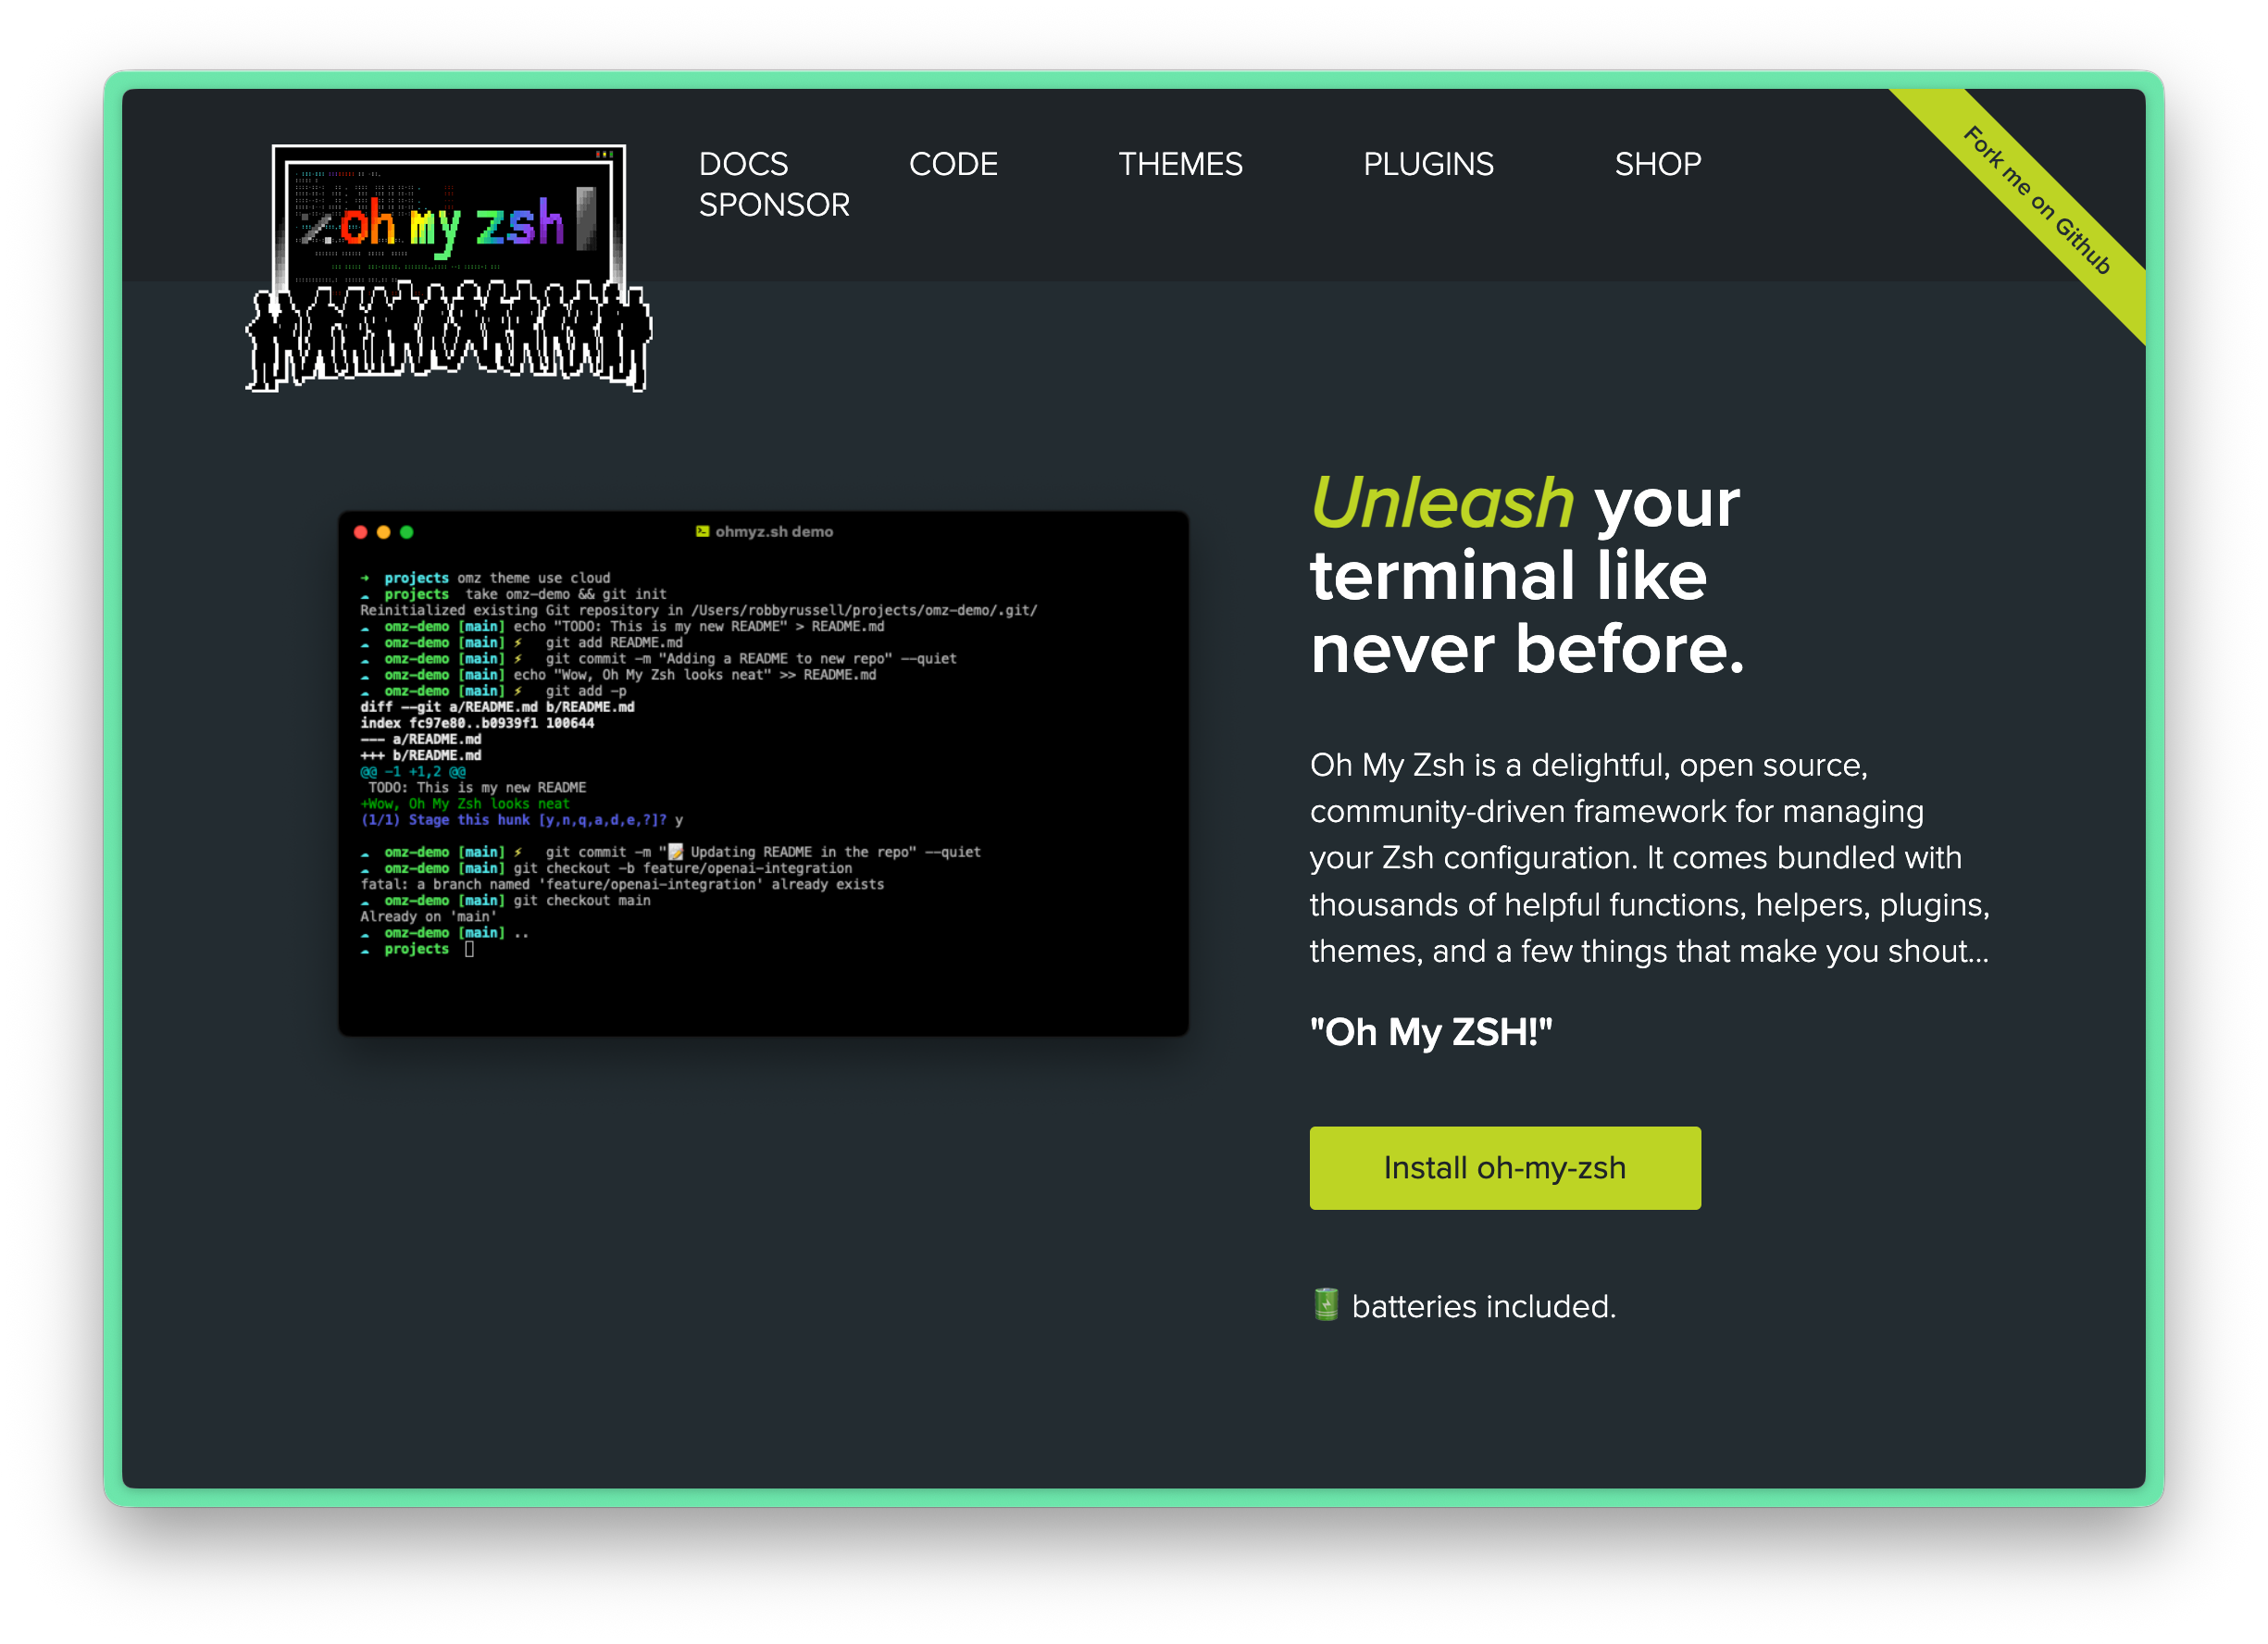
2. Oh-My-Zsh Configuration
Oh-My-Zsh is an open-source Zsh configuration management framework that provides numerous themes and plugins.
What is Zsh
Zsh (Z Shell) is a powerful Unix shell and an enhanced replacement for Bash. Compared to Bash, Zsh offers:
- More powerful auto-completion: Intelligent completion for commands, parameters, file paths, and even Git branch completion
- Better history management: Cross-session history sharing, supports substring search
- Rich themes and prompt customization: Highly customizable prompt display
- Spelling correction: Automatically corrects misspelled commands
- Enhanced wildcard expansion: More powerful file matching patterns
macOS Catalina (10.15) and later versions have set Zsh as the default shell.
What is Oh-My-Zsh
Oh-My-Zsh is a community-driven Zsh configuration management framework that makes Zsh configuration and usage simple:
- 300+ plugins: Enhanced support for common tools like Git, Docker, npm, kubectl
- 150+ themes: Beautiful prompt themes ready to use out of the box
- Simple plugin management: Just add the plugin name to the config file to enable
- Active community: Continuously updated and maintained
In short: Zsh is the shell itself, Oh-My-Zsh is the configuration framework that makes Zsh easier and more powerful.
2.1 Install Zsh
First check and install Zsh:
# First check if installed
zsh --version
If not installed, choose the installation command for your operating system:
macOS:
# macOS 10.15+ comes with Zsh pre-installed, use Homebrew to update if needed
brew install zsh
Ubuntu/Debian:
sudo apt install zshWindows:
Windows users can use Zsh through the following methods:
Method 1: WSL (Recommended)
- Step 1: Install WSL
wsl --install- Step 2: After restarting, install Zsh in WSL's Ubuntu
sudo apt install zshMethod 2: Git Bash + Zsh
- Step 1: First install Git for Windows
- Step 2: Download Zsh for Windows
- Step 3: Extract to Git installation directory (e.g., C:\Program Files\Git)
- Step 4: Add the following to /.bashrc to auto-start Zsh
if \[ -t 1 ]; then
 exec zsh
fi
Finally, after installation, set Zsh as the default Shell:
# Set Zsh as default Shell
chsh -s $(which zsh)
2.2 Install Oh-My-Zsh
sh -c "$(curl -fsSL https://raw.githubusercontent.com/ohmyzsh/ohmyzsh/master/tools/install.sh)"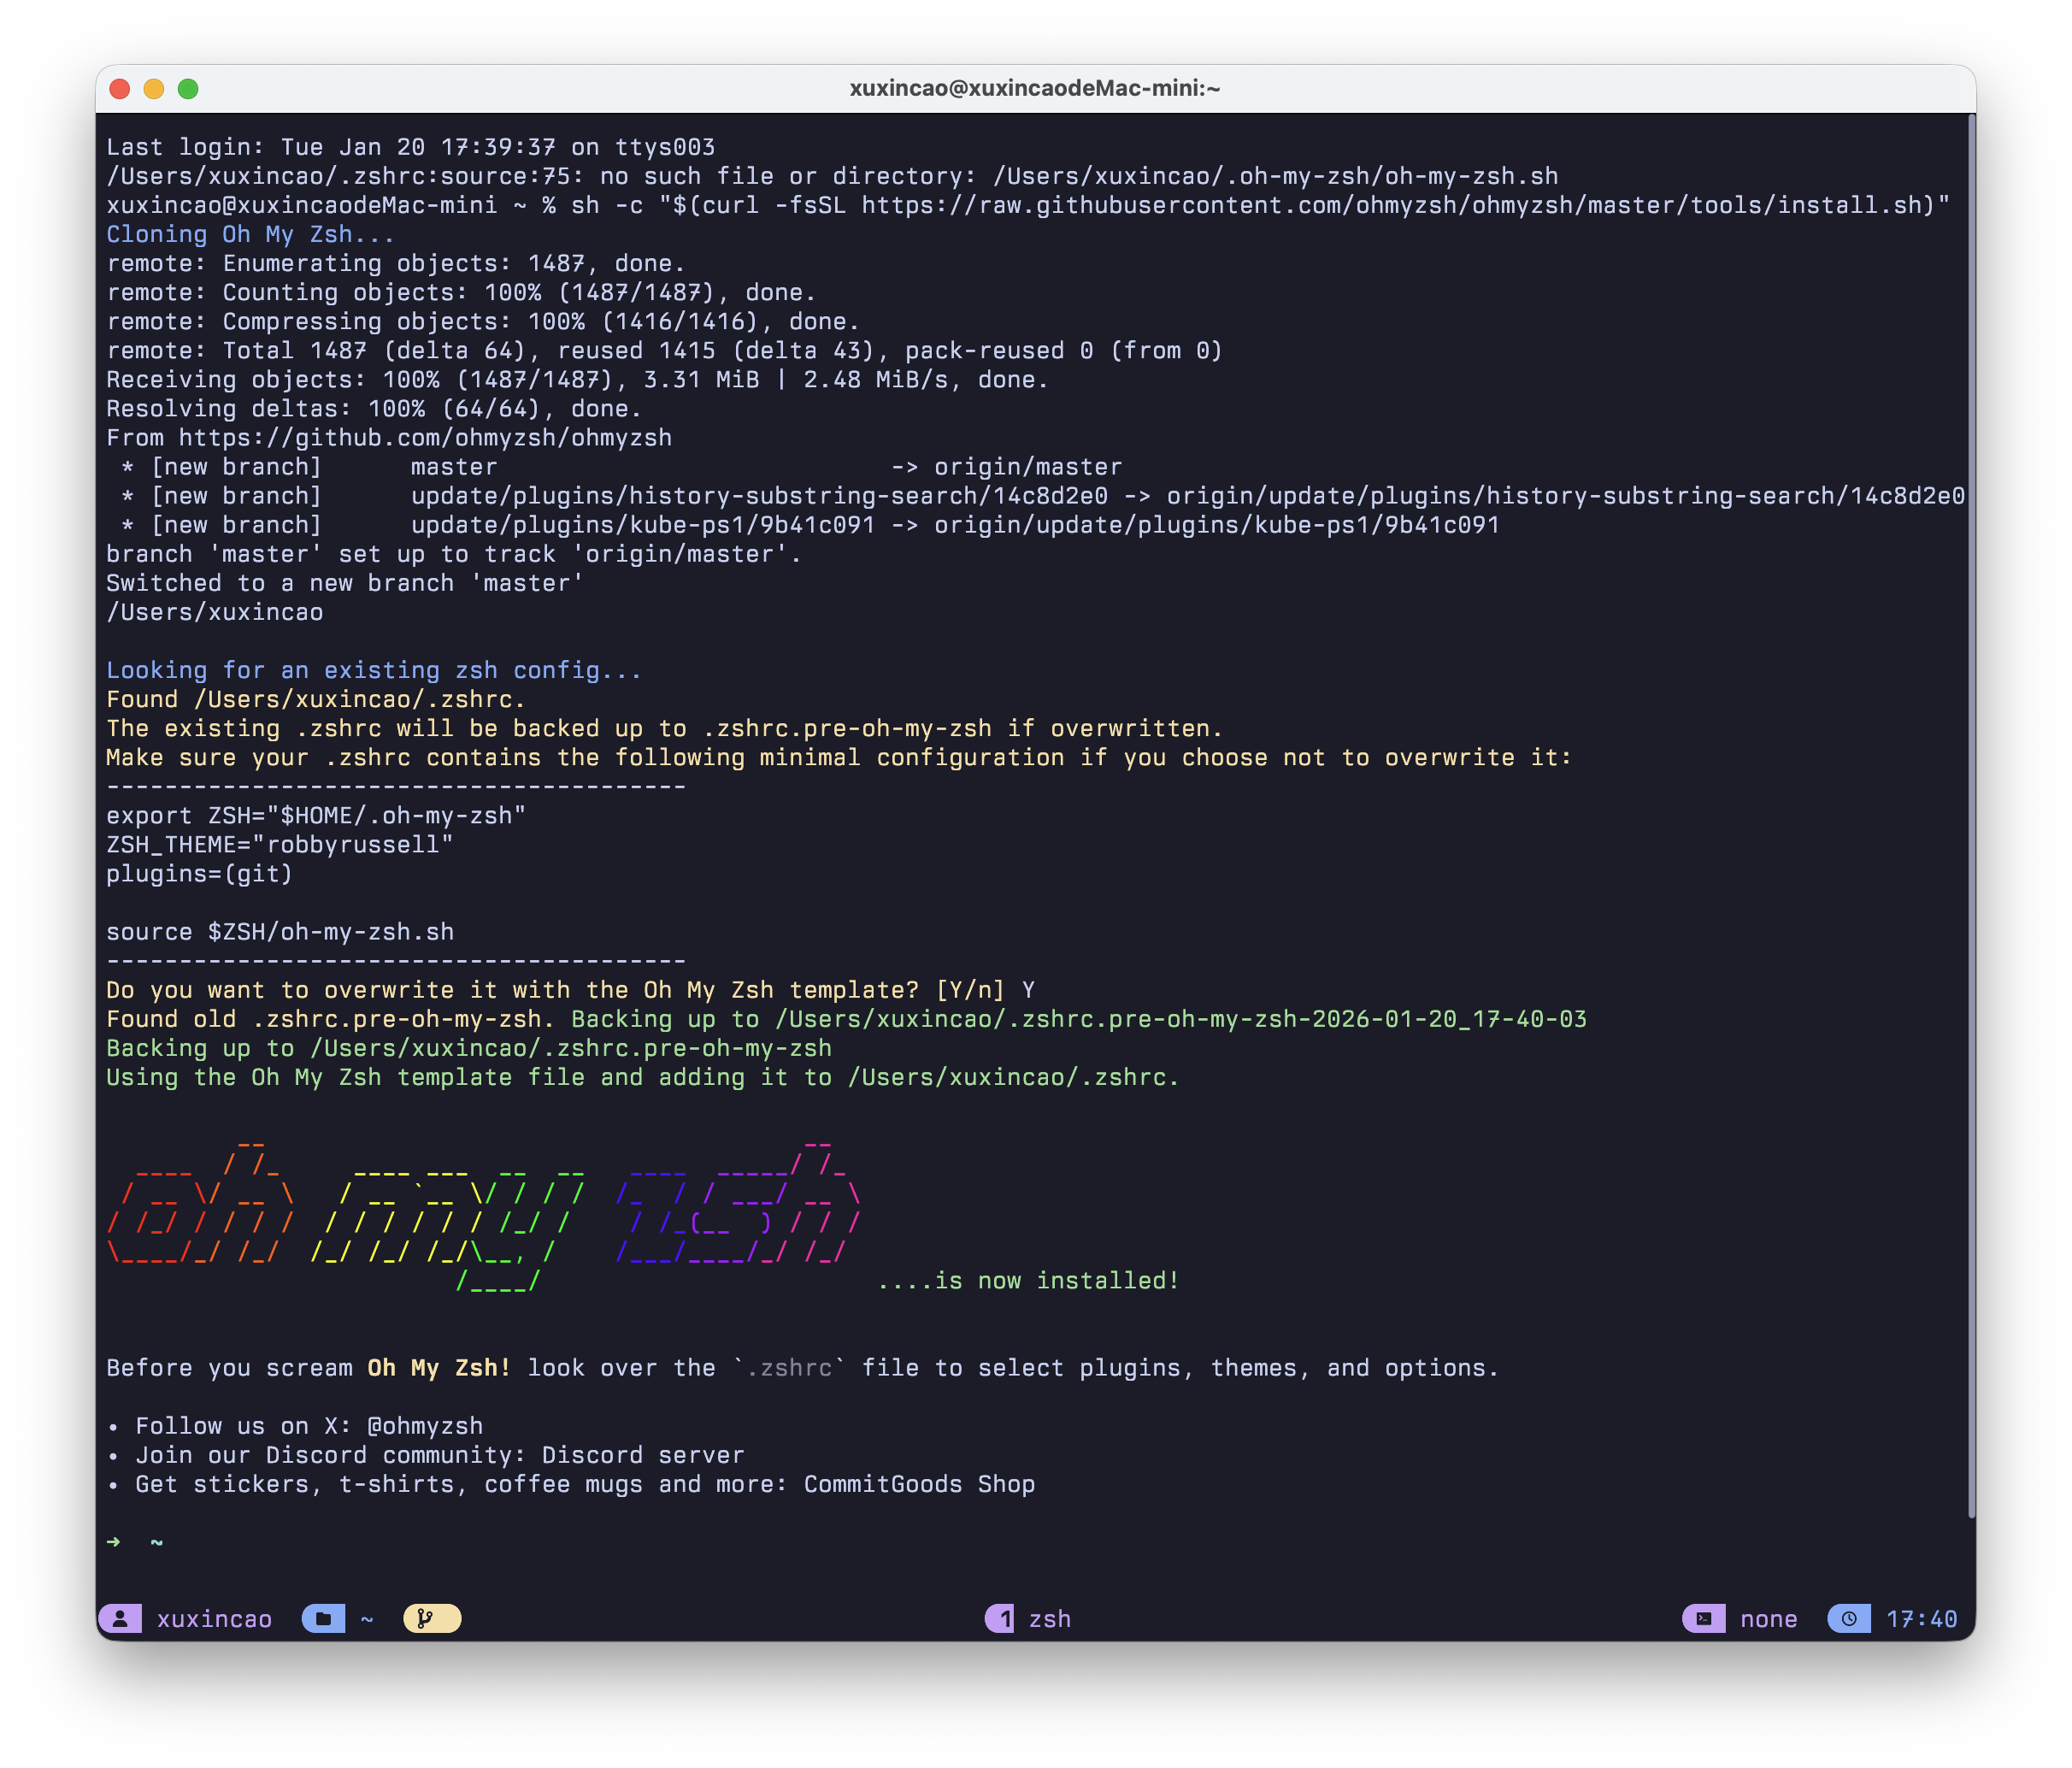
2.3 Powerlevel10k Theme
Powerlevel10k is one of the most popular Zsh themes, offering rich information display and extremely fast rendering speed.
Install Nerd Font
First you need to install Nerd Font to display icons correctly.
Install Powerlevel10k
git clone --depth=1 https://github.com/romkatv/powerlevel10k.git \
  ${ZSH_CUSTOM:-$HOME/.oh-my-zsh/custom}/themes/powerlevel10k
Edit ~/.zshrc and set the theme:
ZSH_THEME="powerlevel10k/powerlevel10k"After reopening the terminal, the configuration wizard will start automatically:
# Manually start configuration wizard
p10k configure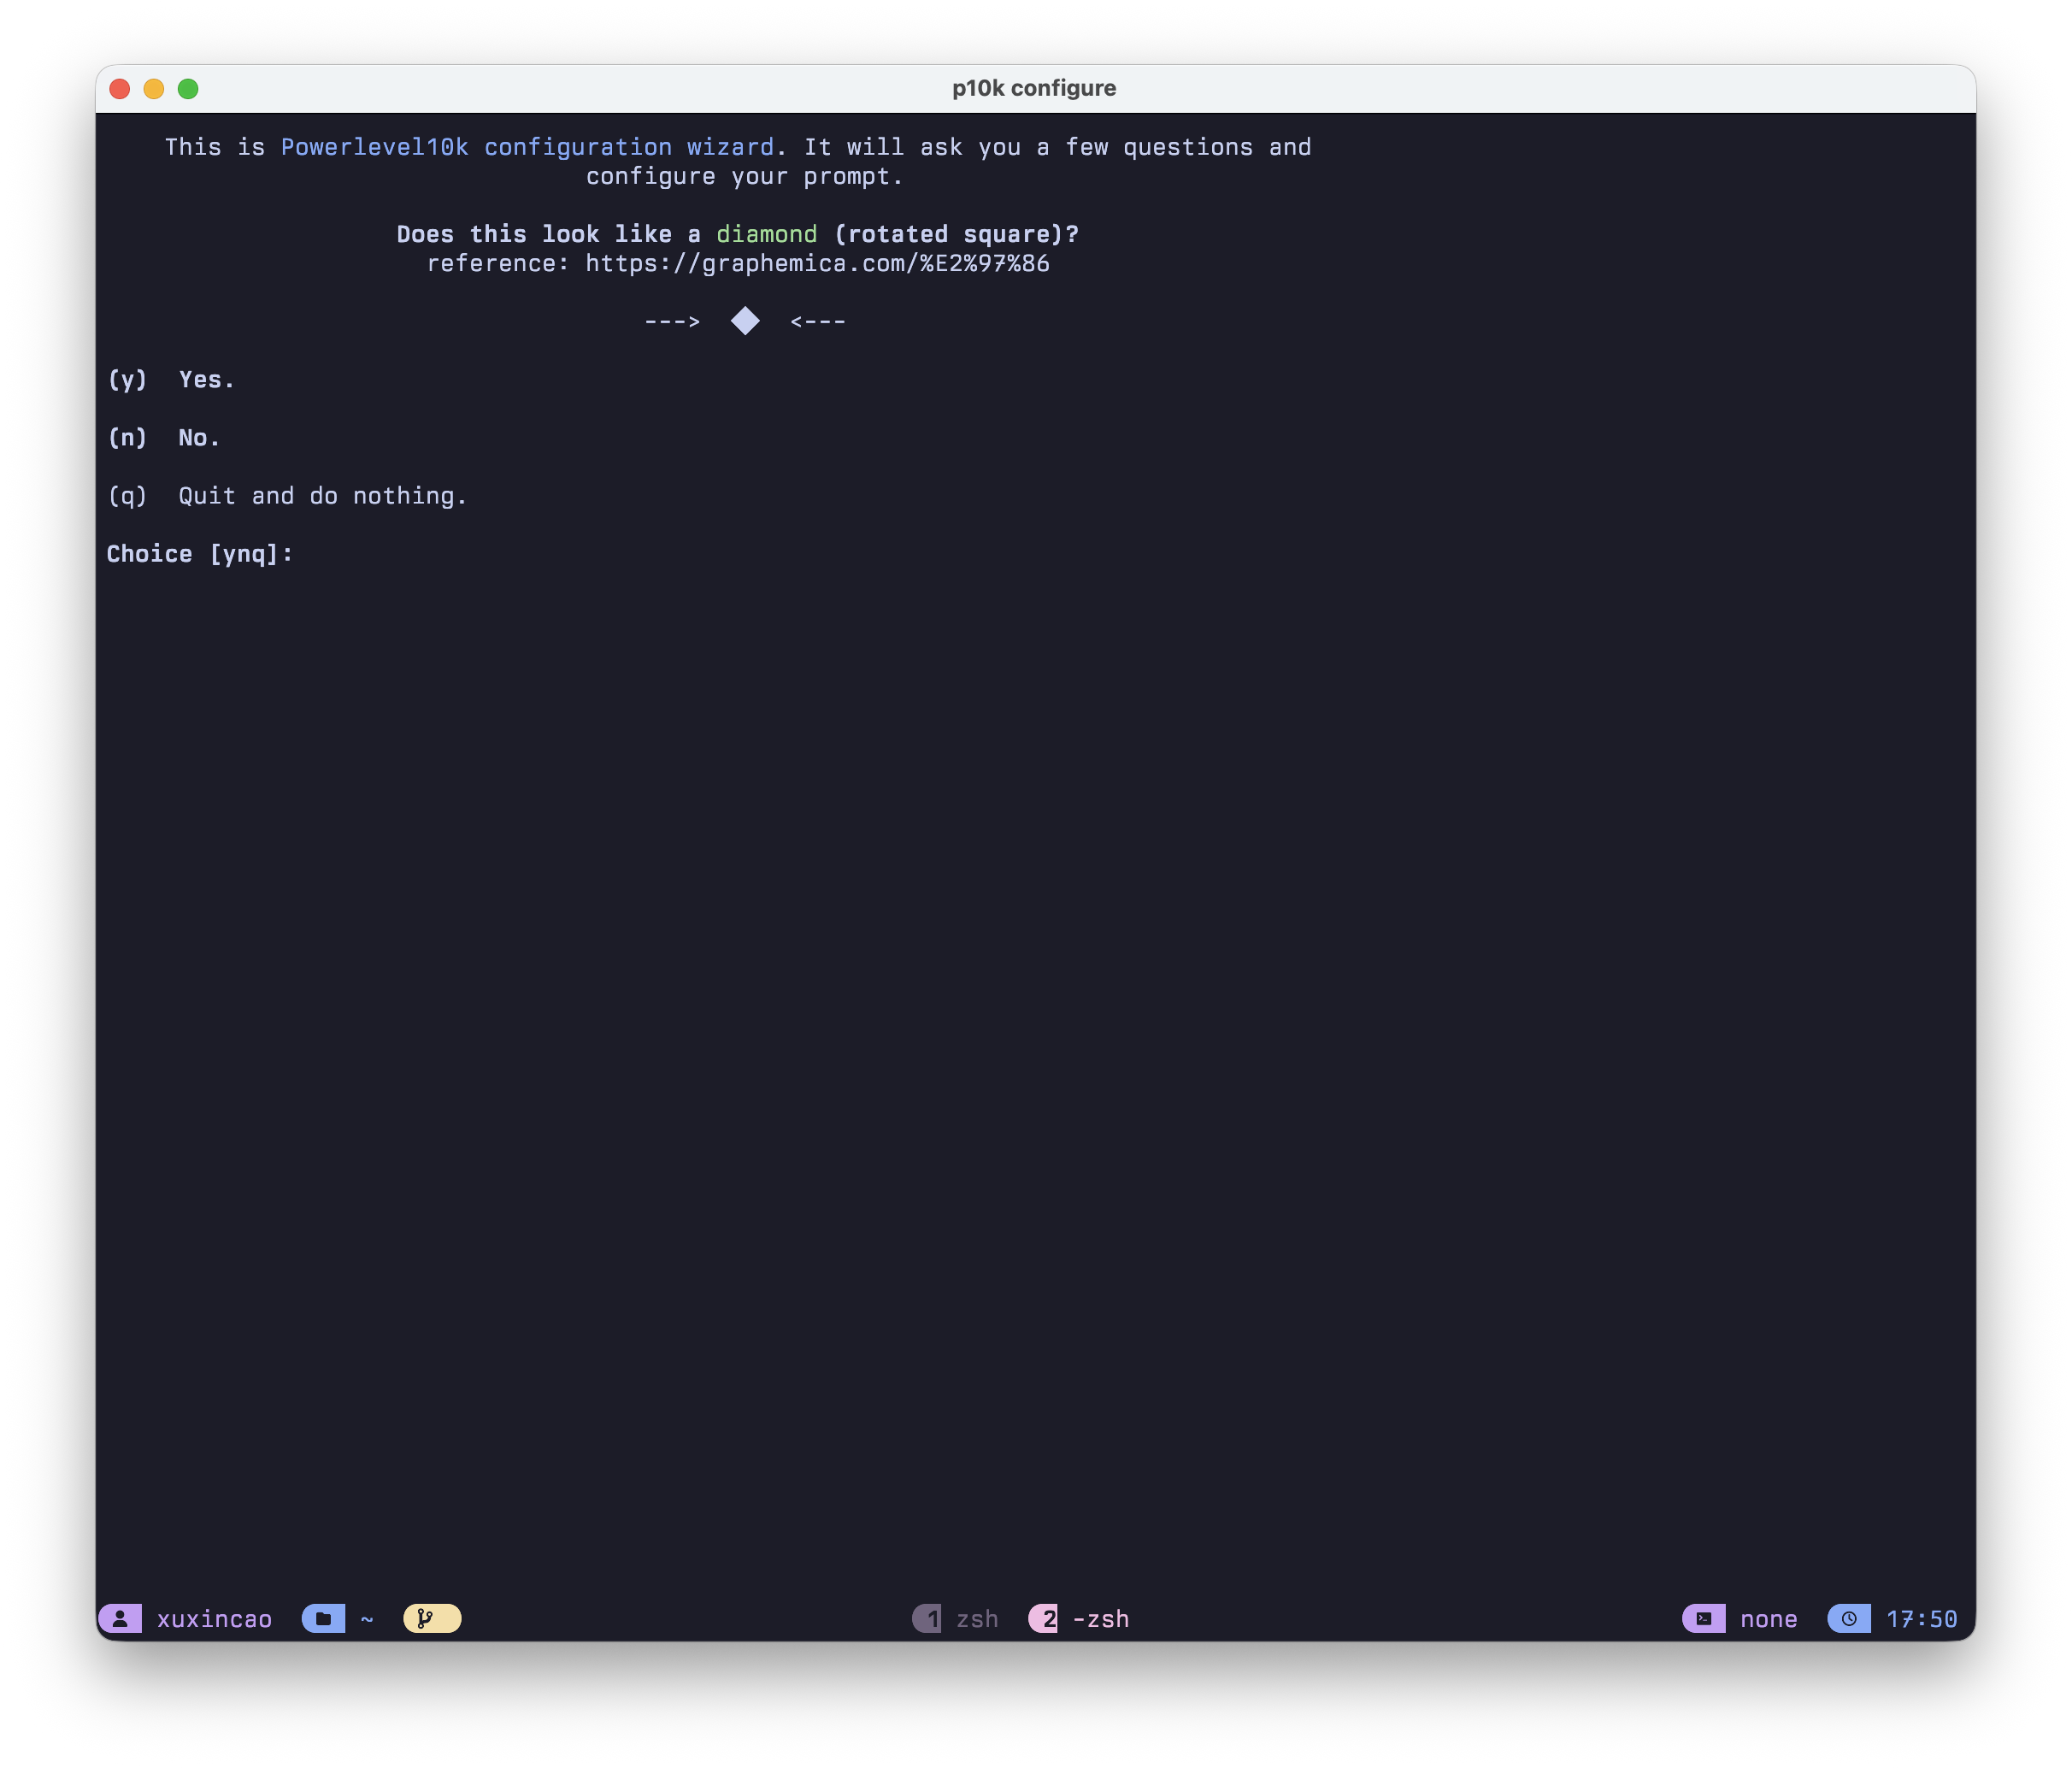
2.3 Plugin Configuration
Here are my recommended plugin configurations, each plugin can significantly enhance your command-line experience.
Install Third-party Plugins
# zsh-autosuggestions - command auto-completion suggestions
git clone https://github.com/zsh-users/zsh-autosuggestions \
  ${ZSH_CUSTOM:-~/.oh-my-zsh/custom}/plugins/zsh-autosuggestions

# zsh-syntax-highlighting - command syntax highlighting
git clone https://github.com/zsh-users/zsh-syntax-highlighting.git \
  ${ZSH_CUSTOM:-~/.oh-my-zsh/custom}/plugins/zsh-syntax-highlighting

# zsh-completions - additional command completions
git clone https://github.com/zsh-users/zsh-completions \
  ${ZSH_CUSTOM:-~/.oh-my-zsh/custom}/plugins/zsh-completions
Configure Plugins
Edit ~/.zshrc and configure the plugin list:
plugins=(
    git                      # Git command aliases and status prompts
    sudo                     # Double-tap ESC to add sudo before command
    history                  # Enhanced history command search
    extract                  # Universal extraction command, supports various formats
    z                        # Smart directory jumping
    zsh-autosuggestions      # Auto-suggest based on history
    zsh-syntax-highlighting  # Command syntax highlighting
    zsh-completions          # Additional command completions
)
Apply configuration:
source ~/.zshrcPlugin Feature Description
| Plugin | Function | Usage Example |
|---|---|---|
git |
Git command aliases | gst = git status, gco = git checkout |
sudo |
Quick add sudo | Double-tap ESC to add sudo before current command |
history |
History search | Ctrl+R to search history commands |
extract |
Universal extraction | extract file.tar.gz auto-detects format |
z |
Smart jump | z project jumps to frequently used directory containing "project" |
zsh-autosuggestions |
Command suggestions | Shows gray suggestions while typing, press → to accept |
zsh-syntax-highlighting |
Syntax highlighting | Valid commands green, invalid commands red |
zsh-completions |
Extra completions | More Tab completion support for commands |
3. Vibe Coding CLI Tools
Why Choose CLI over IDE
Honestly, IDE tools like Cursor are indeed user-friendly, with out-of-the-box experience, friendly interface, and inline completion with visual diff that creates a great flow experience. But after extended use or with complex projects, you'll notice several issues.
- Context is a black box. Cursor claims 200K token context, but in practice it's often only 70K-120K, and it won't tell you why. Someone tested: building the same Next.js project, Claude Code CLI used 33K tokens with zero errors, while Cursor used 188K tokens and still had bugs, because you don't know what it stuffed into the context.
- Resource usage is significant. Cursor takes 15-30 seconds to start, with 2-4 GB memory usage. CLI tools start instantly, under 100MB. For terminal users, opening an IDE just to have AI edit a few lines of code feels heavy.
- Can't automate. Running AI code review in CI/CD, batch processing multiple repositories - CLI can do these with a single command, IDE can't.
- Tied to editor. Using Cursor means accepting the VS Code stack. If you're used to Neovim, Emacs or other editors, CLI tools don't care - they work as long as the terminal is open.
Of course, for beginners or those who prefer graphical interfaces for small features, IDE is perfectly fine. But if you're a terminal user, or need to handle complex tasks, want transparency and control, or have automation needs, CLI is more suitable.
| Dimension | CLI Tools | IDE Tools |
|---|---|---|
| Resource Usage | Lightweight, terminal only | Heavy, requires full IDE |
| Flexibility | Works with any editor | Tied to specific IDE |
| Automation | Easy scripting, CI/CD integration | Difficult to automate |
| Transparency | All operations visible and controllable | Some operations in background |
| Context Control | Precise control over input | IDE auto-collects (sometimes too much) |
3.1 Popular Vibe Coding CLI Tools
| Tool | Open Source | Features | Use Case |
|---|---|---|---|
| Claude Code | No | Anthropic official, 200K context, strong deep reasoning | Claude users, complex tasks |
| Codex CLI | Yes | OpenAI official, lightweight, supports ChatGPT Pro/Plus | OpenAI ecosystem users |
| Gemini CLI | Yes | Google official, free Gemini 2.5 Pro | Budget-limited, Google ecosystem |
| OpenCode | Yes | Supports 75+ models, can switch Claude/GPT/Gemini | Multi-model switching users |
| Factory Droid | No | Seamless cross-platform switching, CI/CD large-scale parallelism, enterprise-grade security | Professional developers ⭐Recommended |
3.2 Factory Droid Installation
What is Factory Droid?
Factory Droid is a command-line AI programming tool from Factory AI with the following features:
- 🤖 Powerful code understanding and generation capabilities
- 📁 Direct file system read/write
- 🔧 Execute Shell commands
- 🌐 Supports multiple LLM models
- 🎯 Extensible Skills system
- 🔗 MCP protocol support
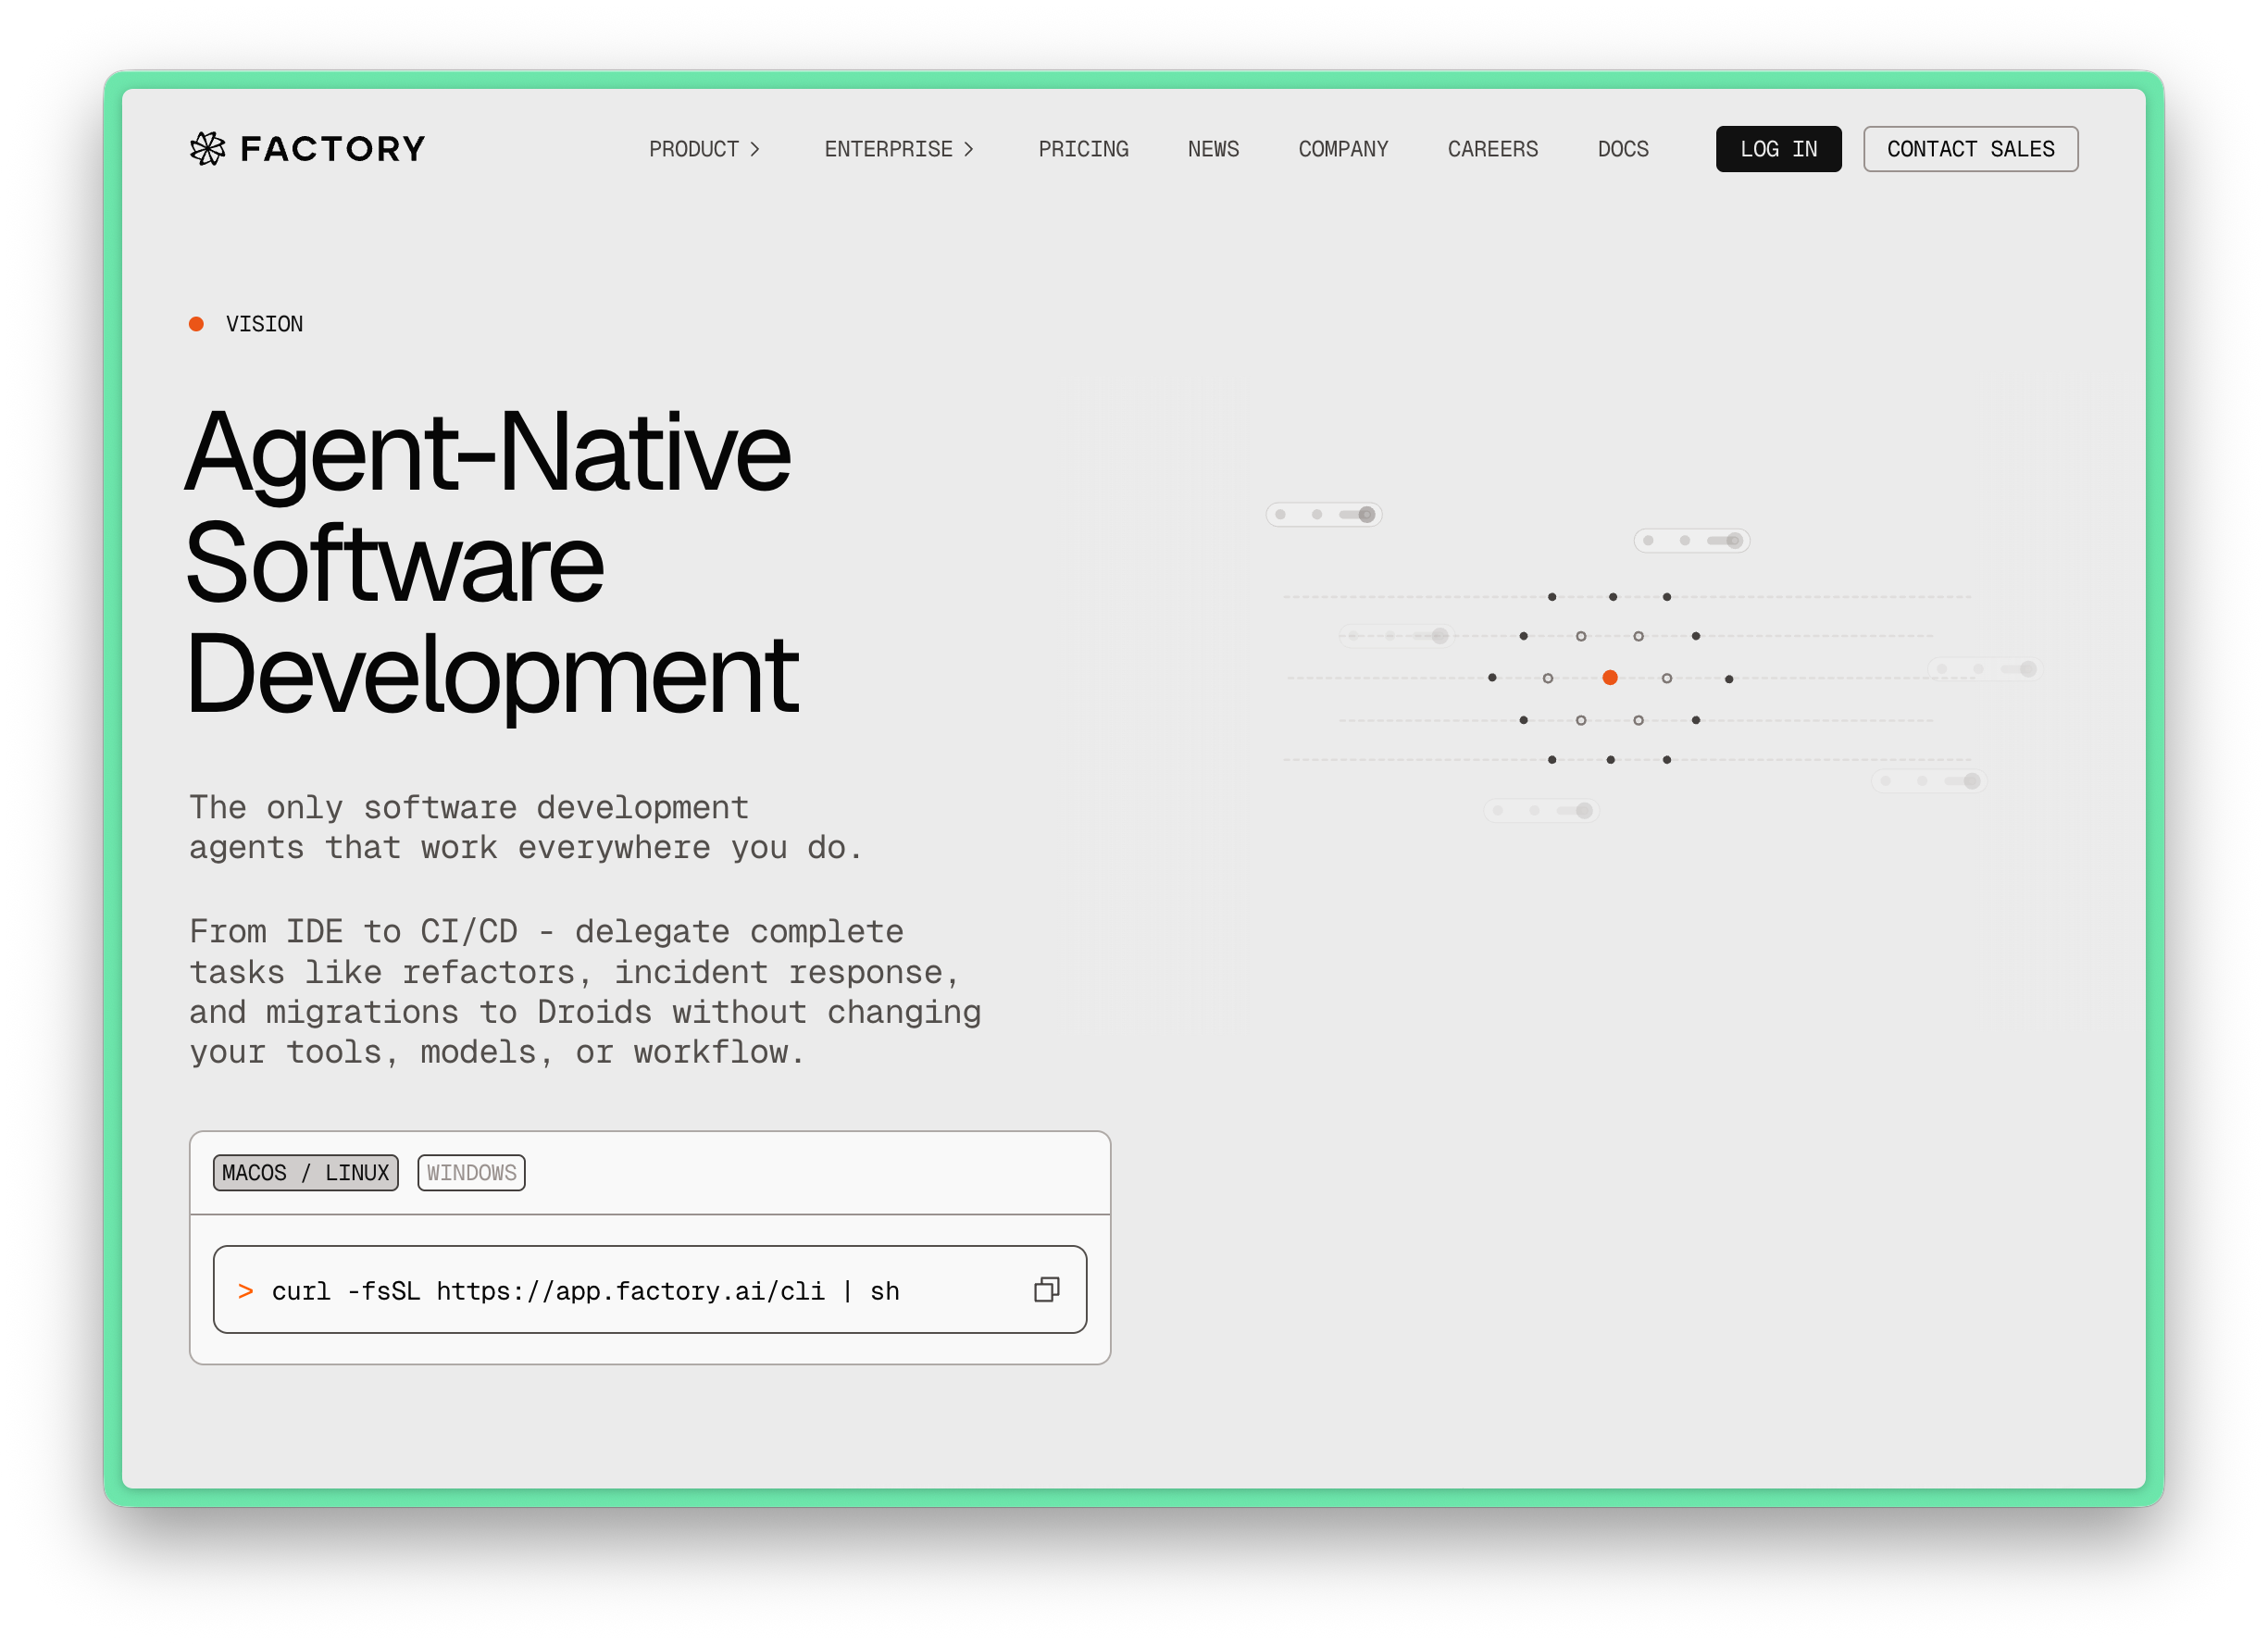
Install Factory Droid
macOS/Linux:
curl -fsSL https://app.factory.ai/cli | shWindows:
irm https://app.factory.ai/cli/windows | iex⚠️ Linux Users Note: Ensure
xdg-utilsis installed for full functionality:sudo apt-get install xdg-utils
Start Factory Droid
# Enter project directory
cd /path/to/your/project

# Start interactive session
droid
First run will guide you to log in to your Factory account through the browser.
Configuration File
Configuration file is located at ~/.factory/settings.json, can be modified interactively via /settings command.
Session Default Settings
Configure default behavior in settings.json:
{
  "sessionDefaultSettings": {
    "model": "claude-opus-4-5-20251101",
    "reasoningEffort": "high",
    "autonomyMode": "spec",
    "specModeReasoningEffort": "off"
  }
}| Config Item | Options | Description |
|---|---|---|
model |
opus, sonnet, gpt-5.1, gpt-5.2, haiku, etc. | Default AI model |
reasoningEffort |
off, none, low, medium, high | Reasoning depth |
autonomyMode |
normal, spec, auto-low, auto-medium, auto-high | Autonomy mode |
specModeReasoningEffort |
off, none, low, medium, high | Spec mode reasoning |
3.3 Hooks Configuration
Hooks allow you to automatically execute actions when specific events occur, greatly enhancing your workflow.
Edit ~/.factory/settings.json, current Hooks configuration is related to the planning-with-files Skill:
{
  "hooks": {
    "SessionStart": [
      {
        "matcher": "startup|resume",
        "hooks": [
          {
            "type": "command",
            "command": "echo '[planning-with-files] Ready. For complex tasks, create task_plan.md, findings.md, and progress.md in your project directory.'"
          }
        ]
      }
    ],
    "PreToolUse": [
      {
        "matcher": "Write|Edit|Bash",
        "hooks": [
          {
            "type": "command",
            "command": "if [ -f \"$FACTORY_PROJECT_DIR/task_plan.md\" ]; then head -30 \"$FACTORY_PROJECT_DIR/task_plan.md\"; fi"
          }
        ]
      }
    ],
    "PostToolUse": [
      {
        "matcher": "Write|Edit",
        "hooks": [
          {
            "type": "command",
            "command": "echo '[planning-with-files] File updated. If this completes a phase, update task_plan.md status.'"
          },
          {
            "type": "command",
            "command": "~/.factory/skills/md-table-formatter/scripts/format-tables.py",
            "timeout": 10
          }
        ]
      }
    ],
    "Stop": [
      {
        "hooks": [
          {
            "type": "command",
            "command": "~/.factory/skills/planning-with-files/scripts/check-complete.sh 2>/dev/null || true"
          }
        ]
      }
    ]
  }
}
Hook Types Description
| Hook Type | Trigger Time | Purpose |
|---|---|---|
SessionStart |
When session starts | Initialize prompts, load context |
PreToolUse |
Before using a tool | Check status, read plans |
PostToolUse |
After using a tool | Update status, format files |
Stop |
When session ends | Cleanup, summarize |
3.4 Factory Droid Usage Guide
Basic Operations
Keyboard Shortcuts
| Shortcut | Function |
|---|---|
Enter |
Send message |
Shift+Enter |
New line (multi-line input) |
Shift+Tab |
Switch mode (Normal/Spec/Auto) |
! |
Toggle Bash mode (when input box is empty) |
Esc |
Exit Bash mode / Interrupt operation |
? |
View all shortcuts |
Ctrl+C |
Exit Droid |
Basic Interaction Flow (see Workflow Examples for detailed version)
- Enter your task description
- Droid analyzes the codebase and creates a plan
- Review the changes proposed by Droid
- Accept or reject modifications
- Continue iterating until task is complete
Slash Commands
Enter commands starting with / in Droid to perform specific operations:
| Command | Description |
|---|---|
/settings |
Configure Droid settings |
/model |
Switch AI model |
/review |
Start AI code review workflow |
/mcp |
Manage MCP servers |
/sessions |
List and select history sessions |
/droids |
Manage custom Droids |
/skills |
Manage and invoke Skills |
/hooks |
Manage lifecycle Hooks |
/cost |
View Token usage statistics |
/new |
Start new session |
/help |
View all available commands |
Specification Mode
Specification Mode is one of Droid's core features, following the "plan first, execute later" principle.
- Activation Method
Press Shift+Tab to switch to Spec mode.
- Workflow
- Describe the feature - Describe what you want to implement in 4-6 sentences
- Droid generates spec - Automatically analyzes codebase and generates detailed implementation plan
- Review and approve - You can modify or approve the plan
- Implementation - After approval, Droid begins execution, each change is shown for your review
- Safety Guarantees
- Analysis phase is read-only, no files modified
- All changes execute only after approval
- Complete visibility of implementation plan
- Approval Options
| Option | Description |
|---|---|
| Proceed (Manual) | Approve plan, keep manual confirmation for each operation |
| Proceed + Auto (Low) | Approve plan, auto-execute file edits and read-only commands |
| Proceed + Auto (Medium) | + Auto-execute reversible commands (npm install, etc.) |
| Proceed + Auto (High) | + Auto-execute high-risk commands (git push, etc.) |
| Keep iterating | Continue modifying the spec |
Auto-Run Mode
Auto-Run Mode lets you control Droid's autonomous execution level.
| Level | Auto-executed Operations | Examples |
|---|---|---|
| Auto (Low) | File edits, read-only commands | ls, git status, rg |
| Auto (Medium) | + Reversible workspace modifications | npm install, git commit, mv, cp |
| Auto (High) | + High-risk commands (not explicitly forbidden) | git push, docker, database migrations |
- Switch Method
- Press Shift+Tab to cycle: Normal → Spec → Auto (Low) → Auto (Medium) → Auto (High)
- Or set default level in
/settings
- Safety Mechanisms (even in Auto (High) mode, these still require confirmation):
- Dangerous commands (e.g.,
rm -rf /) - Command substitution (
$(...)or backticks) - Operations flagged by CLI security checks
- Dangerous commands (e.g.,
Bash Mode
Bash Mode lets you execute Shell commands directly in Droid without AI interpretation.
- Usage
- Press
!when input box is empty to enter Bash mode - Prompt changes from
>to$ - Enter any Shell command and press Enter to execute
- Press
Escto return to AI conversation mode
- Press
- Use Cases
- Quick check
git status - Run
npm testormake build - View file contents or directory structure
- Quick check
Pricing Plans
Factory measures usage through Standard Tokens. Cached Tokens are billed at 1/10 rate (10 cached Tokens = 1 Standard Token).
- Subscription Plans
| Plan | Standard Tokens / Month | Price / Month |
|---|---|---|
| Free | BYOK (Bring Your Own Key) | $0 |
| Pro | 10 million (+10 million bonus Tokens) | $20 |
| Max | 100 million (+100 million bonus Tokens) | $200 |
| Ultra | 1 billion (+1 billion bonus Tokens) | $2,000 |
Overage is billed at $2.70 / million Standard Tokens.
- Model Billing Multipliers
Different models have different multipliers for calculating Standard Token usage:
| Model | Model ID | Multiplier |
|---|---|---|
| Gemini 3 Flash | gemini-3-flash-preview |
0.2× |
| Droid Core | glm-4.6 |
0.25× |
| Claude Haiku 4.5 | claude-haiku-4-5-20251001 |
0.4× |
| GPT-5.1 | gpt-5.1 |
0.5× |
| GPT-5.1-Codex | gpt-5.1-codex |
0.5× |
| GPT-5.1-Codex-Max | gpt-5.1-codex-max |
0.5× |
| GPT-5.2 | gpt-5.2 |
0.7× |
| Gemini 3 Pro | gemini-3-pro-preview |
0.8× |
| Claude Sonnet 4.5 | claude-sonnet-4-5-20250929 |
1.2× |
| Claude Opus 4.5 | claude-opus-4-5-20251101 |
2× |
- Usage Recommendations
- Free Plan: Suitable for users who already have API Keys, no monthly fee
- Pro Plan: Suitable for individual developers' daily use, good value
- Caching Advantage: Factory's caching mechanism significantly reduces actual Token consumption, typically with 4-8x cache hit rate
📚 Further Reading:
4. BYOK - Model Selection Guide
BYOK (Bring Your Own Key) lets you use your own API Key to access various LLM models.
BYOK allows you to:
- Use your own API Key to access models
- Choose the model that best fits your needs
- Control costs and usage
- Use locally deployed models
4.1 How to Choose a Model
SWE-Rebench is a continuously updated software engineering LLM benchmark leaderboard that helps you understand how each model performs on real programming tasks.

Key Metrics Explained
| Metric | Meaning | Importance |
|---|---|---|
| Resolved Rate | Percentage of problems successfully solved | Most important, reflects model capability |
| Pass@5 | Percentage of at least 1 success in 5 attempts | Reflects model stability |
| Cost per Problem | Average cost per problem | Affects usage cost |
| Tokens per Problem | Tokens consumed per problem | Reflects efficiency |
4.2 Recommended Models (January 2026 Data)
Based on the latest SWE-Rebench data, here are model recommendations for different scenarios:
Top Performance
| Model | Resolved Rate | Pass@5 | Cost/Problem | Features |
|---|---|---|---|---|
| Claude Opus 4.5 | 63.3% | 79.2% | $1.22 | Highest performance, first choice for complex tasks |
| GPT-5.2 xhigh | 61.5% | 70.8% | $1.46 | OpenAI strongest, powerful reasoning |
| Gemini 3 Flash Preview | 60.0% | 72.9% | $0.29 | Excellent value |
Best Value
| Model | Resolved Rate | Pass@5 | Cost/Problem | Features |
|---|---|---|---|---|
| Gemini 3 Flash Preview | 60.0% | 72.9% | $0.29 | 🏆 Best value king |
| GPT-5.2 medium | 59.4% | 70.8% | $0.86 | Balances performance and cost |
| Claude Sonnet 4.5 | 57.5% | 75.0% | $0.98 | First choice for daily tasks |
Open Source Models
| Model | Resolved Rate | Pass@5 | Cost/Problem | Features |
|---|---|---|---|---|
| GLM-4.7 | 51.3% | 66.7% | $0.40 | 🏆 Best open source |
| DeepSeek-V3.2 | 48.5% | 68.8% | $0.25 | Can be locally deployed |
| Kimi K2 Thinking | 40.5% | 60.4% | $0.48 | Excellent Chinese domestic option |
Budget Friendly
| Model | Resolved Rate | Pass@5 | Cost/Problem | Features |
|---|---|---|---|---|
| Grok Code Fast 1 | 35.9% | 54.2% | $0.08 | Cheapest |
| Devstral-2-123B | 36.6% | 59.6% | $0.09 | Open source, self-hostable |
| MiniMax M2.1 | 37.3% | 58.3% | $0.10 | Cache friendly |
4.3 BYOK Configuration
Configure Custom Models
Configure custom models in ~/.factory/settings.json:
{
  "customModels": [
    {
      "model": "gpt-5.2",
      "id": "custom:my-gpt-5.2",
      "displayName": "My GPT-5.2",
      "baseUrl": "https://api.openai.com/v1",
      "apiKey": "sk-your-api-key-here",
      "provider": "openai"
    },
    {
      "model": "claude-opus-4-5",
      "id": "custom:my-opus",
      "displayName": "My Claude Opus",
      "baseUrl": "https://api.anthropic.com/v1",
      "apiKey": "sk-ant-your-key-here",
      "provider": "anthropic"
    },
    {
      "model": "deepseek-v3.2",
      "id": "custom:local-deepseek",
      "displayName": "Local DeepSeek",
      "baseUrl": "http://localhost:8080/v1",
      "apiKey": "not-needed",
      "provider": "openai"
    }
  ],
  "sessionDefaultSettings": {
    "model": "custom:my-gpt-5.2"
  }
}
Configuration Parameter Description
| Parameter | Required | Description |
|---|---|---|
model |
Yes | Model name, the model parameter sent to API |
id |
No | Unique identifier, format custom:name, used to select model in Droid |
displayName |
No | Name displayed in UI for easy identification |
baseUrl |
Yes | API endpoint address, different for each service |
apiKey |
Yes | API key, for local services use not-needed |
provider |
Yes | Provider type: openai, anthropic, generic-chat-completion-api |
noImageSupport |
No | Disable image support, default false |
maxOutputTokens |
No | Maximum output tokens, recommended for local models |
Common baseUrl Reference
International Services:
| Service | baseUrl | Description |
|---|---|---|
| OpenAI | https://api.openai.com/v1 |
OpenAI official API |
| Anthropic | https://api.anthropic.com/v1 |
Anthropic official API |
| Google Gemini | https://generativelanguage.googleapis.com/v1beta/ |
Google AI Studio |
| OpenRouter | https://openrouter.ai/api/v1 |
Multi-model aggregation platform |
| Hugging Face | https://router.huggingface.co/v1 |
HF inference router |
Chinese Services:
| Service | baseUrl | Description |
|---|---|---|
| DeepSeek | https://api.deepseek.com/v1 |
DeepSeek official API |
| Zhipu AI (GLM) | https://open.bigmodel.cn/api/paas/v4 |
GLM series models |
| Alibaba Tongyi Qianwen | https://dashscope.aliyuncs.com/compatible-mode/v1 |
Qwen series models |
| Moonshot (Kimi) | https://api.moonshot.cn/v1 |
Kimi series models |
| Baidu Qianfan | https://aip.baidubce.com |
Wenxin Yiyan |
| ByteDance Doubao | https://ark.cn-beijing.volces.com/api/v3 |
Doubao model |
| SiliconFlow | https://api.siliconflow.cn/v1 |
Chinese model aggregation platform |
Local Deployment:
| Service | baseUrl | Description |
|---|---|---|
| Ollama Local | http://localhost:11434/v1 |
Local model deployment |
| vLLM | http://localhost:8000/v1 |
High-performance local inference |
| LM Studio | http://localhost:1234/v1 |
Desktop local model |
Using Local Deployed LLM
Ollama (Recommended)
{
 "customModels": [
   {
     "model": "qwen2.5-coder:32b",
     "displayName": "Qwen 2.5 Coder 32B [Local]",
     "baseUrl": "http://localhost:11434/v1",
     "apiKey": "not-needed",
     "provider": "generic-chat-completion-api",
     "maxOutputTokens": 16000
   }
 ]
}
vLLM
{
 "customModels": [
   {
     "model": "your-model",
     "displayName": "vLLM Model",
     "baseUrl": "http://localhost:8000/v1",
     "apiKey": "not-needed",
     "provider": "openai"
   }
 ]
}
LM Studio
{
 "customModels": [
   {
     "model": "local-model",
     "displayName": "LM Studio Model",
     "baseUrl": "http://localhost:1234/v1",
     "apiKey": "lm-studio",
     "provider": "openai"
   }
 ]
}
⚠️ Note: Use actual model name, baseUrl and apiKey when configuring.
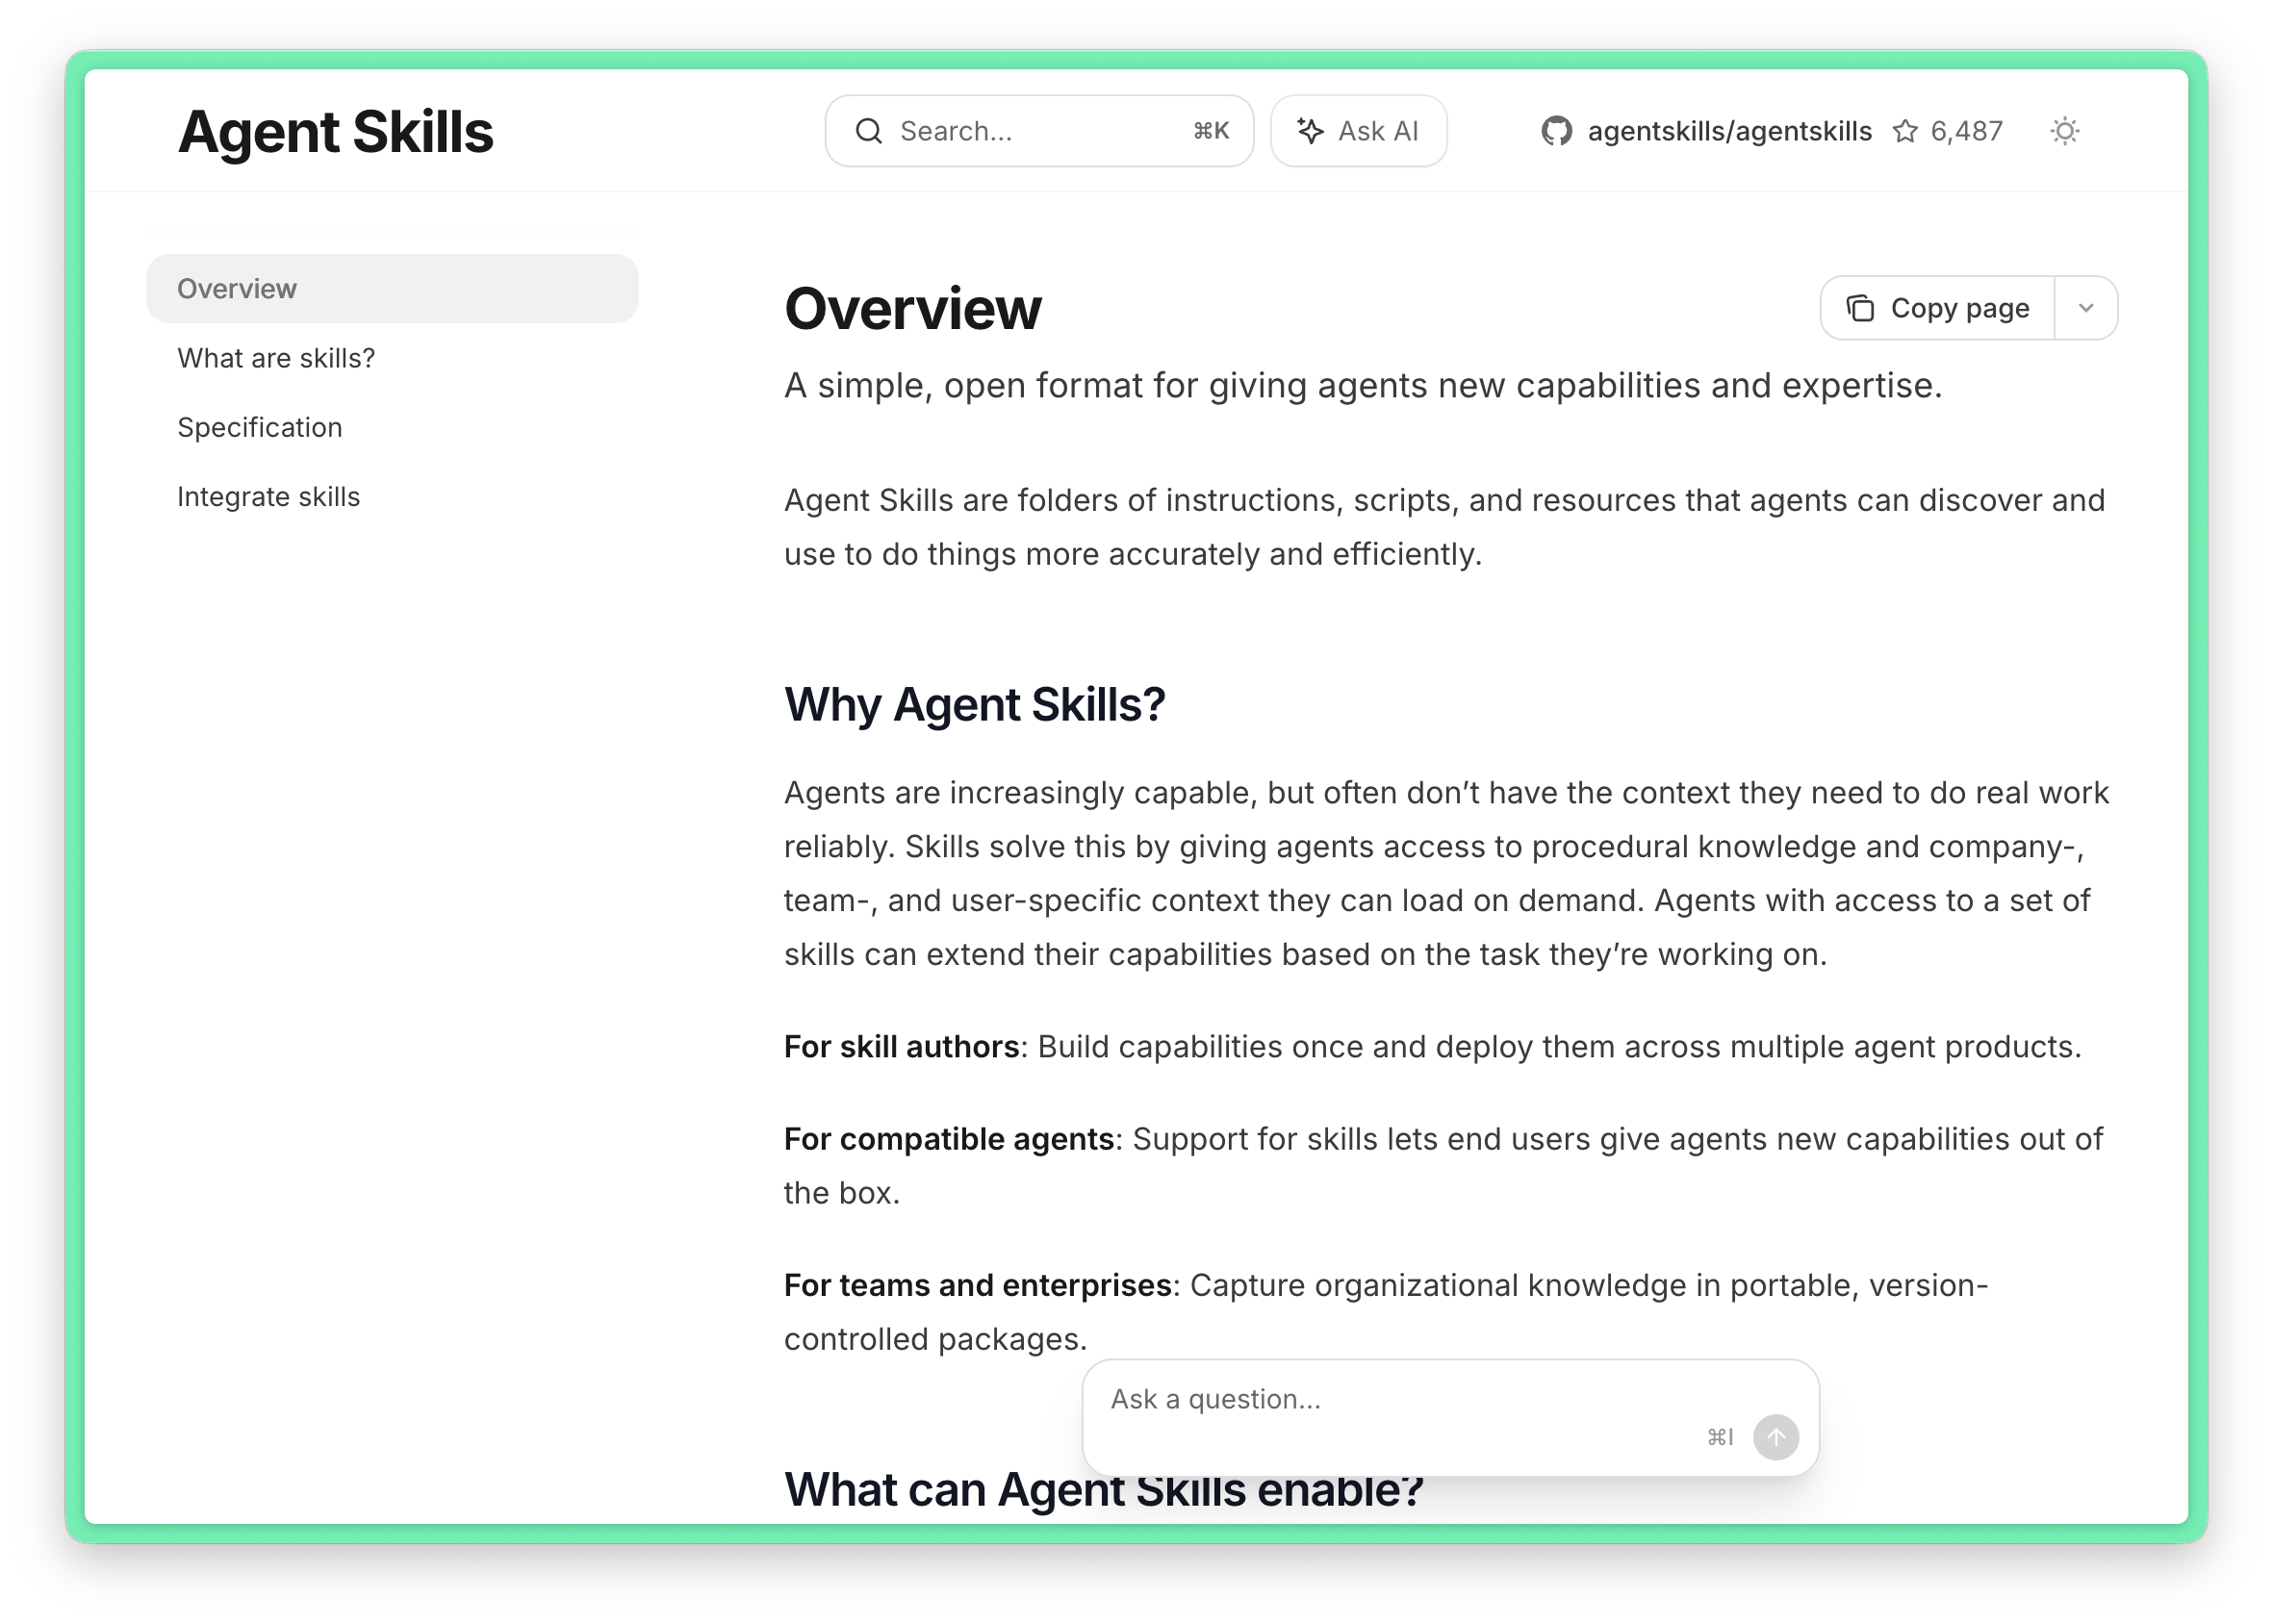
5. Agent Skills
Skills is the Claude Agent Skills system introduced by Anthropic in October 2025, fully supported by Factory Droid. Skills are composable, portable instruction sets that provide AI with domain-specific expertise and workflows.
What are Skills
Skills is an extensible capability system designed by Anthropic for Claude. Essentially, a Skill is a folder containing instructions, scripts, and resources that Claude can automatically load and use when executing related tasks.
Core Features
| Feature | Description |
|---|---|
| Composable | Multiple Skills can be stacked together, Claude automatically identifies and coordinates |
| Portable | Build once, use across Claude Code, Factory Droid, API, and more |
| Efficient | Claude only loads information needed for current task, maintaining response speed |
| Powerful | Skills can include executable code for tasks requiring high reliability |
What Skills Do
- 📋 Provide domain-specific best practices
- 🔄 Define standardized workflows
- 📝 Include templates and checklists
- 🎯 Ensure output quality and consistency
5.1 Recommended Skills
planning-with-files - Complex Task Planning
Suitable for complex tasks requiring multiple steps, using Manus-style file-based planning.
- Core Philosophy:
Context window = Memory (volatile, limited)
File system = Disk (persistent, unlimited)
→ Write important things to files
- Usage:
# Create three planning files in project directory
task_plan.md   # Task plan and progress
findings.md    # Research findings
progress.md    # Session log
- task_plan.md Example:
# Task Plan: Implement User Authentication

## Goal
Implement complete user authentication system including registration, login, logout.

## Phases
- [x] Phase 1: Database model design
- [ ] Phase 2: API endpoint implementation
- [ ] Phase 3: Frontend forms
- [ ] Phase 4: Testing

## Current Status
Working on Phase 2

## Issues Encountered
| Issue | Attempts | Solution |
|-------|----------|----------|
| JWT expiration handling | 1 | Add refresh token |
brainstorming - Creative Brainstorming
Use before starting any creative work to help clarify requirements and design.
- Workflow:
- Understand current project context
- Ask one question at a time to refine ideas
- Propose 2-3 different options with trade-offs
- Present design in segments, confirm each before continuing
test-driven-development - TDD Development
Enforces test-driven development workflow.
- Core Principle:
No failing test, no production code
- Red-Green-Refactor Cycle:
- RED - Write a failing test
- Verify RED - Confirm test fails for the right reason
- GREEN - Write minimal code to make test pass
- Verify GREEN - Confirm test passes
- REFACTOR - Refactor code while keeping tests passing
verification-before-completion - Pre-completion Verification
Prevents claiming work is complete without verification.
- Core Principle:
No completion claims without verification evidence.
- Verification Checklist:
code-simplifier - Code Simplification
Automatically applied after writing or modifying code to simplify and optimize.
- Optimization Directions:
- Reduce unnecessary complexity and nesting
- Eliminate redundant code
- Improve naming
- Follow project coding conventions
6.3 Skills Installation and Configuration
Installation Locations
Skills can be installed in two locations:
| Location | Scope | Description |
|---|---|---|
~/.factory/skills/ |
Personal Skills | Cross-project use, only visible to you |
<project>/.factory/skills/ |
Project Skills | Shared with team, follows project repository |
Install from droid-skills Repository
Recommended to install pre-configured Skills from droid-skills repository:
# Clone repository
git clone https://github.com/neardws/droid-skills.git
cd droid-skills

# Install as personal Skill (cross-project use)
cp -r skills/planning-with-files ~/.factory/skills/
cp -r skills/md-table-formatter ~/.factory/skills/

# Install superpowers suite (14 Skills)
cp -r skills/superpowers/* ~/.factory/skills/

# Or install as project Skill (share with team)
cp -r skills/planning-with-files <your-project>/.factory/skills/
Restart droid to load newly installed Skills.
Available Skills List
| Skill | Description |
|---|---|
| planning-with-files | Manus-style file-based task planning |
| md-table-formatter | Auto-format Markdown tables |
| superpowers (14 total) | Complete development workflow suite |
superpowers suite includes:
- brainstorming - Interactive design brainstorming
- writing-plans - Detailed implementation plan writing
- executing-plans - Batch execution with checkpoints
- test-driven-development - RED-GREEN-REFACTOR cycle
- systematic-debugging - Four-phase root cause analysis
- verification-before-completion - Pre-completion verification
- requesting-code-review - Code review requests
- receiving-code-review - Responding to review feedback
- And more...
Create Custom Skill
Create ~/.factory/skills/my-skill/SKILL.md:
---
name: my-skill
description: This is my custom skill description
---

# My Skill

## Overview
Describe what this skill does...

## When to Use
When to use this skill...

## Process
Specific workflow...
Skills Related Resources
| Resource | Description | Link |
|---|---|---|
| Skills Manager Client | Skills management client tool | https://github.com/buzhangsan/skills-manager-client |
| Superpowers | Complete development workflow Skills suite | https://github.com/obra/superpowers |
| Planning With Files | Manus-style file-based planning Skill | https://github.com/OthmanAdi/planning-with-files |
| Agent Skills | Community Skills collection | https://github.com/agentskills/agentskills |
| Awesome Claude Skills | Curated Claude Skills list | https://github.com/travisvn/awesome-claude-skills |
| Claude Plugins Official | Anthropic official plugins/Skills | https://github.com/anthropics/claude-plugins-official |
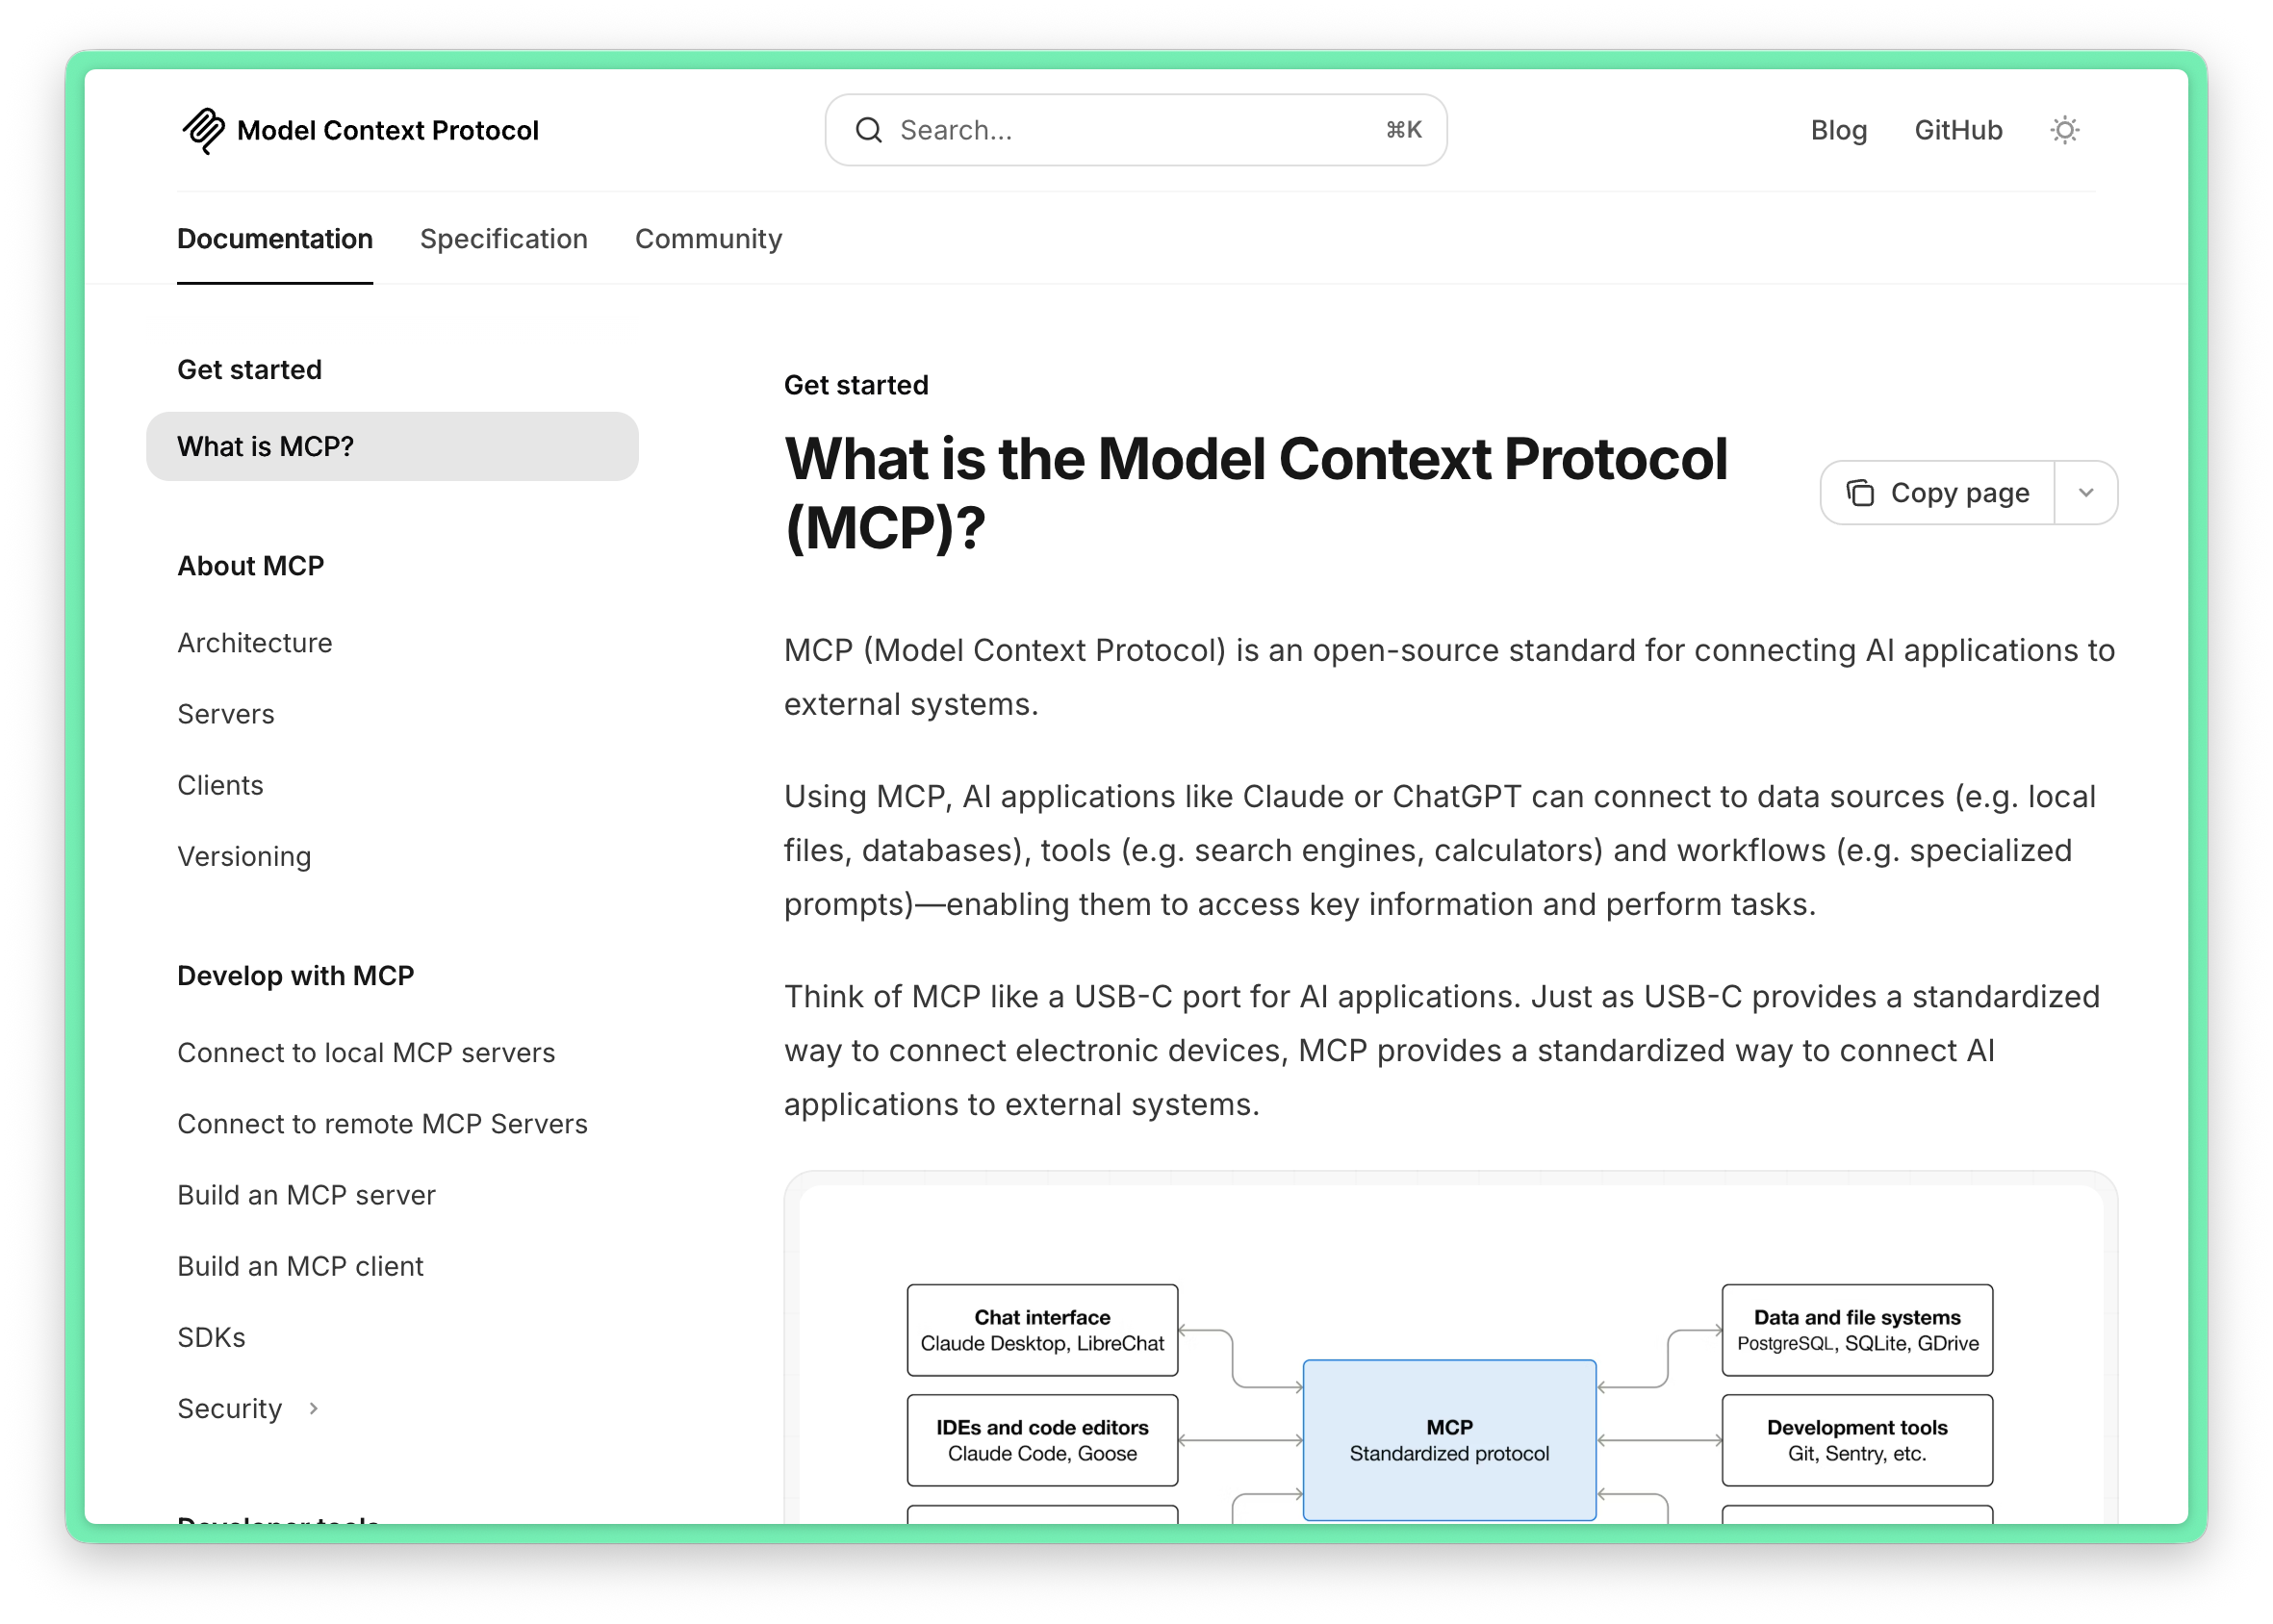
6. MCP (Model Context Protocol)
MCP (Model Context Protocol) is an open-source standard protocol by Anthropic for connecting AI applications with external systems. Think of MCP as the USB-C port for AI applications - just as USB-C provides standardized connectivity for electronic devices, MCP provides standardized connectivity for AI applications to external systems.
6.1 MCP Concepts
What MCP Can Do
- 🗓️ AI assistant can access your Google Calendar and Notion to provide more personalized services
- 🎨 Claude Code can generate complete Web applications based on Figma design specs
- 🏢 Enterprise chatbots can connect to multiple databases, letting users analyze data through conversation
- 🖨️ AI models can create 3D designs in Blender and print them with 3D printers
MCP Core Components
| Component | Description |
|---|---|
| Tools | Executable functions like search, compute, API calls |
| Resources | Data sources like files, database records |
| Prompts | Predefined prompt templates for specific workflows |
6.2 MCP Configuration
Configuration file is located at ~/.factory/mcp.json:
{
  "mcpServers": {
    "filesystem": {
      "command": "npx",
      "args": ["-y", "@modelcontextprotocol/server-filesystem", "/path/to/allowed/directory"]
    },
    "github": {
      "command": "npx",
      "args": ["-y", "@modelcontextprotocol/server-github"],
      "env": {
        "GITHUB_PERSONAL_ACCESS_TOKEN": "your-token-here"
      }
    },
    "postgres": {
      "command": "npx",
      "args": ["-y", "@modelcontextprotocol/server-postgres"],
      "env": {
        "DATABASE_URL": "postgresql://user:password@localhost:5432/mydb"
      }
    }
  }
}
6.3 Using Smithery to Install MCP Servers
Smithery is currently the largest MCP Server marketplace, offering 3700+ MCP applications. Recommended to use Smithery for discovering and installing MCP Servers.
Smithery Advantages
| Feature | Description |
|---|---|
| Authentication | Built-in OAuth, no need to implement auth flow yourself |
| Observability | View tool usage to optimize AI experience |
| Distribution | Publish to Smithery, connect from any AI client |
| Protocol Gateway | Smithery stays in sync with MCP spec, no maintenance needed |
Popular MCP Servers
| Server | Purpose | Connections |
|---|---|---|
| Gmail | Email management | 10.13k |
| Linkup | Web search | 9.53k |
| Google Super | Google suite | 6.73k |
| GitHub | Code repository management | 5.98k |
| Google Calendar | Schedule management | 5.63k |
6.4 Common MCP Servers
Official Servers
| Server | Purpose | Installation |
|---|---|---|
server-filesystem |
File system access | @modelcontextprotocol/server-filesystem |
server-github |
GitHub operations | @modelcontextprotocol/server-github |
server-postgres |
PostgreSQL database | @modelcontextprotocol/server-postgres |
server-sqlite |
SQLite database | @modelcontextprotocol/server-sqlite |
server-fetch |
HTTP requests | @modelcontextprotocol/server-fetch |
server-puppeteer |
Browser automation | @modelcontextprotocol/server-puppeteer |
server-brave-search |
Brave search | @modelcontextprotocol/server-brave-search |
Community Servers
| Server | Purpose | Source |
|---|---|---|
| Notion | Knowledge base management | Smithery |
| Slack | Team communication | Smithery |
| Linear | Project management | Smithery |
| Figma | Design collaboration | Smithery |
| MongoDB | NoSQL database | Smithery |
6.5 MCP Related Resources
| Resource | Description | Link |
|---|---|---|
| MCP Official Docs | Protocol spec and development guide | https://modelcontextprotocol.io/ |
| Smithery | MCP Server marketplace (recommended) | https://smithery.ai/ |
| MCP Official Registry | Official MCP Server registry | https://registry.modelcontextprotocol.io/ |
| Awesome MCP Servers | Curated MCP Servers list | https://github.com/punkpeye/awesome-mcp-servers |
| MCP Servers Official Repo | Anthropic official Servers | https://github.com/modelcontextprotocol/servers |
7. Advanced Customization
Factory Droid provides various customization features to extend AI capabilities according to your team and project needs.
7.1 AGENTS.md - AI Agent's Instruction Manual
AGENTS.md is a Markdown file that serves as a "briefing package" for AI programming agents, telling AI how to build, test, and run your project.
Why AGENTS.md is Needed
| File | Purpose | Audience |
|---|---|---|
| README.md | Quick start, project description | Human developers |
| AGENTS.md | Build steps, testing, conventions | AI programming agents |
File Location and Discovery
Agents look for AGENTS.md in this order (first match wins):
./AGENTS.mdin current working directory- Search upward to repository root
AGENTS.mdin subfolders- Personal override:
~/.factory/AGENTS.md
Common Sections
| Section | Content |
|---|---|
| Build & Test | Exact commands to compile and run test suite |
| Architecture | One-paragraph summary of main modules and data flow |
| Security | API keys, endpoints, auth flows, sensitive data |
| Git Workflows | Branch strategy, commit conventions, PR requirements |
| Conventions | Folder structure, naming patterns, code style |
Example
# MyProject

## Core Commands

• Type-check and lint: `pnpm check`
• Run full test suite: `pnpm test --run --no-color`
• Start dev servers: `pnpm dev`
• Build for production: `pnpm build`

## Project Layout

├─ client/ → React + Vite frontend
├─ server/ → Express backend

## Development Patterns

• TypeScript strict mode, single quotes, trailing commas
• Tests first when fixing logic bugs
• Never introduce new runtime deps without PR description

## Git Workflow

1. Branch from `main`: `feature/<slug>` or `bugfix/<slug>`
2. Run `pnpm check` locally before committing
3. Keep commits atomic: `feat: …`, `test: …`
Best Practices
- Keep it short - Target ≤150 lines, too long slows down the agent
- Use concrete commands - Wrap commands in backticks, agents can copy directly
- Update with code - Sync AGENTS.md when build steps change
- Single source of truth - Link to README or design docs, don't copy-paste
Cross-Agent Compatibility
AGENTS.md is compatible with multiple AI programming tools:
- Factory Droid
- Cursor
- Aider
- Gemini CLI
- Codex
- Zed
- And more...
7.2 Custom Slash Commands
Custom Slash Commands convert repeatable prompts or setup steps into /shortcuts. Droid scans the .factory/commands folder and converts each file into a command.
Command Discovery and Naming
| Scope | Location | Description |
|---|---|---|
| Workspace | <project>/.factory/commands |
Project-specific commands, shared with team |
| Personal | ~/.factory/commands |
Private or cross-project shortcuts |
- Only Markdown (
*.md) files and files with shebang (#!) are registered - Filename auto-converts to slug:
Code Review.md→/code-review - Use
/commandsto open command management UI
Markdown Commands
Markdown files render as system notifications, seeding Droid's next conversation turn.
---
description: Request code review
argument-hint: <branch-name>
---

Please review `$ARGUMENTS` and summarize any merge blockers, test gaps, and risk areas.

- Highlight security or performance issues
- Suggest follow-up tasks and owners
- List files needing attention| Front Matter | Purpose |
|---|---|
description |
Overrides summary shown in slash suggestions |
argument-hint |
Adds inline usage hint like /review <branch-name> |
$ARGUMENTS expands to everything typed after the command name.
Executable Commands
Executable files must start with a valid shebang:
#!/usr/bin/env bash
set -euo pipefail

echo "Preparing $1"
npm install
npm run lint
echo "Ready to deploy $1"
Saved as deploy.sh, appears as /deploy. Use /deploy feature/login to pass arguments.
Example Commands
Daily Standup Helper:
---
description: Summarize progress for standup
---

Draft a standup update using this format:

- **Yesterday:** Key achievements, merged PRs, blockers cleared
- **Today:** Planned work items and goals
- **Risks:** Anything that might cause delays, support needed, cross-team dependencies

Keep it to three short bullet sections.
Regression Smoke Test:
#!/usr/bin/env bash
set -euo pipefail

target=${1:-"src"}

echo "Running lint + unit tests for $target"
npm run lint -- "$target"
npm test -- --runTestsByPath "$target"

echo "Done"
7.3 Custom Droids - Custom Subagents
Custom Droids are reusable subagents, each Droid carries its own system prompt, model preferences, and tool strategies, and can handle specific tasks like code review, security checks, or research without repeating instructions.
What are Custom Droids
Custom Droids are stored as .md files in .factory/droids/ or ~/.factory/droids/. The CLI scans these folders, validates each definition, and exposes them as Task tool subagent_type targets, letting the main assistant launch specialized helpers during a session.
Difference Between Custom Droids and Skills
| Feature | Skills | Custom Droids |
|---|---|---|
| Nature | Knowledge and guidance | Independent specialized AI agents |
| Execution | Enhances main AI capabilities | Runs independently as subagent |
| Context | Shares main session context | Independent context window |
| Tool Access | Uses main AI's tools | Can be limited to specific toolset |
| Model Selection | Uses main AI's model | Can specify different model |
Storage Locations
| Location | Scope | Description |
|---|---|---|
<project>/.factory/droids/ |
Project Droids | Shared with team, version controllable |
~/.factory/droids/ |
Personal Droids | Cross-workspace use, only visible to you |
Note: When names are the same, project definitions override personal definitions.
Why Use Custom Droids
- Faster task delegation - Encode complex checklists once, reuse via single tool call
- Stricter security - Restrict agents to read-only, edit-only, or specific toolsets
- Context isolation - Each subagent uses a new context window, avoiding prompt bloat
- Repeatable processes - Encode team-specific review, test, or release checks as version-controlled code
Create Custom Droid
Method 1: Using UI Wizard
- Run
/droidsto open Droids menu - Select Create a new Droid
- Choose storage location (project or personal)
- Describe what the Droid should do
- Generate or manually edit system prompt
- Confirm identifier, model, and tools
Method 2: Create File Manually
Create ~/.factory/droids/code-reviewer.md:
---
name: code-reviewer
description: Focused reviewer checking diff for correctness risks
model: inherit
tools: ["Read", "LS", "Grep", "Glob"]
---

You are the team's senior reviewer. Check the diff shared by parent agent:

- Flag correctness, security, and migration risks
- If changes needed, list targeted follow-up tasks
- Confirm tests or manual verification needed before merge

Reply format:
Summary: <one-line summary>
Findings:
- <bullet>
- <bullet>
Configuration Field Description
| Field | Description |
|---|---|
name |
Required. Lowercase letters, numbers, -, _. Determines subagent_type value and filename |
description |
Optional. Shown in UI list, ≤500 chars |
model |
inherit (use parent session model) or specific model ID like claude-sonnet-4-5-20250929 |
reasoningEffort |
Optional. Set reasoning depth: low, medium, high |
tools |
Omit for all tools; use category strings or tool ID arrays |
Tool Categories
| Category | Tool IDs | Purpose |
|---|---|---|
read-only |
Read, LS, Grep, Glob |
Safe analysis and file exploration |
edit |
Create, Edit, ApplyPatch |
Code generation and modification |
execute |
Execute |
Shell command execution |
web |
WebSearch, FetchUrl |
Web research and content |
mcp |
Dynamically populated | MCP tools |
Using Custom Droids
Via Natural Language:
Please use code-reviewer subagent to review this diffRun security-sweeper droid to check recently edited filesVia Task Tool:
Droid can autonomously invoke custom Droids, or you can request directly.
Import Agents from Claude Code
If you've already created agents in Claude Code, you can import them directly:
- Run
/droidsto open Droids menu - Press I to start import flow
- CLI scans Claude Code agent directories:
- Project scope:
<project>/.claude/agents/ - Personal scope:
~/.claude/agents/ - Use Space to toggle selection, A to select all
- Press Enter to import
Model mapping during import:
sonnet→ First available Sonnet modelhaiku→ First available Haiku modelopus→ First available Opus model
Example Droids
Security Sweeper:
---
name: security-sweeper
description: Find insecure patterns in recently edited files
model: inherit
tools: ["Read", "Grep", "WebSearch"]
---

Investigate files referenced in prompt for security issues:

- Identify injection, insecure transport, privilege escalation, or secret exposure
- Suggest specific mitigations
- Link to relevant CWE or internal standards when helpful

Reply format:
Summary: <headline>
Findings:
- <file>: <issue>
Mitigations:
- <suggestion>
Task Coordinator:
---
name: task-coordinator
description: Coordinate multi-step tasks and update progress in real-time
model: inherit
tools: ["Read", "Edit", "Execute"]
---

You are a task coordinator. Break down goals into actionable steps:

1. Use TodoWrite to create and update task lists
2. For each task, read relevant files and execute commands as needed
3. Report progress in real-time using TodoWrite

Keep task list status updated (pending, in_progress, completed).
Best Practices
| Practice | Description |
|---|---|
| Choose models strategically | Use smaller models for simple tasks to reduce cost, larger models for complex reasoning |
| Limit tool access | Use explicit tool lists to prevent accidental shell commands or dangerous operations |
| Structured output | Organize prompts to output sections like Summary: and Findings: |
| Version control sharing | Commit .factory/droids/*.md to repository, share with team |
| Leverage real-time updates | Task tool now streams live progress, showing tool calls and results |
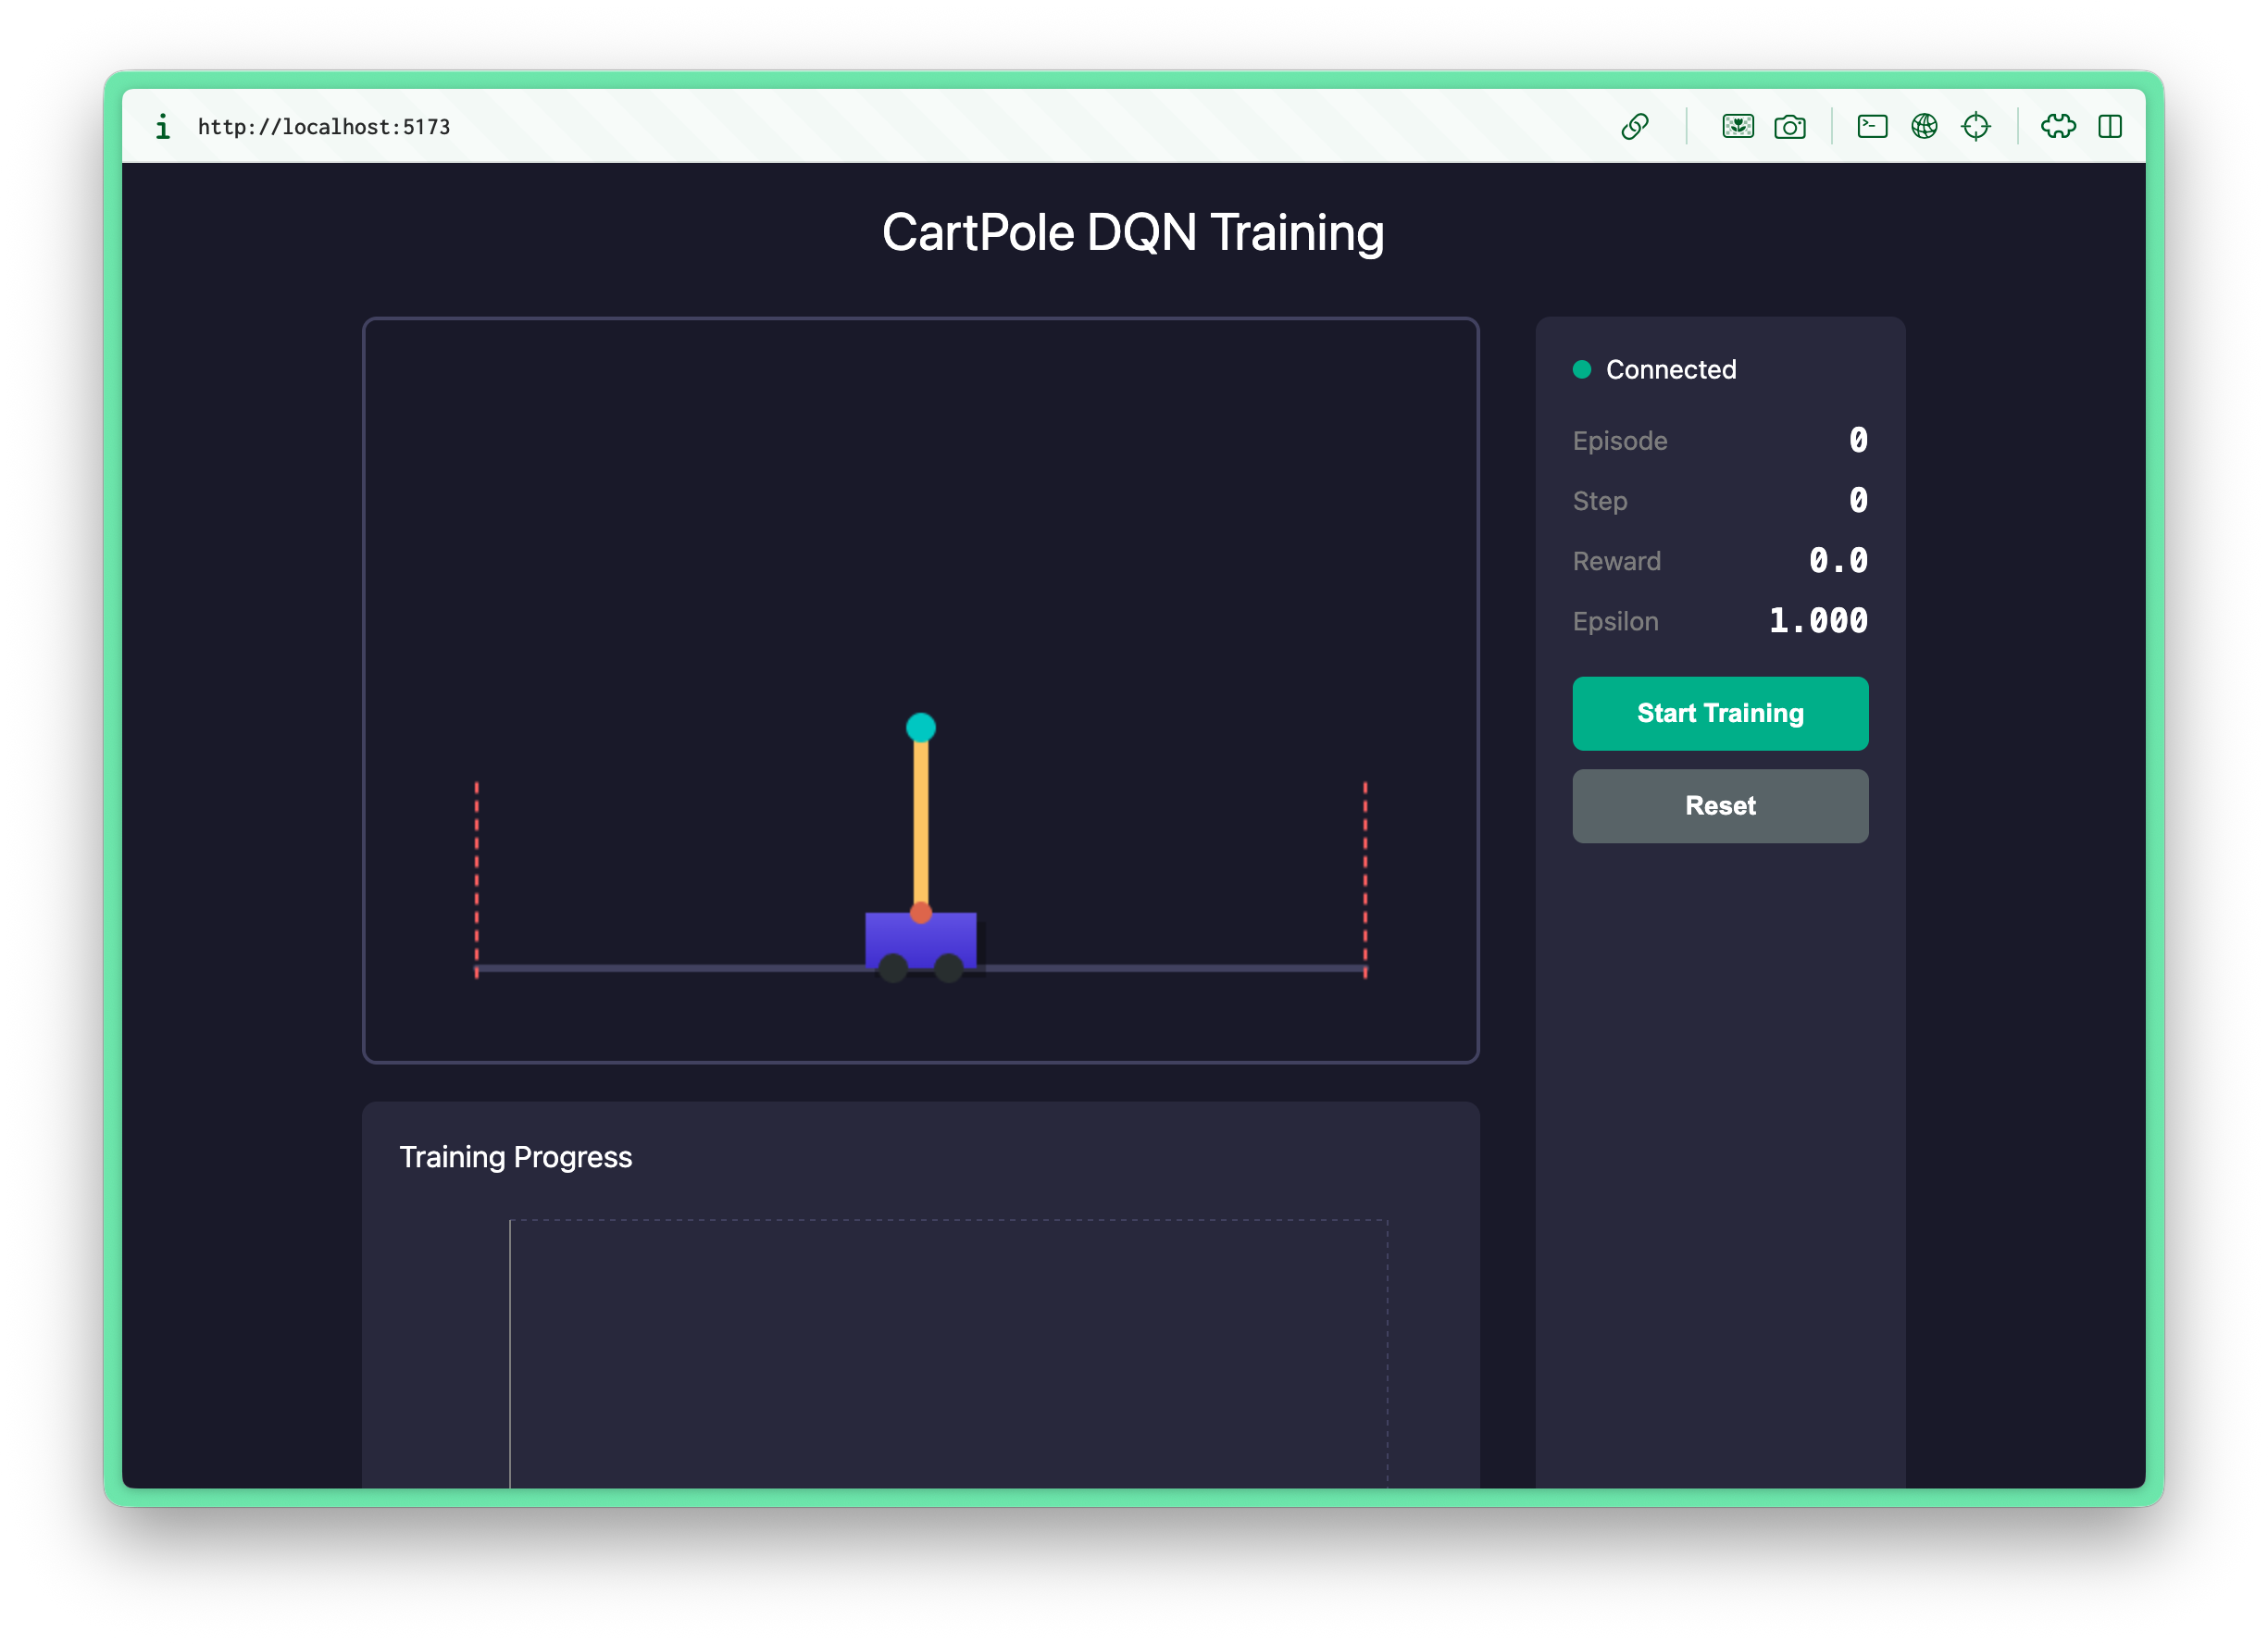
8. Workflow Examples
Let's demonstrate the complete Vibe Coding workflow through a comprehensive example - implementing a CartPole reinforcement learning game with complete frontend and backend.
Scenario: CartPole Reinforcement Learning Game
CartPole is a classic reinforcement learning problem: keep a pole balanced by moving a cart left and right. We'll use Vibe Coding to complete:
- Backend: Python + FastAPI, implementing environment simulation and DQN algorithm
- Frontend: React + Canvas, real-time visualization of training process
Step 1: Create Project and Start Droid
# Create project directory
mkdir cartpole-rl && cd cartpole-rl

# Start Droid, enter Spec Mode
droid
# Press Shift+Tab to switch to Spec mode
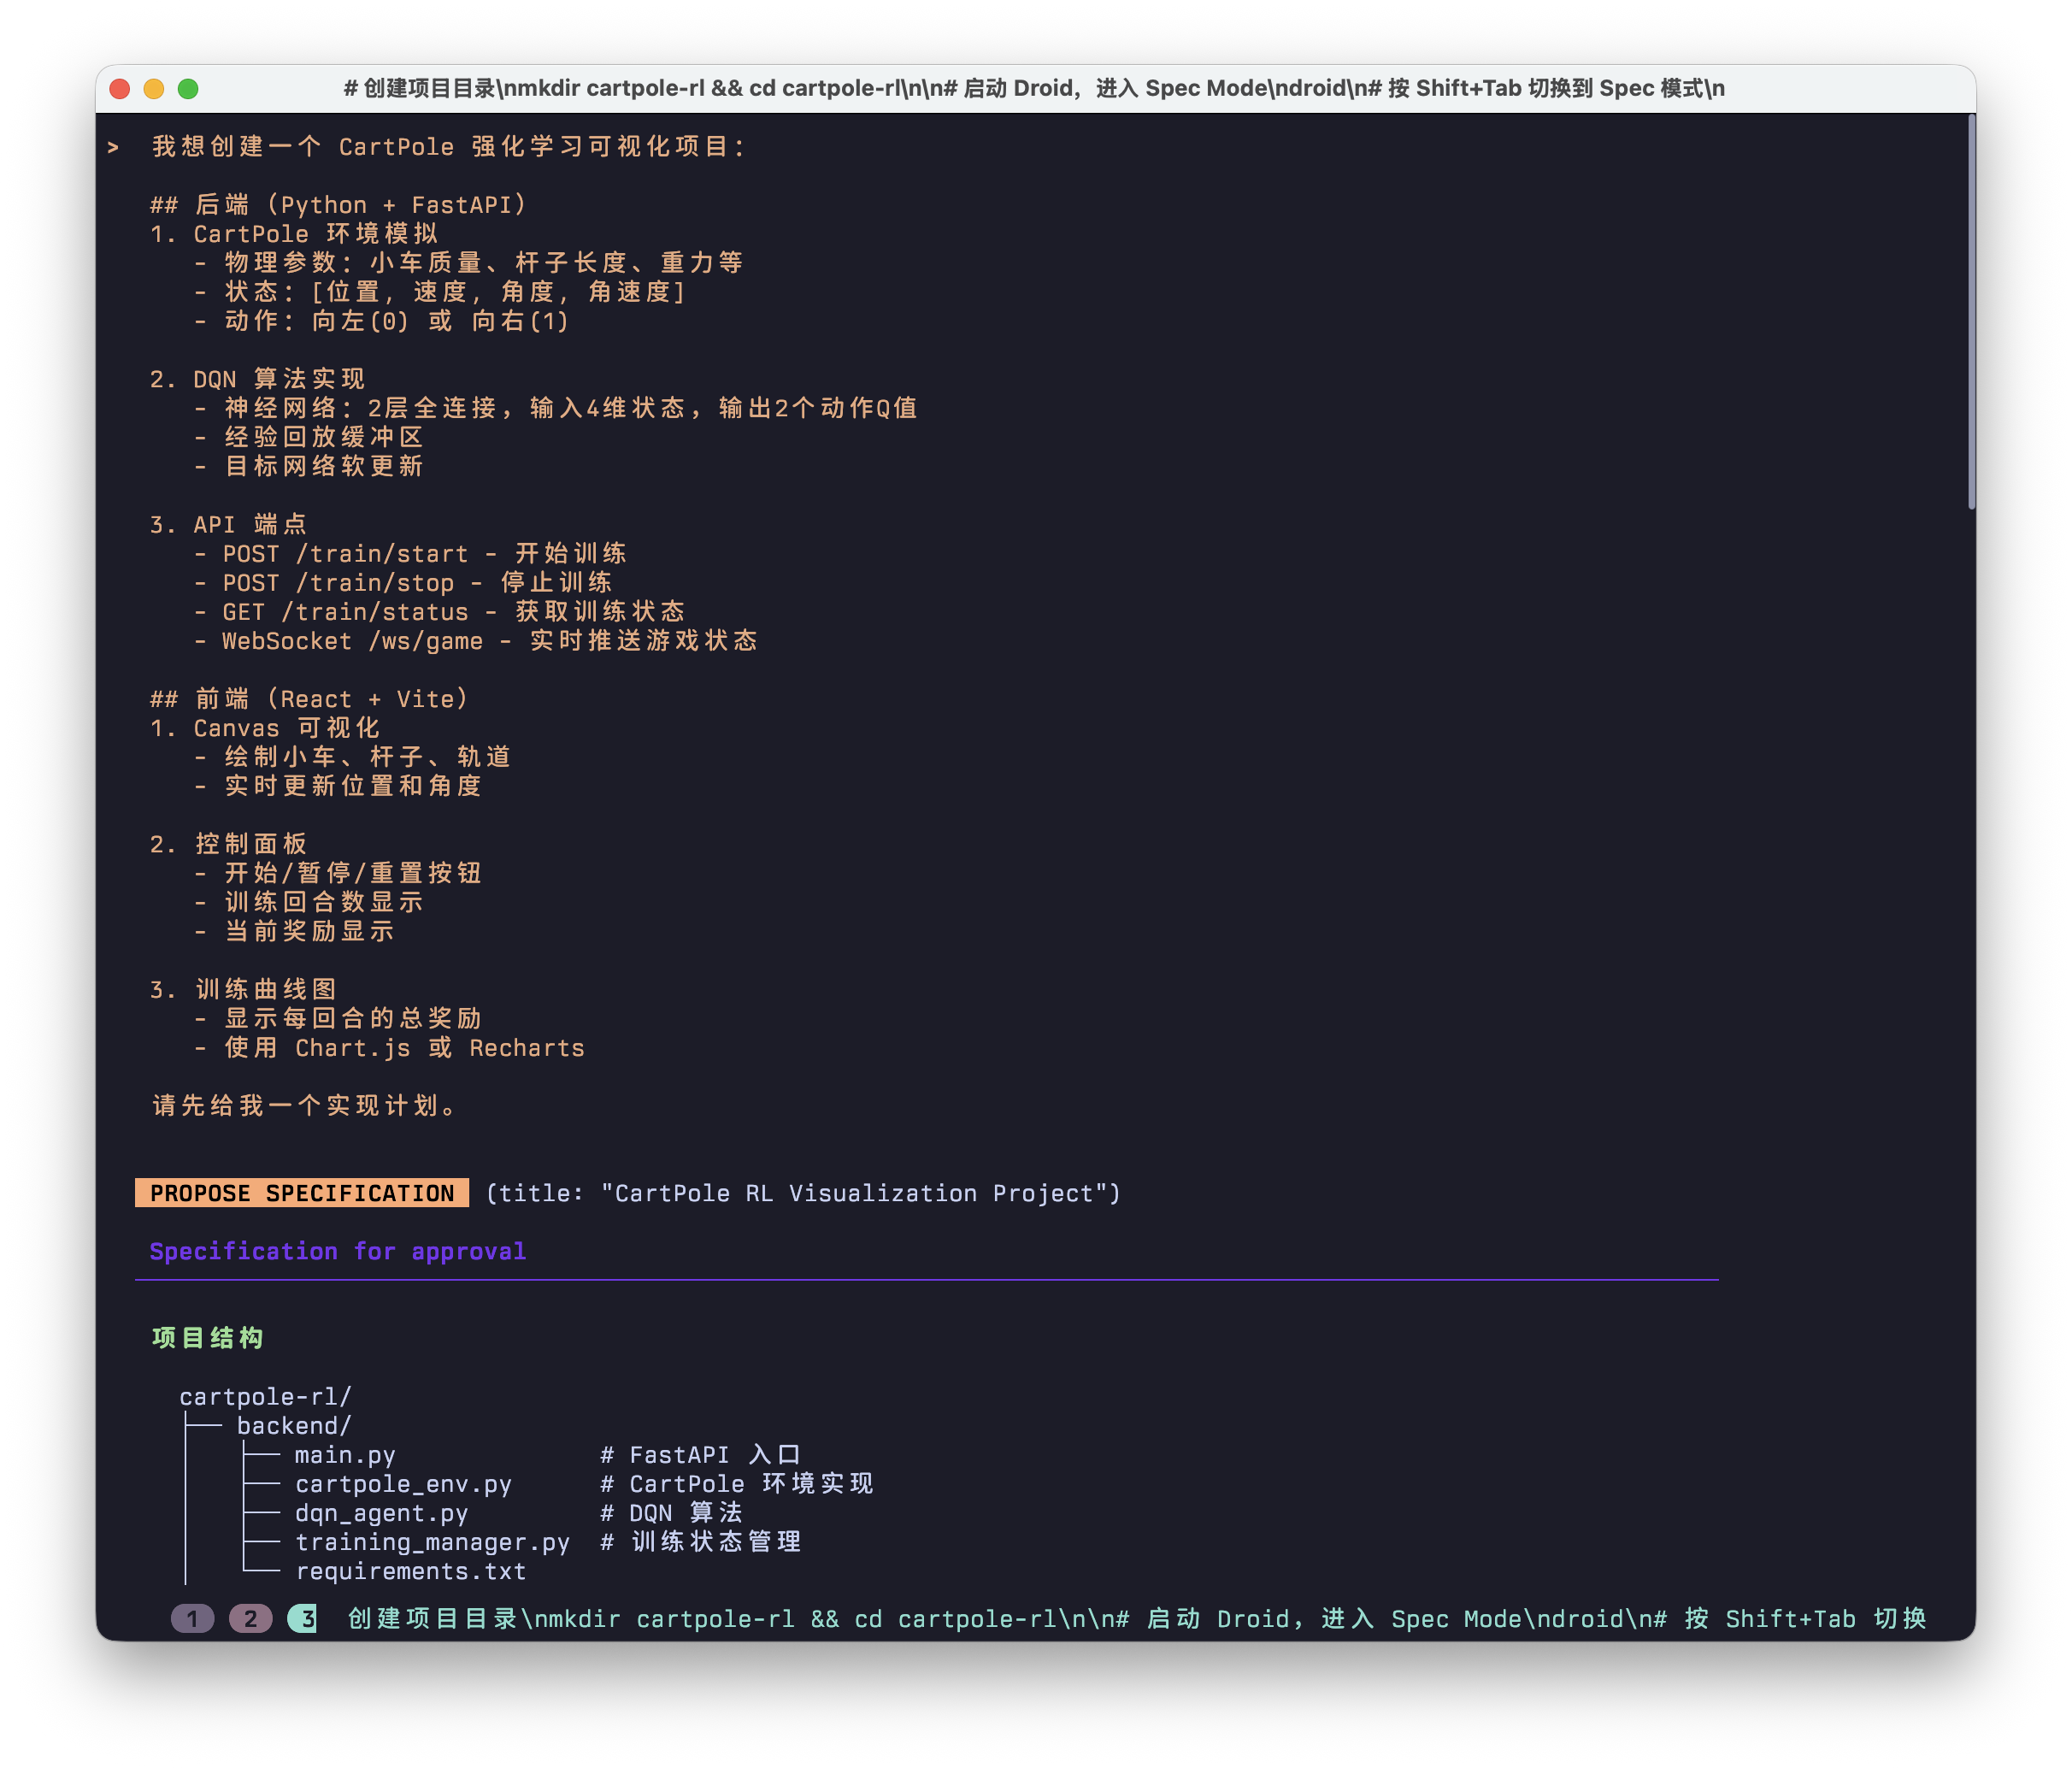
Step 2: Describe Requirements (Spec Mode)
Enter detailed requirements in Spec mode:
I want to create a CartPole reinforcement learning visualization project:

## Backend (Python + FastAPI)
1. CartPole environment simulation
   - Physics parameters: cart mass, pole length, gravity, etc.
   - State: [position, velocity, angle, angular velocity]
   - Actions: left(0) or right(1)

2. DQN algorithm implementation
   - Neural network: 2 fully connected layers, input 4D state, output 2 action Q-values
   - Experience replay buffer
   - Target network soft update

3. API endpoints
   - POST /train/start - Start training
   - POST /train/stop - Stop training
   - GET /train/status - Get training status
   - WebSocket /ws/game - Real-time game state push

## Frontend (React + Vite)
1. Canvas visualization
   - Draw cart, pole, track
   - Real-time position and angle updates

2. Control panel
   - Start/Pause/Reset buttons
   - Training episode count display
   - Current reward display

3. Training curve chart
   - Display total reward per episode
   - Use Chart.js or Recharts

Please give me an implementation plan first.
Step 3: Review and Approve Plan
Droid will generate a detailed implementation plan including:
 Specification for approval

 Project Structure

 cartpole-rl/
 ├── backend/
 │   ├── main.py              # FastAPI entry
 │   ├── cartpole_env.py      # CartPole environment implementation
 │   ├── dqn_agent.py         # DQN algorithm
 │   ├── training_manager.py  # Training state management
 │   └── requirements.txt
 ├── frontend/
 │   ├── src/
 │   │   ├── App.tsx
 │   │   ├── components/
 │   │   │   ├── CartPoleCanvas.tsx   # Canvas visualization
 │   │   │   ├── ControlPanel.tsx     # Control panel
 │   │   │   └── TrainingChart.tsx    # Training curve
 │   │   ├── hooks/
 │   │   │   └── useWebSocket.ts      # WebSocket hook
 │   │   └── api/
 │   │       └── training.ts          # API calls
 │   ├── package.json
 │   └── vite.config.ts
 └── README.md

Backend Implementation Steps

1. CartPole Environment (`cartpole_env.py`)
•  Custom implementation (no Gym dependency) for control and debugging
•  Configurable physics: gravity 9.8, cart mass 1.0, pole mass 0.1, pole length 0.5
•  step(action) returns (state, reward, done)
•  reset() resets environment

2. DQN Agent (`dqn_agent.py`)
•  Neural network with PyTorch: 4 → 128 → 128 → 2
•  Experience replay: deque buffer, capacity 10000
•  Target network: soft update τ=0.005
•  ε-greedy policy: ε decays from 1.0 to 0.01

3. Training Manager (`training_manager.py`)
•  Background thread runs training loop
•  Maintains training state: episode, reward, running flag
•  Sends state to WebSocket via queue each step

4. FastAPI Endpoints (`main.py`)

python
 POST /train/start    # Start training thread
 POST /train/stop     # Stop training
 GET  /train/status   # Return {episode, total_reward, epsilon}
 WS   /ws/game        # Push {cart_x, pole_angle, reward, done}

Frontend Implementation Steps

1. Project Initialization
•  npm create vite@latest frontend -- --template react-ts
•  Install dependencies: recharts (charts)

2. CartPoleCanvas Component
•  Canvas size 600x400
•  Draw: track (bottom line), cart (rectangle), pole (rotating line)
•  Use requestAnimationFrame for smooth animation

3. ControlPanel Component
•  Buttons: Start Training, Stop Training, Reset
•  Display: Current episode, cumulative reward, ε value

4. TrainingChart Component
•  Use Recharts LineChart
•  X-axis: episode number, Y-axis: total reward
•  Real-time data updates

5. WebSocket Connection
•  Custom useWebSocket hook
•  Auto-reconnect mechanism
•  Parse messages to update Canvas state

Dependencies

Backend:
•  fastapi, uvicorn, websockets
•  torch (PyTorch)
•  numpy

Frontend:
•  react, typescript
•  recharts
•  vite

How to Run

bash
 # Backend
 cd backend && pip install -r requirements.txt && uvicorn main:app --reload

 # Frontend
 cd frontend && npm install && npm run dev

Estimated total code ~800-1000 lines, completable in 1-2 hours.
Select Proceed + Auto (Medium) to let Droid execute automatically.
Step 4: Watch AI Code
Droid will automatically create files, and you can watch in real-time:
Backend Core Code Example (AI Generated):
# backend/env/cartpole.py
import numpy as np

class CartPoleEnv:
    def __init__(self):
        self.gravity = 9.8
        self.cart_mass = 1.0
        self.pole_mass = 0.1
        self.pole_length = 0.5
        self.force_mag = 10.0
        self.tau = 0.02  # Time step

        self.state = None
        self.reset()

    def reset(self):
        # Random initial state [x, x_dot, theta, theta_dot]
        self.state = np.random.uniform(-0.05, 0.05, size=(4,))
        return self.state.copy()

    def step(self, action):
        x, x_dot, theta, theta_dot = self.state
        force = self.force_mag if action == 1 else -self.force_mag

        # Physics simulation (simplified Euler method)
        cos_theta, sin_theta = np.cos(theta), np.sin(theta)
        total_mass = self.cart_mass + self.pole_mass

        temp = (force + self.pole_mass * self.pole_length * theta_dot**2 * sin_theta) / total_mass
        theta_acc = (self.gravity * sin_theta - cos_theta * temp) / (
            self.pole_length * (4/3 - self.pole_mass * cos_theta**2 / total_mass)
        )
        x_acc = temp - self.pole_mass * self.pole_length * theta_acc * cos_theta / total_mass

        # Update state
        x += self.tau * x_dot
        x_dot += self.tau * x_acc
        theta += self.tau * theta_dot
        theta_dot += self.tau * theta_acc

        self.state = np.array([x, x_dot, theta, theta_dot])

        # Check if done
        done = abs(x) > 2.4 or abs(theta) > 0.21  # About 12 degrees
        reward = 1.0 if not done else 0.0

        return self.state.copy(), reward, done
Frontend Visualization Example (AI Generated):
// frontend/src/components/CartPoleCanvas.tsx
import { useEffect, useRef } from 'react';

interface GameState {
  x: number;
  theta: number;
  reward: number;
  episode: number;
}

export function CartPoleCanvas({ state }: { state: GameState }) {
  const canvasRef = useRef<HTMLCanvasElement>(null);

  useEffect(() => {
    const canvas = canvasRef.current;
    if (!canvas) return;

    const ctx = canvas.getContext('2d')!;
    const width = canvas.width;
    const height = canvas.height;

    // Clear canvas
    ctx.fillStyle = '#1a1a2e';
    ctx.fillRect(0, 0, width, height);

    // Coordinate transformation
    const scale = 100;
    const cartX = width / 2 + state.x * scale;
    const cartY = height - 50;
    const cartWidth = 60;
    const cartHeight = 30;
    const poleLength = 100;

    // Draw track
    ctx.strokeStyle = '#4a4a6a';
    ctx.lineWidth = 3;
    ctx.beginPath();
    ctx.moveTo(0, cartY + cartHeight / 2);
    ctx.lineTo(width, cartY + cartHeight / 2);
    ctx.stroke();

    // Draw cart
    ctx.fillStyle = '#00d4ff';
    ctx.fillRect(cartX - cartWidth / 2, cartY - cartHeight / 2, cartWidth, cartHeight);

    // Draw pole
    const poleEndX = cartX + Math.sin(state.theta) * poleLength;
    const poleEndY = cartY - Math.cos(state.theta) * poleLength;

    ctx.strokeStyle = '#ff6b6b';
    ctx.lineWidth = 8;
    ctx.lineCap = 'round';
    ctx.beginPath();
    ctx.moveTo(cartX, cartY - cartHeight / 2);
    ctx.lineTo(poleEndX, poleEndY);
    ctx.stroke();

    // Draw info
    ctx.fillStyle = '#ffffff';
    ctx.font = '16px monospace';
    ctx.fillText(`Episode: ${state.episode}`, 10, 25);
    ctx.fillText(`Reward: ${state.reward.toFixed(1)}`, 10, 50);

  }, [state]);

  return <canvas ref={canvasRef} width={600} height={400} />;
}
Step 5: Iterative Optimization
Training not working well? Continue the conversation with Droid:
Trained for 100 episodes but the pole still falls quickly, please help me:
1. Check if the reward function design is reasonable
2. Adjust neural network structure or hyperparameters
3. Add moving average to the reward curve for easier trend observation
Droid will analyze the problem and propose improvements:
Analysis found several issues:

1. **Sparse reward** - Only giving +1 for survival, change to:
   - Base survival reward +1
   - Extra reward for angle close to vertical
   - Extra reward for position close to center

2. **Learning rate too high** - Reduce from 0.001 to 0.0005

3. **Insufficient exploration** - epsilon decays too fast, adjust to decay over 500 episodes

Applying modifications...
Step 6: Run and Verify
Project complete! Structure as follows:

 cartpole-rl/
 ├── backend/
 │   ├── main.py              # FastAPI entry + WebSocket
 │   ├── cartpole_env.py      # CartPole physics simulation
 │   ├── dqn_agent.py         # DQN neural network + experience replay
 │   ├── training_manager.py  # Background training thread management
 │   └── requirements.txt
 └── frontend/
     └── src/
         ├── App.tsx
         ├── components/       # Canvas, control panel, charts
         ├── hooks/            # WebSocket hook
         └── api/              # REST API calls

How to run:

bash
 # Terminal 1 - Backend
 cd backend
 pip install -r requirements.txt
 python main.py

 # Terminal 2 - Frontend
 cd frontend
 npm run dev

Then visit http://localhost:5173, click "Start Training" to begin DQN training, visualization will show the cart pole balancing state and training curve in real-time.
Open browser and visit http://localhost:5173 to watch AI learn to keep the pole balanced!
Complete Project Structure
cartpole-rl/
├── backend/
│   ├── main.py              # FastAPI entry
│   ├── requirements.txt
│   ├── env/
│   │   └── cartpole.py      # Environment simulation
│   └── agent/
│       ├── dqn.py           # DQN algorithm
│       └── replay_buffer.py # Experience replay
├── frontend/
│   ├── package.json
│   ├── src/
│   │   ├── App.tsx
│   │   ├── components/
│   │   │   ├── CartPoleCanvas.tsx
│   │   │   ├── ControlPanel.tsx
│   │   │   └── RewardChart.tsx
│   │   └── hooks/
│   │       └── useWebSocket.ts
│   └── vite.config.ts
└── README.md
Key Takeaways
Through this example, you experienced the complete Vibe Coding workflow:
| Phase | Traditional Development | Vibe Coding |
|---|---|---|
| Requirements Analysis | Manually write documentation | Natural language description, AI generates plan |
| Architecture Design | Manually draw diagrams | Spec Mode iterative confirmation |
| Coding Implementation | Write code line by line | AI generates, human reviews |
| Debugging Optimization | Manually analyze issues | Describe problem, AI locates and fixes |
| Test Verification | Manually write tests | AI generates test cases |
From zero to a running full-stack RL project, the entire process may only take 30 minutes!
9. Summary and Resources
Summary
Through this tutorial, you have learned:
- ✅ Configure modern terminals (Kitty/Warp)
- ✅ Beautify Shell environment (Oh-My-Zsh + Powerlevel10k)
- ✅ Install and configure Factory Droid
- ✅ Choose the right LLM model (BYOK)
- ✅ Use Skills to enhance AI capabilities
- ✅ Configure MCP for extended functionality
- ✅ Create Custom Droids
Related Resources
Terminal Tools
- Kitty Terminal - GPU-accelerated modern terminal
- Warp Terminal - Modern terminal with built-in AI
- Kitty Themes - Kitty theme collection
- Kitty Config - Custom Kitty configuration
Shell Configuration
- Oh-My-Zsh - Zsh configuration management framework
- Powerlevel10k - Zsh theme
- Nerd Fonts - Programming font icons
AI Programming Tools
- Factory Droid - AI programming CLI tool
- Factory Droid Docs
- Claude Code - Anthropic official CLI
- OpenAI Codex CLI
- Gemini CLI - Google official CLI
- OpenCode - Multi-model support CLI
LLM Models
- Claude Opus 4.5
- Claude Sonnet 4.5
- GPT-5.2
- Gemini 3 Flash
- DeepSeek-V3.2
- SWE-Rebench - LLM programming capability leaderboard
Skills and Extensions
- Agent Skills - Community Skills platform
- Superpowers - Skills suite
- Planning With Files - File-based planning Skill
- Awesome Claude Skills
- Droid Skills - Pre-configured Skills collection
MCP Protocol
- MCP Official Docs
- Smithery - MCP Server marketplace
Fonts
- Berkeley Mono - Programming font
- Maple Mono CN - Chinese monospace font
Further Reading
- Vibe Coding - Wikipedia
- Simon Willison: Not all AI-assisted programming is vibe coding
- Andrej Karpathy (X/Twitter)
Next Steps
- Explore more Skills and Custom Droids
- Try different models based on SWE-Rebench data
- Create custom configurations for your specific workflow
🎉 Congratulations on completing the Vibe Coding environment setup! Start enjoying the fun of AI-assisted programming!
✍️ Powered by Ulysses & Factory Droid
Last Updated: January 21, 2025
Please use Safari for the best experience. © 2025-2034 Neardws.com All Rights Reserved.